Your Ultimate Guide To Deep Cleaning Your Fridge

There's a pretty good chance that you give your fridge a quick wipe when you unpack your weekly grocery haul or perhaps wipe down the surface when you're seeing too many fingerprints from quick trips to grab a snack. However, you should actually be giving that frequently-used appliance in your kitchen a much deeper clean from time to time as well. As Digital Trends reports, the refrigerator door handle and certain drawers within the appliance can potentially be loaded with different germs. In fact, a study from the National Sanitation Foundation found germs like salmonella and listeria in refrigerator vegetable compartments, with meat drawers harboring yeast, mold, and e.coli.
Knowing all the potential germs and other nasty things that could be lurking in those nooks and crannies you're likely overlooking, you definitely want to deep clean your fridge on a regular basis. Molly Maid recommends a true deep clean once every 3 to 4 months. There are also a few extenuating circumstances that may require you to do a deep clean — for example, the CDC recommends you thoroughly clean out your fridge if you have a food item that has been recalled, as it could potentially contaminate other items within your fridge.
The deep cleaning process doesn't just involve using different cleaning products than you would for your periodic wipe-downs — there are a few key steps you need to take in order to properly deep clean your fridge. Read on to learn more about the ideal process.
1. Completely empty it out
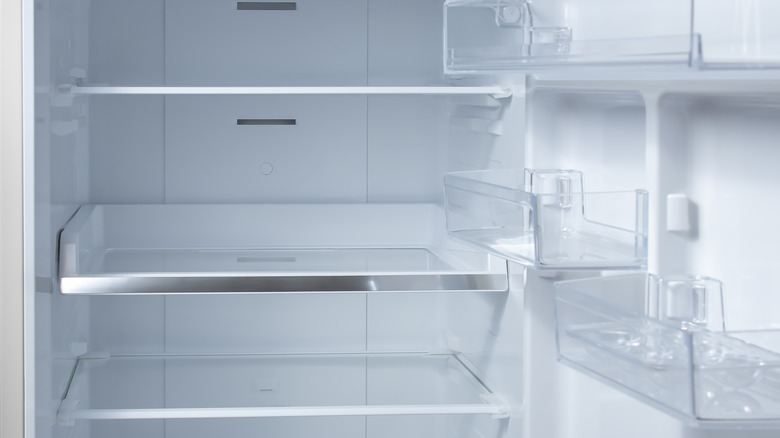
The first step may seem obvious, but it's the most important one if you want to truly deep clean your fridge. As per the CDC's suggestion, you'll want to start by completely emptying the fridge. You'll also want to clear your schedule while you complete the deep cleaning process, as this isn't the type of cleaning task you can start and come back to throughout the day. As the U.S. Department of Agriculture states, you don't want to leave food unrefrigerated for more than two hours. This timeline is even more condensed if you live in a very warm climate — food shouldn't be unrefrigerated for more than an hour if the temperature is 90 degrees or above. If you worry you might take too long, follow the Epicurious suggestion of putting some of the food in a cooler.
While you're removing all the food items, you may want to quickly double-check that nothing is expired — you don't want to put spoiled products back once you've finished the deep cleaning process and ruin all your hard work. After you've cleared out all the food items from your fridge, you'll also want to remove anything that can be taken out, such as shelves, drawers, and any other parts. You'll be able to more easily clean those areas, and you'll also have access to parts of the fridge that may often get overlooked.
With everything removed, your fridge is ready to be scrubbed down.
2. Clean the interior of the fridge

While you might wipe up the occasional spill or quickly clean the exposed shelf space before you load in a new batch of groceries, it's only once everything is removed that you'll be able to truly deep clean that fridge interior. You may be hesitant to use strong cleaning products in your fridge since you'll be loading your food back into it once you're done deep cleaning. However, you don't have to worry — a simple solution of dish soap and water should do the trick. If you're particularly bothered by the odor, Martha Stewart suggests using a DIY cleaning solution that consists of one quart of hot water and two tablespoons of baking soda.
With all the removable parts and food gone, put in some elbow grease and scrub out that fridge. As with any thorough cleaning job, you may want to consider working in a certain order, such as top to bottom, to ensure you don't miss any spots. And, for any small crevices or areas that are tough to reach, take WikiHow's suggestion and use an old toothbrush to scrub.
If you want to go the extra mile, once you've cleaned the interior, the CDC suggests using a solution that includes 1 tablespoon of liquid bleach in 1 gallon of water in order to sanitize the interior of your fridge. In order to ensure those bleach fumes aren't lingering, you'll want to leave the door open for about 10 minutes after sanitizing.
3. Wash and dry all the removable parts

Don't put away the cleaning solution you used to tackle the fridge's interior quite yet — you can use the same items to clean those shelves, drawers, and whatever other removable parts you took out of the fridge to deep clean. The process is virtually the same as cleaning your fridge's interior, and that WikiHow hack of using an old toothbrush to get any tricky areas may come in handy, especially if there are spills or residue near the edges of your shelves or in the tough-to-reach portions of your drawers.
And while you don't want your food to be unrefrigerated for too long, there's a good reason to start with the fridge interior before moving on to all the removable parts. While you likely won't run into this issue with wire shelving or plastic bins, as Housewife How-Tos writes, running hot water over the still chilled surface of the removed parts could potentially cause cracking on glass surfaces. The CDC suggests allowing glass shelves or drawers to come to roughly room temperature before you start cleaning them with hot water. If there are any particularly tricky areas where there have been spills, Epicurious recommends reaching for a solution that incorporates vinegar, as this cleaning powerhouse is a food-safe way to battle grease. Once all those interior segments have been washed, you'll want to carefully dry them with a clean cloth or dish towel.
4. Put everything back

Once you've cleaned the interior of your fridge and all the removable parts like shelves and drawers, you may want to give the exterior a quick wipe as well to deal with any fingerprints or exterior grime. Then, you can start putting everything back into the fridge. The CDC suggests taking the extra step of wiping down all the food and drink containers with some hot soapy water before you place them back in their proper spots in your fridge — pay particular attention to any that have residue on the exterior to avoid transferring that grime into your cleaned fridge.
If the deep cleaning process was particularly labor intensive because of all the spills and residue you ended up having to clean, there are a few tips that will make future deep cleans a little easier. As CNET suggests, consider lining your drawers and shelves with paper towels or plastic placemats. These items can help catch anything that spills, making it much easier to clean these areas in the future.
In order to keep that fridge as fresh and clean as possible in the future, you may also want to add some type of odor neutralizer. Serious Eats suggests activated charcoal; they also recommend that, if you opt for the classic baking soda solution, put it in a bowl or plate rather than keeping it in the box, as you want the maximum amount of surface area exposed for the powder to absorb those odors.
5. Reset your space

You've put in the time cleaning and scrubbing and now have a fridge that's absolutely sparkling from top to bottom, with any expired or messy food items dealt with as well. It may be tempting to just shut that fridge door and relax after all your hard work, but there's one more important step in the deep cleaning process, and it involves essentially resetting your space.
According to the CDC, you need to finish your deep clean by cleaning anything you used during the process. You'll want to start by washing your hands with soap and water or by disposing of the gloves you used if you opted to do your deep cleaning with your hands protected.
Then, you'll need your classic soap and hot water mixture (or whatever your preferred kitchen cleaning product is) and a cloth to wipe down the countertops and sink. Basically, you want to ensure every surface that was touched by either the fridge shelves and drawers or the food items from within it has been cleaned as well.
Finally, take any cloths or towels you used, from the dirty ones that helped do all the tough scrubbing to the seemingly clean ones that just dried off various surfaces, and toss them in the washing machine before using them again in your home — after all the hard work of cleaning the fridge, you don't want to accidentally transfer any of those germs or grime to other surfaces in your home.