The Easiest Way To Revive A Weathered Deck

Decking is a classic element of nearly any kind of home in the United States (as well as around the world). Decks make their way into the design and feature specifications of homes that are raised up on pier and beam foundations (for example, homes built near the coast to prevent flooding from storm swells), as well as on homes that are placed completely flat against the ground, as is the case for many homes across the U.S.
Per Statista, the number of single-family homes built with decking alongside the primary structure (as opposed to additions that are made afterward through home improvement projects, for instance) has risen in recent years. Up until 2016, decking was included in the builds of 31,000 new homes, on average (from 2010 to 2015). From 2016 through 2020, however, this figure has exploded by more than 45%, to an average of 45,000 homes.
There's clearly a shift toward interest in the use of external space alongside the traditional structure of a home. However, with the introduction of decking elements comes a unique maintenance requirement that many homeowners may not be prepared for.
Maintaining a decking is simple when you understand the basics of the process, but for a novice, it can be hard to know where to begin when restoring a weathered deck. With these simple steps, though, ensuring your deck is always in great condition is easier than ever.
1. Investigate potential sources of damage
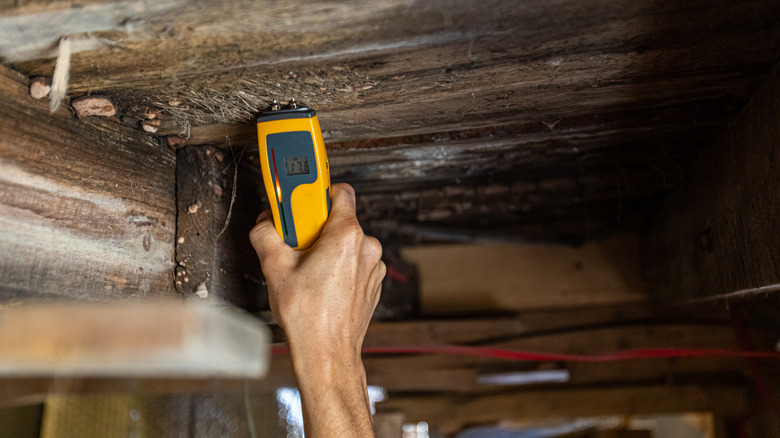
Before restaining a weathered deck, it's important to investigate the surface and its underlying structural elements to identify and address any potential damage. Staining damaged wood is a waste of your time and energy (not to mention your money), because the decking could fail shortly after the stain has been applied. This leads to an even larger job of repairing or replacing significant portions of the deck before it can be used again.
Decks.com notes that dry rot is a significant issue for deck owners and something that should be investigated on a regular basis. Rot presents itself as a spongy texture in the wood, and can be exacerbated by nearby plumbing outlets, drainage downspouts, or other creators of moisture. Consistent wetness can lead to fast-moving rot in untreated wood, and over time can also affect treated lumber, too.
Before beginning any new project on a weathered deck, it's important to search for rot, termites and other wood-affecting pests, as well as warping or cracks in structural boards and flooring elements, in order to repair or replace damaged segments before staining the surface. This will ensure your efforts are not made in vain, and keeping this inspection process as a part of your workflow will help you identify the early establishment of any type of threat to your weathered deck so that you can address it quickly and easily.
2. Clean the deck
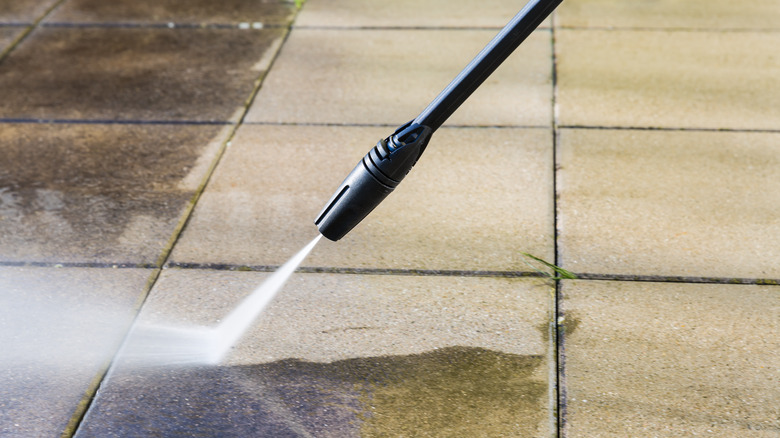
Once you've established that there are no issues with pest infestation, rot, or structural issues in the deck, you should begin the cleaning phase of the staining process. Pressure washing the deck is a great way to go about this part of the process because it's quick and easy. Pressure washers apply a steady stream of targeted water to the surface and can be used on a number of increasing-pressure settings to dial in the exact intensity of the water jet for maximum cleaning while avoiding the potential for damage that can come from too aggressive a power wash. Craving Some Creativity suggests using a 2800 PSI setting for the best results on most decks.
Soap and water (or perhaps simply the use of water and a sponge) can also be effective on smaller deck areas. The important part of this part of the staining process is to clear away any foreign intrusions in and on the surface of your decking. Mud, sand, grass stains, and other grit can easily become trapped in this flooring addition, and before any sort of staining can be done, it's important to clear away the surface of any irritants that can become lodged even further into the weathered deck planks with improper staining practices.
3. Sand the deck to prepare it for staining
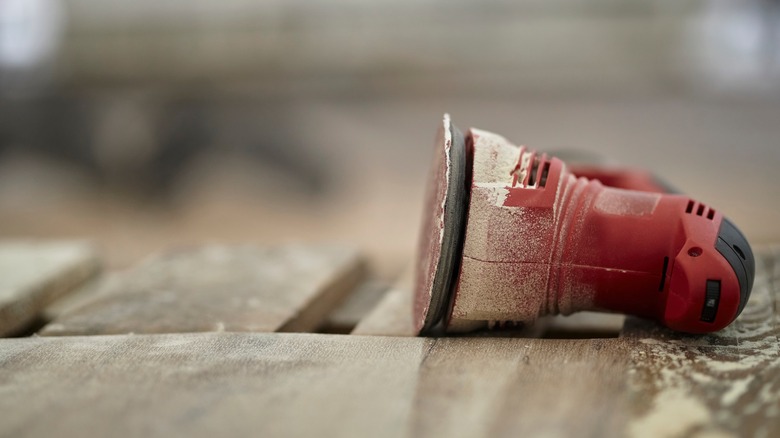
The next step is to sand the surface. Sanding weathered decking with an electric sander will finish the preparation of the deck for a new coat of stain. Plasticine House suggests a few passes to completely sand the surface for preparation. Starting with a low-grit sandpaper is essential to getting the job done correctly. Beginning with an 80 grit (or perhaps even lower) will smooth out the largest imperfections from the wood. It's also important to work against the grain here in order to strip away hard edges that have formed while ensuring you don't pit the planks and create new problem spots in the process.
An electric sander, or even the use of a larger, orbital floor sander, is a must for this task. Sandpaper can get the job done, but it will take many, many hours of hard labor to finish off the sanding if you don't use a power tool to help facilitate this work. After you've made a pass (or perhaps a second, depending on the existing state of your decking surface), moving up to a higher grit will give you a soft, smooth finish that's perfect for the application of your new stain.
In addition to stripping away rough edges, sanding also opens up the planks' pores, allowing for a more effective coating that will protect and beautify your deck.
4. Always use the same stain or sealer if possible

One thing to keep in mind when you arrive at the actual staining step is that it's best to stick with the same brand, consistency, and color selection for each new stain that you'll apply to the deck. Of course, you don't have to do this, and restaining the deck every few years can be a transformative experience that sees the wood take on a vast array of colors, darkness or lightness, and transparency elements.
According to Deck Restoration Co., consistency in stain use means you won't have to completely scrub away the old application in order to effectively add a new layer. If you're using a new brand or color stain, you'll need to be meticulous with your sanding efforts because the different stains won't interact seamlessly with one another. This leads to a patchwork finish that won't look very good (and will remain in this state for the foreseeable future).
Using the same stain on a regular basis makes the job far less time-consuming, meaning you can spend less time preparing the weathered deck surface for a new application of stain and more time enjoying the space with friends, family, and other loved ones.
5. Use multiple coats and restain every two to three years

Every time you stain or seal a deck, you should use at least two coats, allowing for an appropriate amount of time between coats to elicit proper drying, of course. Craving Some Creativity notes that a semi-transparent stain is often the best option for a mixture of longevity and aesthetic value. Likewise, using a third coat of any stain that's very light in color or completely transparent is a good practice for homeowners looking to apply maximum protection to their decking space.
On the other end of the deck maintenance spectrum is the length of time that you should leave between restaining efforts. Per C&M Residential Services, a typical deck should be restained every two to three years. The sun's UV rays will damage the grain of exposed wood over time, and this goes for both sealed and unsealed decks.
A wooden structure that's been treated with seal or stain is better able to handle the aggressive drying and degrading effects that come along with constant sunlight. However, one that hasn't been well-cared for will begin to deteriorate quickly, with the quality of the planks going downhill in a hurry.
Ensuring you use the right kind of stain for your needs, apply the correct number of coats, and reseal or stain the deck on a routine schedule will help you keep the boards looking great and feeling smooth on the feet for many years.