Everything You Need To Know To Grow Your Own Garlic
Nothing beats fresh, garden-grown produce. Garlic is one of the best vegetables to grow in your own backyard. You may have more garlic bread and homemade bruschetta than you know what to do with when you become a garlic gardener. According to Nursing Times, gardening is also good for your health. It connects us to nature and living things. Doing so helps us to be less self-absorbed and can even ward off depression. Gardening is relaxing and a way to forget about the stresses of the day. As you care for plants, you become a more nurturing person, and on those days when gardening is exhausting, you can be thankful for the exercise raising your dopamine and serotonin levels.
On top of all that good news, garlic is known for its health benefits. A study explains that garlic reduced the number of colds in a study group when taken daily over 12 weeks, and those with colds experienced a reduction in the length of symptoms by 70 percent (via the National Library of Medicine). There you have it. What's not to love about growing garlic? Here's a look at everything you need to know to grow this plant on your own. Let the planting begin.
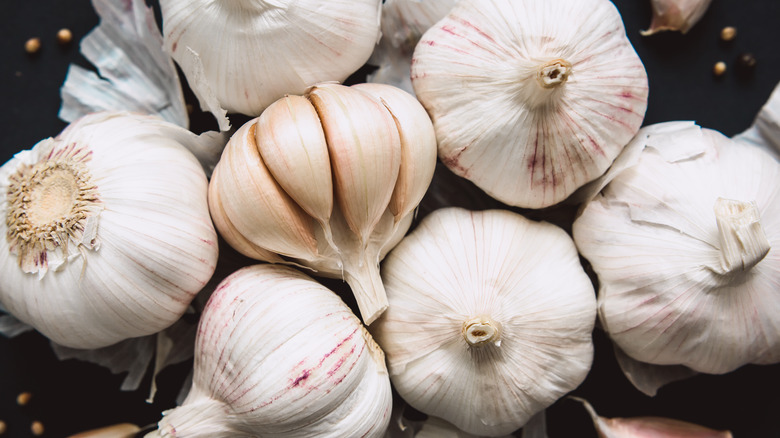
Choosing the right type of garlic
You can grow two basic types of garlic: hardneck and softneck. If you buy your growing garlic from a local company, you'll likely get something that works well in your climate. Food Hacks explains that hardneck garlic has a stronger flavor than softneck. Some people describe it as spicy or hot. It prefers a cold climate because it requires a long winter to become dormant in the spring and blossom. According to Harvesting History, hardnecks are perfect for gardening zones 1 to 5. These are the coldest ones in the United States and can give the garlic at least 10 weeks of frigid temperatures each year. The hardnecks create larger bulbs with up to 12 cloves on each. Choose this variety if you like a bold flavor or plan to use your garlic to infuse things, such as olive oil or vinegar.
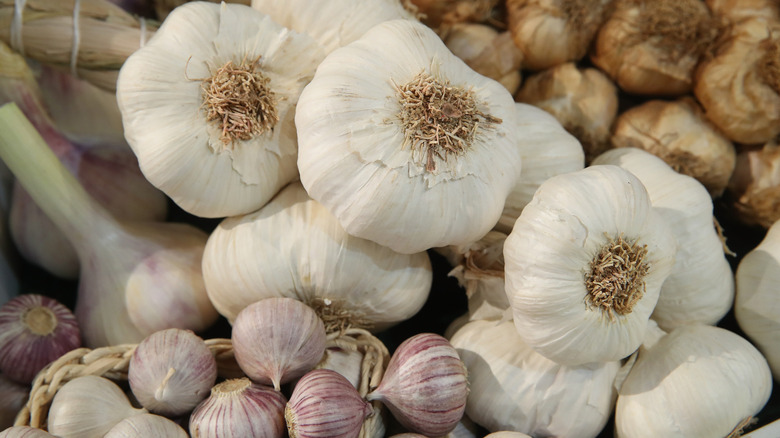
Softneck garlic is common in grocery stores. The bulbs are smaller but can produce up to thirty or more cloves. They aren't into the cold and grow better in warmer zones 5 to 7, with some varieties surviving and thriving in zones 8 to 9. If you prefer raw garlic on your salads, in dressing, or roasted, you should reach for soft garlic. The taste is often called grassy and isn't hot like hardneck garlic. When choosing garlic for your garden, pay attention to your climate zone and what type of flavor you're hoping to experience.
When to plant your garlic
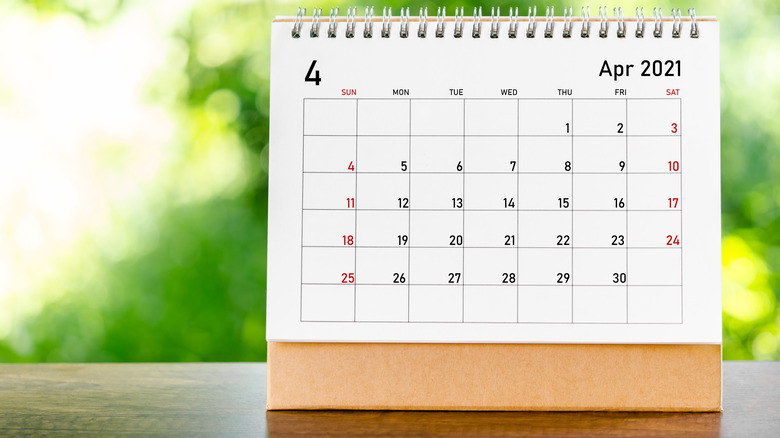
With different types of garlic and different climate zones, it can be challenging to know when to plant. Fall weather is typically best for garlic planting. However, each part of the country reaches the correct temperature at different times.
For best results, plant garlic when the soil is 50 degrees at 4 inches deep, per Growing For Market Magazine. That's why in some areas of the country, you can plant after the first frost, which may be as early as October in growing zones 1 to 5, the northern states. It may be January or February before you can plant in the South or states like California. Not to worry, though. You'll still get a yield, but the bulbs might be smaller than garlic planted as early as October (via GardenMyths). You can always give it a shot even if you miss the window in your area. Although, once the hot months hit, it's best to wait for the fall.
Prepare the soil
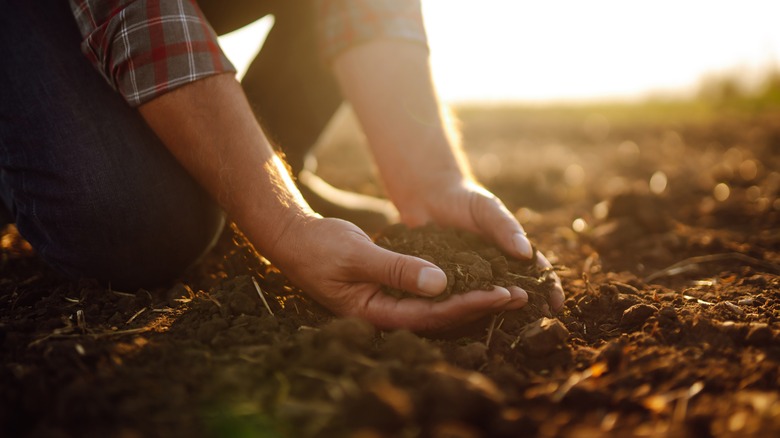
Once you've chosen your garlic, it's time to plant. You'll need fertile soil that drains well. Grow a Good Life explains that healthy soil consists of organic matter, nutrients, and minerals. To improve your soil, consider making your own DIY compost. Compost is recycling organic matter, such as food and leaves, and turning it into fertilizer to enrich the soil and help grow healthy plants (via NRDC). It's like a superfood for your plants, including your garlic. The great news is you can make your own compost. You only need an area in your yard where you can pile your scraps, or you can use any bin. Start the routine of dumping organic matter into your compost pile or bin each day. You can compost things like vegetable scraps, coffee grounds, manure from small animals, leaves, sticks, eggshells, and even newspapers (via SOS Future).
To keep the compost moist, add a little water when necessary, but don't soak it. When it gets cold, use a pitchfork or shovel to turn the compost and help it warm up. If you leave your compost pile sitting without turning it, the process won't work as well and could take much longer. Use a tarp to help trap moisture and keep it warm. After several months, your hard work will look more like a pile of dirt instead of a pile of scraps. Now you can mix the compost in with your soil. If your compost isn't ready, you can still plant your garlic and add compost at another time.
Planting the garlic
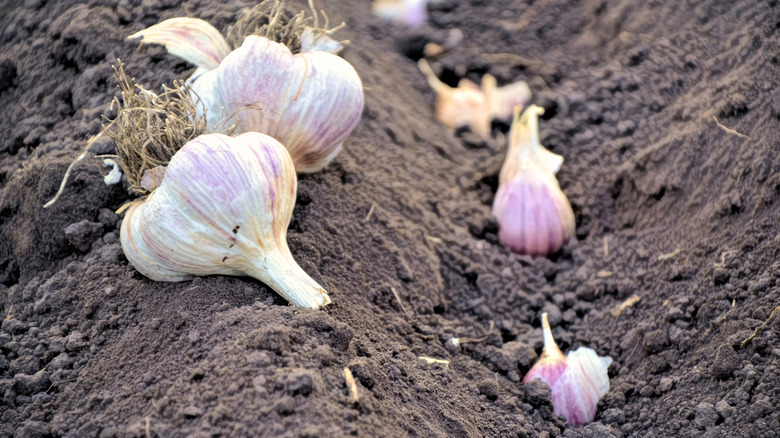
When it's time to plant, there are seldom actual seeds involved. Practical Self Reliance explains the difference between "garlic seed" and "seed garlic." Seed garlic is the clove of garlic that most people plant when growing their own. Garlic seed is what's left over, usually in abundance, when garlic scapes (the flowering part of the plant) mature into heavy heads of garlic in the fall, producing little bulbils. The bulbils are the true garlic seed. Since scapes allow the plant to focus its energy elsewhere, you won't often get many bulbils. Therefore, using an entire clove to plant is more common. Don't rely on the bulbs you picked up from the grocery store when buying garlic to plant. Those won't grow as well because of the way they're mass produced. Instead, order from reputable companies that focus on supplying garden seeds and bulbs.
To plant your garlic, choose a place where the plants will receive at least six to eight hours of sunshine each day. If you have compost to prepare your soil, go ahead and mix that into the garden area before planting. You can also add some fertilized soil to what you have to improve it. Choose an outdoor soil designed for gardening from a local garden store. If you have very poor dirt, especially clay that doesn't drain well, build raised beds, about 10 to 12 inches deep and at least 2 to 3 feet wide, with plenty of mulch to grow your garlic (via Farmers' Almanac). The mulch helps with drainage in the raised bed. Keep the papery husk on the cloves you're planting. Keep cloves about 4 to 8 inches apart and 2 inches deep when putting them into the soil. You'll place the pointy end of the clove upward and point the wide end down. Keep rows about 6 to 12 inches apart. You'll yield approximately 5 pounds of garlic in a 10-foot row.
Fertilize, water, and care for your garlic
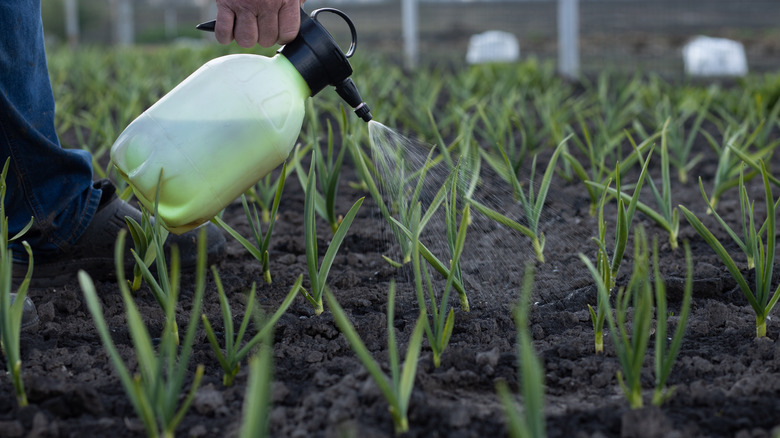
Garlic needs proper care to grow and reach its full potential. Keep the weeds away and the soil healthy. We've talked a lot about compost, and for good reason. It adds an additional level of nutrients to your soil. If your compost isn't ready in time, you still add it to the area where you're growing after planting. However, you should be careful when placing the compost around the plants. You don't want to disturb them, especially if they're still young and small. Place the compost right on top of the soil around the plants, per HappySprout. For mature plants, you can work it into the soil but be careful not to damage the plants or roots.
You'll need to weed regularly to stop them from taking over and stunting the growth of your garlic. You can use leaves, grass clippings, straw, or any mulch, as long as it isn't heavy, to lay in your garden and scare away the weeds (via Keene Organics). Pile mulch up to 6 inches deep. Keep an eye out in the spring to ensure the little garlic plants pop through and clear spots away if the mulch is weighing them down.
How much water does garlic need? If you underwater, the garlic won't grow well. However, if you overwater, you'll cause bulb rot (via Joe Gardener). Judge the water needs by your soil quality. If the soil drains well, your garlic plants need about a ½ to 1 inch of water a week. Keep an eye on rain reports. If you get an inch of rain one week, don't water the plants. If you don't have good drainage, watch closely for moisture needs to avoid overwatering.
Cutting garlic scapes
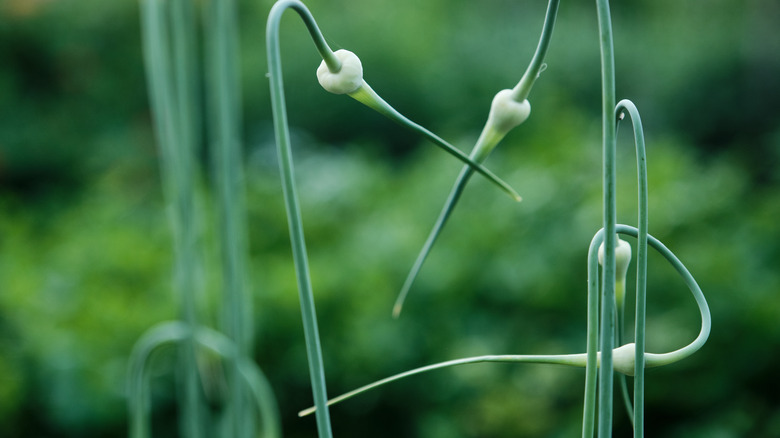
Garlic scapes look like thin stems and sometimes resemble wild onions. You'll see them curling, usually in late spring, per the Farmer's Almanac. The young scapes are tender and have a mild flavor. They don't taste like mature garlic, which is why some people like to harvest them and use them for cooking or salads. Either way, they're usually cut so that the garlic plant focuses its energy on growing the bulb of garlic rather than the shoots of scapes.
Cut scapes in the early summer months before the plant starts to flower. That's how you'll conserve its growing energy and send it to the bulb instead. However, if you want to harvest and eat the scapes, cut them later when flowering. Use them in the same way you might enjoy chives. Place scapes on pizza, chop them up, and sauté them as a side dish or put them on salad. You can also stir scapes into an omelet. Eating scapes is a fun way to enjoy a bit of an early harvest as you await your full-grown garlic. Still, if you want larger bulbs, harvest the scapes early before they're ready to eat.
Harvesting and storing garlic
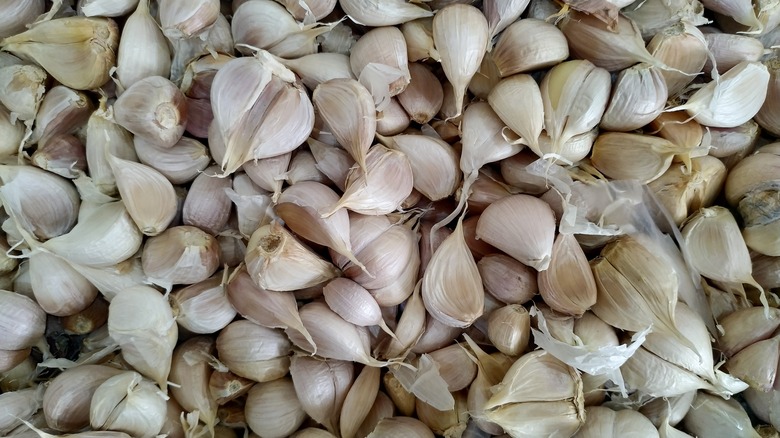
Finally, your reward is here. The garlic is ready to harvest. Since garlic grows underground, it can be tricky to know when it's ready to be pulled out and brought into your kitchen. Away To Garden suggests waiting until lower leaves are brown with five or six green leaves. Don't let more than that turn, or your bulbs will start to lose protection. The leaves connect to the wrapper on your garlic bulb, so you want plenty of strong ones left as you store your garlic. You can always pull one bulb to see if it's ready when you aren't sure. Don't harvest garlic by pulling on the top leaves. That can do some damage. Instead, use a pitch fork or spade and dig out the bulb (via Savvy Gardening). Gently work around the bulb, trying not to touch it, then lift it out once the dirt is loose.
After harvesting, dry or cure the garlic to store it properly. You can easily do this with a drying rack or bundle stalks together with some string and then hang them in a dark, well-ventilated spot for around three weeks (via Cedar Circle Farm & Education Center). You want to leave your garlic alone as much as possible while it hangs to dry. It's best to not even clean it, except for gently brushing off some dirt. You'll know your garlic is ready to enjoy once the stalks are brown and the bulbs have several layers of papery skin.
Braiding harvested garlic
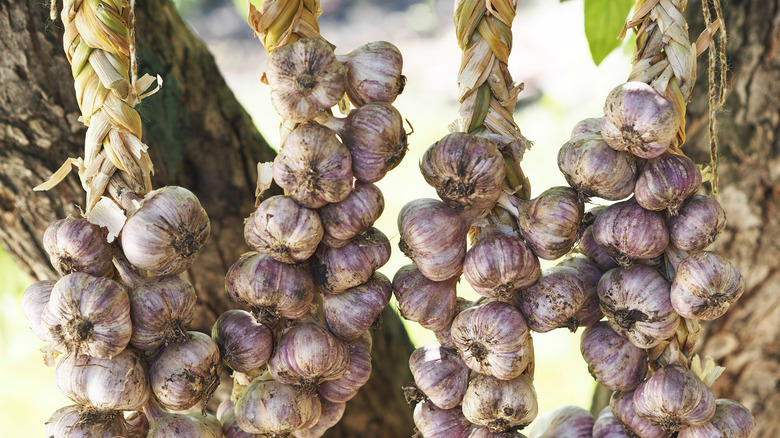
Garlic braids are exactly like they sound. It's the method of braiding fresh garlic together to make it easier to store. Braiding takes place after curing the garlic. Birdsong Farm Oregon suggests going through the garlic before braiding and pulling out the largest bulbs for planting again in the fall. Now you can finally clean up the garlic. Use scissors to trim the roots, cutting close to the bulb, then use a soft brush to wipe off the dirt. Keep the stems attached. You can remove some wrappers to get rid of dirt, but not too much. The wrapper protects your cloves.
You'll need about 16 to 19 bulbs to braid. Let them soak on a wet towel for a bit before beginning. Have scissors and some twine on hand. Begin with three bulbs, along with their stems, and braid the stems as you would someone's hair: right, left, center. After creating one braided knot, you'll add a fourth bulb at the center and continue the pattern, adding more bulbs after each knot. If you've ever created a French braid in your hair or someone else's, it's similar.
Once you have some beautifully braided garlic, tie it off with some twine to keep the braid together. Keep your braided garlic in a cool, dry spot (via The Prairie Homestead). Be cautious of humid basements since they might have a lot of moisture. The goal is to keep the garlic dry. You can hang braids in your kitchen if you're sure you'll use them quickly.
What to do with all that garlic
If you've ever gardened before, you know that sometimes the harvest is overwhelming. However, don't throw any of your garlic away. After friends and family have had their fill, there are some unique ideas to help you use your extra fresh garlic. If you planted garlic, more than likely, you know exactly what to do with it — eat it up. Fresh garlic gives life to sauces, meats, and salad dressings. Still, if you've harvested pounds and pounds of it, you might run out of ideas. One thing you can do to make your fresh garlic last even longer and give it more uses is to dehydrate it.
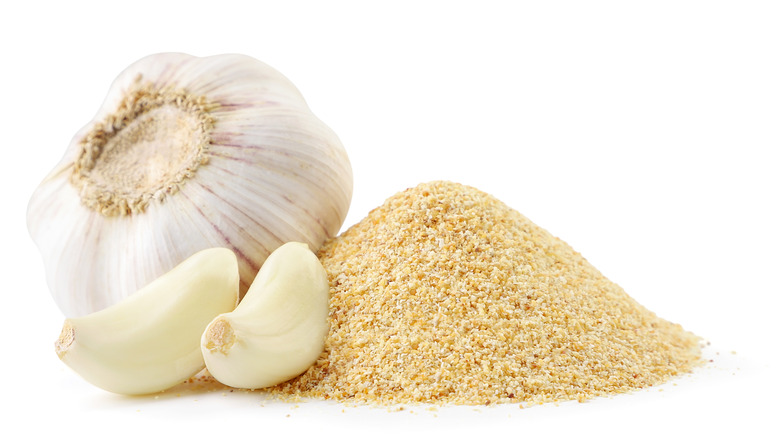
According to Alpha Foodie, you can make dried garlic flakes with your homegrown garlic. Have you ever read the list of fillers on the back of a bottle of dried garlic flakes? When you make your own, you'll combine convenience with all-natural. No fillers. Clean, peel, and slice the garlic or pulse it quickly in the food processor, then use a dehydrator to do the rest of the work. Store your dehydrated garlic in a glass jar and keep it near the spices. You can also set up shop at a farmer's market and sell your fresh garlic. You'll make a little money and meet like-minded people who enjoy fresh produce.
Garlic boasts antiviral properties and has been used since ancient times to fight disease (via the National Library of Medicine). Keep some garlic on hand for protection during cold and flu season. Eat one to two cloves of raw garlic daily unless you experience side effects, such as heartburn, acid reflux, or increased bleeding. You can use leftover garlic for planting in the fall.
Planting garlic indoors
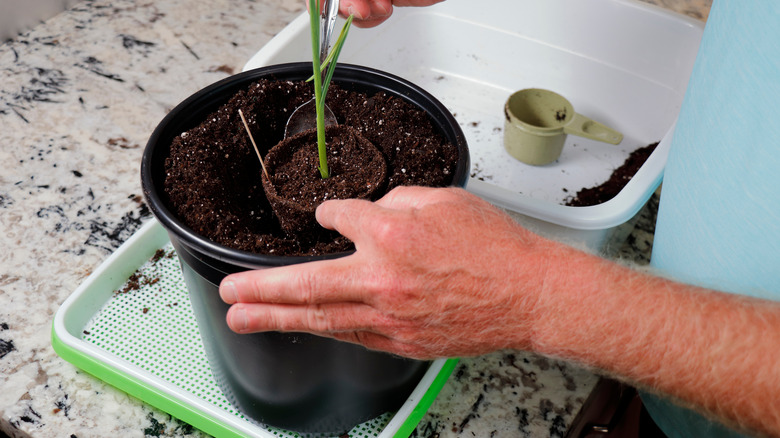
Don't miss out if you have no space to garden. Even if you live in a small apartment in the city, you can grow fresh garlic. Grab a terra cotta pot from a home improvement store and get started. The benefits of growing indoor plants are undeniable. WebMD explains that growing plants at home can reduce stress levels. Plants need some attention and give us something to take care of and nurture. Growing something at home can even boost your self-esteem. It's satisfying to see a clove of garlic burst into a large bulb of fresh garlic.
When potting your garlic at home, choose a pot a minimum of 6 inches deep to allow space for the garlic clove to sink at least 2 inches into the potting soil (via Rural Sprout). Plant in the fall just as you would outside and place the pot near your sunniest window. Keep the soil moist but not drenched. Harvest just as you would your garlic that's grown in the garden. Growing garlic at home can be very fulfilling, and you won't end up with an overabundance when harvested.