We Tried The Cheapest Cordless Power Drill At Home Depot. Here's How It Went.

We may receive a commission on purchases made from links.
Outside of buying, say, a 2x4 or a flat of pansies, what could be a more prototypical Home Depot shopping experience than picking up a cordless drill? HomeFixated's Mark Lyman says a cordless drill is the handyman's most essential tool (via Art of Manliness). Lyman also says not to be a cheapskate when buying a drill, but we aim to do just that.
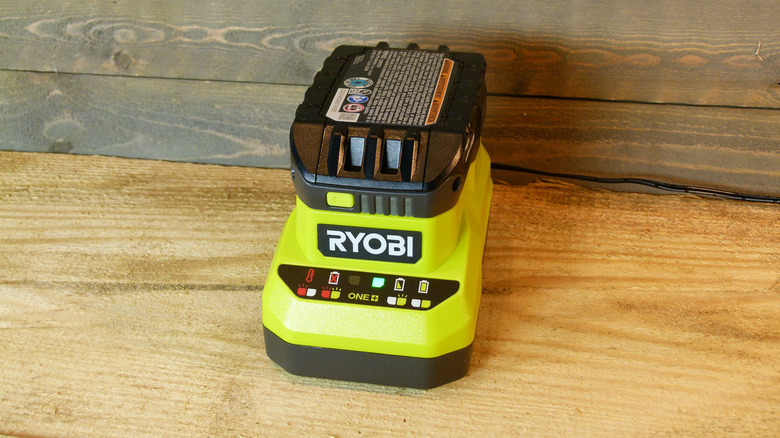
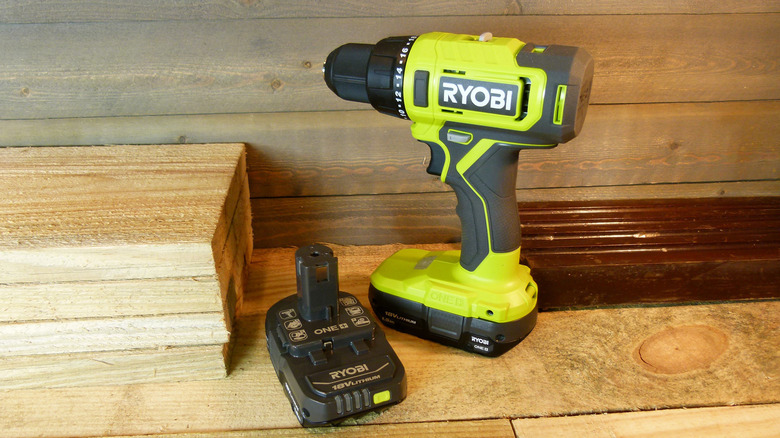
Shopping for cordless tools at Home Depot can be a frustrating, needlessly obscure process often involving locked cages, smartphones, ladders, looks of apologetic puzzlement, and much squirting at and re-checking of SKU numbers. Since the locked cages didn't prevent the staff from losing all six of the underpowered Ryobi PDD209s they were supposed to have in stock, the Ryobi PCL206 was the cheapest cordless power drill at Home Depot at the same $59.97 price, including two 1.5 Ah batteries and a charger. This took our little enterprise from the realm of certain failure to the realm of potential.
Since this is a drill review and not a battery platform review, let's deal with the battery thing up front. The Ryobi 18V One+ system seems to be powered by quality lithium batteries. Its chargers are fast enough ... certainly fast enough to charge before you can drain a second battery, in most cases. And the One+ power tools are good enough that, unless you're religiously opposed to mixing battery platforms, there's no reason to discount the Ryobi system even if you've already committed to another.
Ryobi PCL206: Too good to be true?
On paper, Ryobi's PCL206 compares favorably with every other drill in the store: ½-inch chuck, 515 inch-pounds of torque, max 1750 RPM. The only disappointing spec is a brushed motor that, compared with brushless models, will underperform.
The PCL206 succeeds Ryobi's P215, and is (aside from the brushed motor) a step in the direction of making their cheapest ½-inch drill/driver more of a prosumer model. The P215 featured consumer-oriented stuff you don't need while lacking in some key specs you certainly do need. On its base, the P215 had a gimmicky bit holder and tiny magnetic tray for holding bits or screws, neither particularly practical for anyone focused on productivity. More importantly, the P215 included lackluster batteries and charger, a non-ratcheting clutch, and a torque rating that relied on a different battery from the one that came with the drill. The PCL206 has a higher (and apparently battery-independent) torque rating, better batteries that include a level meter, a ratcheting clutch, and a slight but important difference in the way the onboard LED works, which we'll get to in a bit.
The PCL206 has a variable-speed trigger and a two-speed gearbox that tops out at 450 and 1750 RPM; of the drills in stock, only a $200 Milwaukee and a $220 DeWalt had (slightly) better top speeds (at 1800 and 2000 RPM). The 24-position clutch is pretty standard. But not everything is on paper, and our first impression wasn't altogether favorable.
Putting the Ryobi PCL206 through its paces
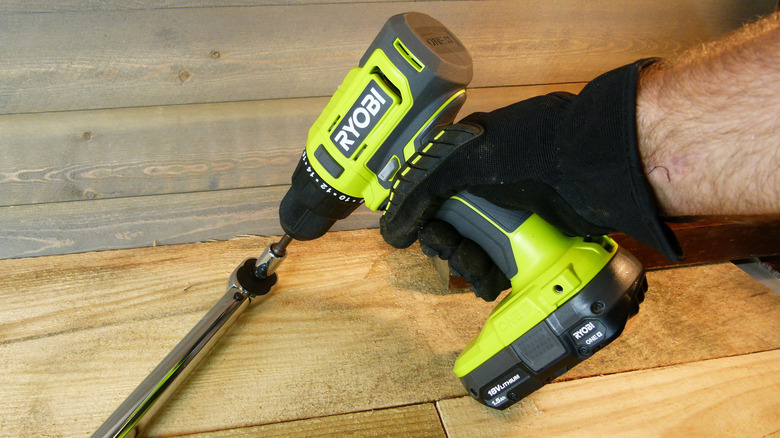
Out of the box, the drill felt big and heavy (though, at 2.6 pounds, it's in the middle of the Home Depot pack), yet somehow the plastic housing gave the impression of being potentially flimsy. So we put it through its paces on a couple of weekend projects and double-checked some key specs.
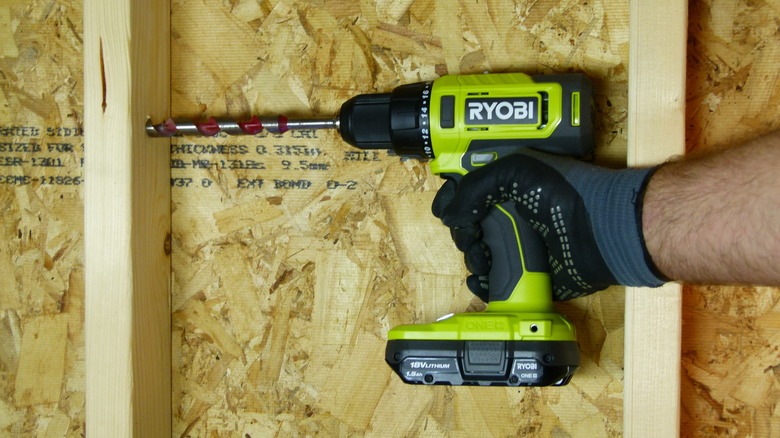
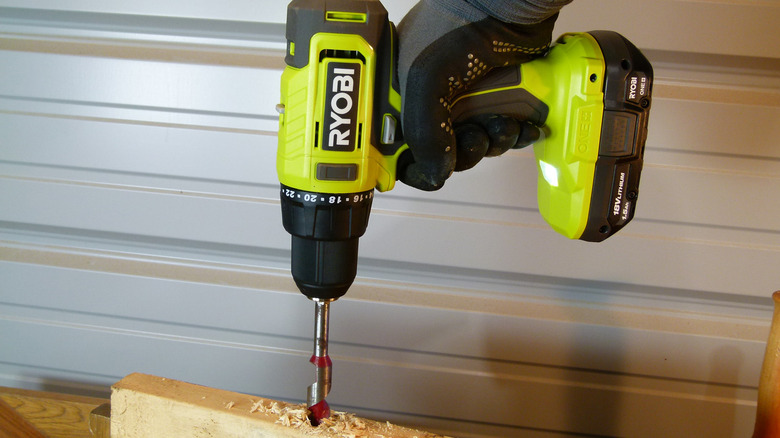
To get a handle on its general performance and usability, we anchored a wall with French doors to replace a garage door, and drilled wall studs for wiring a storage building. The former involved anchoring in both concrete and steel, and the latter involved the demanding use of spade and auger bits to bore big holes in 2x4s. We also drilled through the 5 1/2-inch width of SPF 2x6s with an auger bit a handful of times, which would make a lot of drills bog down. For all of these, we used only one of the batteries that came with the drill.
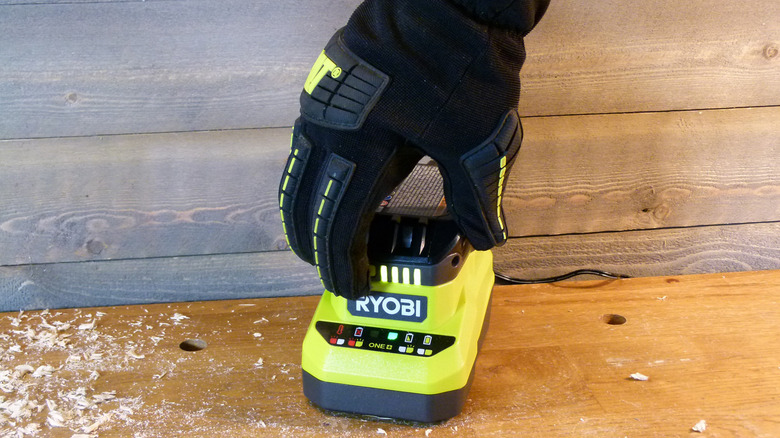
It was surprising that Ryobi should have the highest published torque ratings among all cordless drills in Home Depot, so we devised an impromptu test to check that 515-inch-pound figure using a ½-inch drive torque wrench. We set the wrench around the published PCL206 limit and crept up until the drill would no longer break through the wrench's click mechanism. The next-to-last setting should represent an approximate number for the drill's actual torque. We used only the remaining 1.5 Ah battery, fully charged, for this test.
What the cheapest Ryobi half-inch cordless drill did right
By the time we got to the torque-wrench test, we expected decent results. The drill performed everyday tasks admirably. While it struggled to make #14 self-drilling hex-head screws bite into steel framing and was nowise efficient in pre-drilling concrete for anchors, we knew from the outset that those were tasks better suited to impact drivers and hammer drills. The PCL206 handled everything else we threw at it.
Drilling the 2x4 studs separately for both Romex and audio cable didn't cause a hiccup. A pleasant surprise was that the drill was small enough to get between the 16-inches-on-center studs even when fitted with a longish 5/8-inch auger bit, though we also used a shorter ⅝-inch paddle bit in a few tight spots. Compared with the steel and concrete, the wood drilling was close to effortless. And as long as we cleared the auger bit of sawdust every few inches, the PCL206 had no trouble with the 2x6s.
That left the torque wrench test. Click-type torque wrenches work by breaking free of applied force when torque reaches a dialed-in level. We increased the torque setting until we could no longer break the wrench loose. The last setting at which we successfully clicked it over was 46 foot-pounds, or about 552 inch-pounds. Ryobi rates the drill at 515 inch-pounds, so it met its claims, assuming our margin of error was 10%or less. (The wrench was factory-certified to be accurate within 4%.)
What the PCL206 could do better
Nitpicking seems like a petty pursuit until you've actually had nits. Ryobi already stripped the unimportant elements away from this new model, and what was left was worth doing right. In a few areas, they fell a little short.
Most consumer, prosumer, and professional cordless drills include an on-board LED. These tend to function the same way: When you squeeze the trigger, the light is powered and stays on for 10 seconds after you release the trigger. But the PCL206 turns the light off immediately when you stop pressing the trigger. This has two unfortunate effects: Obviously, you have to keep squeezing the trigger to illuminate whatever it was you wanted the light for; and even if you don't need the light, it comes on anyway so anytime you're pulsing the motor you get a distracting light show. You can lightly squeeze the trigger to engage the light but not the motor. However, this was such a precise maneuver that you're likely to accidentally start drilling half the time.
Low-speed drilling appears to present some other problems. More than a few reviewers tout this function as an advantage over other models, but running the drill at its lowest speed for more than a few seconds makes the drill housing noticeably hot, and the motor emits that familiar hot-electric-motor smell that usually presages a power tool's decline. Oh, and if you're interested, drill bits keep falling out of this drill.
Wait, what? Drill bits fall out?
Within the first minute of use, perhaps after four or five squeezes of the trigger, the first bit we used came loose in the chuck. This is no minor problem, as you know if you've ever slung a sharp bit across a workshop at 1,000+ RPM. When it happened a few more times, we started investigating.
Most people, including us, tighten keyless drill chucks in roughly the same way: You insert the bit, pick your clutch setting, hold the ribbed clutch sleeve, and power the drill until the clutch clicks. This works fine until you try the Ryobi PCL206 and discover it's not tight enough.
Time to consult the manual and learn the correct way to tighten bits in this drill (and many other models with ratcheting chucks), which is to insert and position the bit, then turn the sleeve clockwise (facing the front of the drill) by hand until the mechanism clicks. This manual locking process prevents the chuck from loosening when the drill's brake causes sudden stops (via Pro Tool Reviews). To verify this, set the clutch on a fairly high setting (say, 18) and tighten a bit using the hold-and-drive method. Run the drill for a while in short, full-speed bursts until the bit loosens. Then load the bit again and hand-tighten per Ryobi's instructions, and you'll see that it won't loosen at all. The manual gives clear instructions on page 7, in three languages — which we read eventually.
The final verdict was fairly easy to reach
Let's sum up the negatives: The PCL206 is not a great flashlight. It runs hot when you run it below its rated speed, like the manual says it will. And if you don't insert your bit properly, it might fall out.
These are not staggering revelations that undermine the value of an $80 drill kit with the specifications of drills two to three times its price — which is not to say the PCL206 will outperform those pricier drills. If they are brushless, the Ryobi's brushed motor can't compete, full stop. Brushed motors turn more slowly, use more battery, and generally have less power. They also cost significantly less. And while the gap is closing, brushless motors are still the province of professionals in terms of cost and benefits of performance.
Overall, we were pleasantly surprised with the PCL206 drill/driver. It keeps up with pricier drills and seems to live up to its own hype. It's much better than its predecessor, the P215, so while the P215 remains at the same price, so you have to think of the PCL206 as a great value.
Time might show the flaws and vulnerabilities in this tool. It'll get dropped off a few ladders and overstressed or overheated nearly to the melting point. Then we might see some long-term shortcomings and places where Ryobi skimped on a consumer-level cordless tool. But we haven't seen them yet, and there's no real reason to think we will.