The Right Way To Open A Can Of Paint
There are certain interior design and home renovation tasks that seem self-explanatory. Take painting, for instance. Most homeowners and DIY enthusiasts will feel confident enough to repaint a wall or even the entire room. However, sometimes it's the little things that can spoil a project before it even gets started.
A task that you may think is easy is opening a can of paint. However, you may not be doing it in the most efficient manner. As The DIY Playbook points out, many people make a giant mess when opening a paint can. Alternatively, maybe you've never painted before and you need some advice on the basics. Perhaps you have a lid that's stuck and you're not sure what to do, or you could also have some questions on how to properly close a can of paint. If any of these scenarios are resonating with you, you'll want to read the information below.
How to open a paint can
When opening a can of paint, most people only pry from one side. However, this can cause the paint to splatter and make a mess, which can be extremely frustrating. Instead of only opening the can from one place, Two Feet First says to use a flathead screwdriver and pry the lid from three or four places. Only push down hard enough for the can to release some pressure, don't try to lift the lid until you know it is completely separated, and lift gently. Love & Renovations also recommends placing your hand on the top of the lid, to ensure it doesn't flip open and splatter paint everywhere. Once the lid is fully separated, put it in a safe location where you know it won't accidentally get touched.
If you don't have a screwdriver, you could also use a putty knife, a butter knife, or a key, suggests Two Feet First. Whatever tool you use, be sure to wipe off any excess paint immediately with a paper towel before it dries. If the lid is stuck, you can gently use a hammer on the end of the tool to provide more leverage. If the paint has dried around the lid from previous use, cut around the lid with a razor blade before beginning to pry it open. Alternatively, you could let the can soak in warm water or sit in direct sunlight for 10 minutes, which should loosen the dried paint.
How to close a paint can
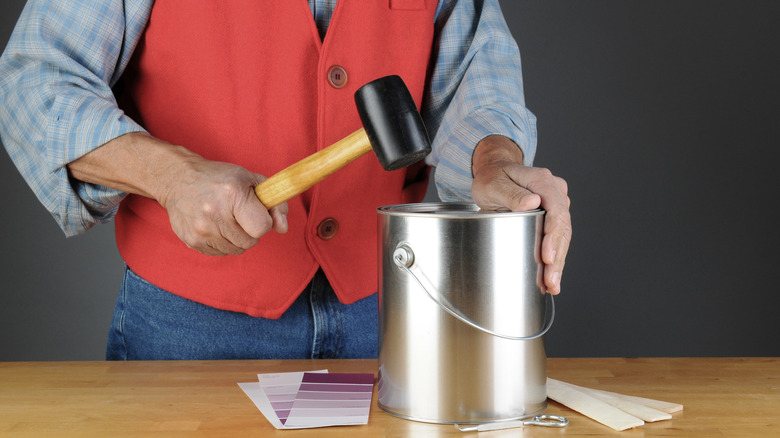
If you still have leftover paint, you'll need to close the can so that it doesn't dry out. Two Feet First recommends first wiping away excess paint from the lip of the can — this will prevent the lid from getting stuck onto the can. Once the lid is in position, drape an old rag over top and tap a hammer or mallet around the edges, then remove the rag.
Many people don't place a rag over the can before sealing the edges. However, it is beneficial as it will keep the lid from getting dented. It will also protect your hammer from getting paint on it and, as Love & Renovations points out, it will ensure you don't splatter. MM DIY also says that standing on the can is another easy way to seal the lid. Step on the top in a few places, to make sure it's fully sealed, and put all your body weight on it — make sure to check the sole of your shoe before walking inside, though, so you don't track paint everywhere.