Try These 5 Outlet Tests For Your Home's Safety

We have a theory: nothing hurts as much as sitting on your own while a device is charging, and then from nowhere, you get a whiff of burnt wire. It could be the gadget or device, but it could also be your blender that short circuits whenever you plug it into THAT outlet. We feel the anger and frustration too. If you realize that you've had to replace your gadgets, or your appliance chargers, more often than usual, you might have a little wiring or outlet problem.
As a homeowner, it's important to understand the wiring connections of your home. This enables you to spot faults as soon as they come up. As such, you'll prevent yourself and your kids from safety hazards and petty inconveniences.
More often than not, these faults result from a poor connection, says Energuide. Thankfully, the troubleshooting process of ascertaining the actual problem with your home can be done with a simple outlet test. And even better, there's a tool known as the multimeter that can do most of the work for you. So, grab your safety gear, and let's go all Mario on the problem.
Test the voltage
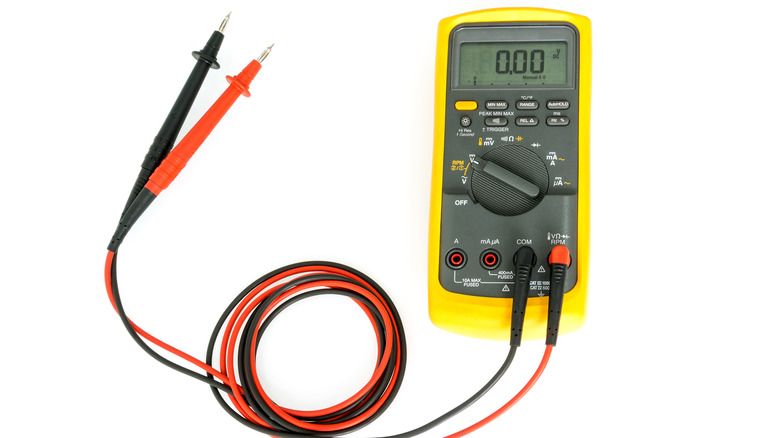
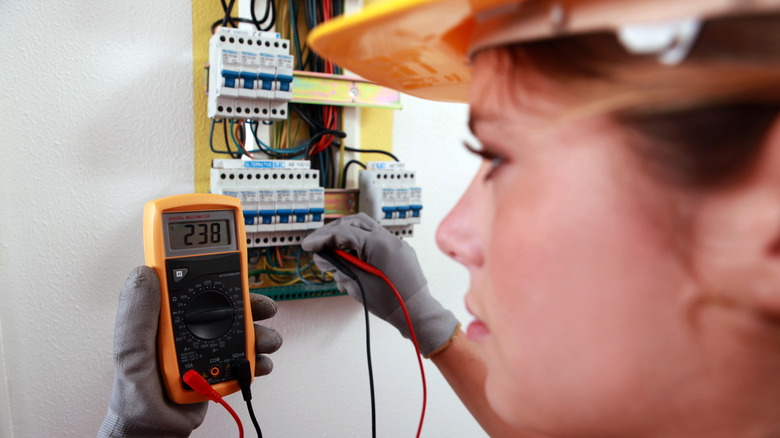
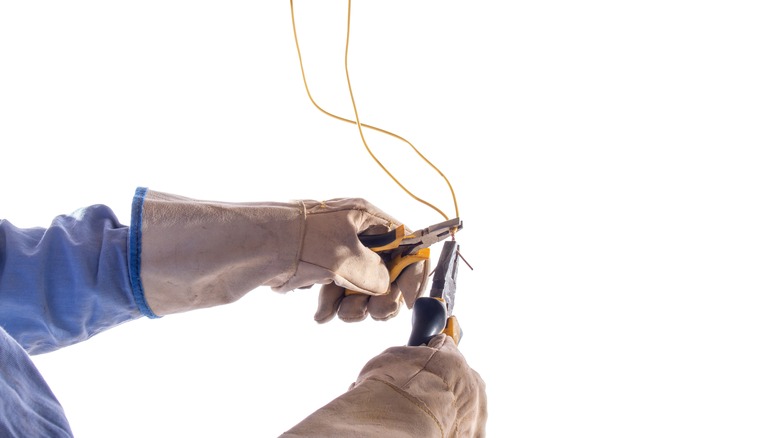
The first safety outlet test we'll have you do is a simple voltage test. To do this, you'll require a multimeter. A multimeter looks just like a stethoscope, but smaller, and comes with two colored probes (black and red), which are to be connected to your test outlet.
Before plugging in the multimeter, you are going to need to switch off the power and then identify the appropriate hole for each wire. There are two: volts and com phase. The red probe goes into the volts input, which has a red circle and a Greek omega sign, while the black goes into the com phase with the black circle sign, writes Simply Smarter Circuitry Blog. Also, please be careful to ensure that the wires do not overlap to avoid a safety hazard.
Having set your connection right, the next thing you want to do is to read the figures. The average voltage reading of the home is between 110 and 120 volts (per Diverse Interests). If your home has a good voltage and connection, some numbers will be displayed on the multimeter's screen.
If your multimeter has no reading, then it isn't receiving any power input at all, says Popular Mechanics. You need to further check the wiring connection for a break somewhere in-between.
Check your breaker panel
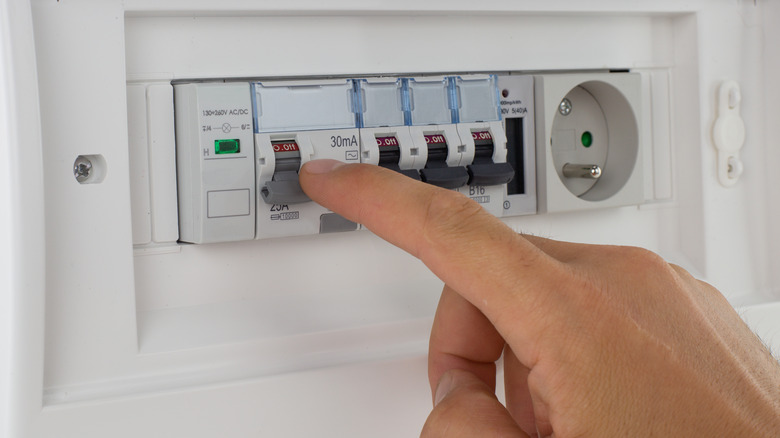
When it comes to power outlets, we like to think of the breaker panel as the big gun. Essentially, the breaker panel is the single electrical outlet that ensures an even distribution of power across all other outlets. If your breaker panel develops a fault, the rest of your outlets are most likely to shut down as well (via Express Electrical Services). Thus, it is quite imperative to know how to troubleshoot your breaker panel.
Get started by checking out the breaker panel itself and every other plug. Ensure the space between the breaker panel and other items is no less than 3 feet. Then, shut off the power and open up the breaker panel. Using a flashlight for accuracy, check for molding, rust, and corrosion. If you've been using one breaker panel for a while, then there is a higher chance that it has begun to rust. To fix this, Kukun writes that you should repaint it with metal-based paint. However, when it has corroded beyond repair, you should consider replacing it entirely.
Moving on, the experts at D & F Liquidators say to test out how loose the lever is. Switch it from on to off multiple times and if it seems stuck, or you seem to have trouble moving it, it's time to get it replaced. Finally, if you've been experiencing trips, perform a simple voltage test with the tips we recommended above.
Check for improper grounding
Improper grounding can be determined through a minor test. Using the multimeter leads, reverse the connection you made initially — that is, switch the connection ports of the red and black probes. Record the reading you get first, then remove the black probe gently and insert it into the third outlet port before checking the reading again. Normally, it should match the original figures you had during the first testing (per HGTV). If it's different, your outlet is improperly grounded.
Angi writes that fixing a grounding problem costs between $130 and $170; however, you can decide to take it on yourself. The first step is to locate the earth rod and check for any corrosion in the wires. Also, there may be a loose connection that needs some tightening. If that's not the issue, then check each cable joining area in the home for any wire breaks. Once the fault is detected, fix it by replacing the wires where necessary.
Safety tip: Switch off all electrical connections before checking wires to avoid an electrical shock.
Check extension cords and loose sockets
Another recommended handy outlet test for your home's safety is ensuring that all extensions and sockets are in prim and proper shape. Extension cords are convenience appliances. If your socket is too far away, or a plug can't seem to fit in the main socket, use one. However, extension cords also go through wear and tear. This includes stretching of the rubber, which can lead to cuts and tears, and in worst-case scenarios, exposure of the wires.
According to Sunrise Electric, it is prudent to do routine checks on your extension cords. If you notice a cut or exposed wires, you can either proceed with a DIY fix or replace the cord. If you'd like a DIY fix, begin by unplugging your extension cords and then wrap the exposed points in some black tape.
Similarly, if your socket is kept in place by a screw, over time, the screw might loosen, leading to your socket popping out of its place. To fix this, replace the screws for best results (optional), and then use a screwdriver. Art of Manliness recommends turning the screws clockwise until they're tightened.
Check for improper wiring
The last test for your outlets is checking for improper wiring. Your At Home Team writes that leaving improper wiring unfixed is highly risky. It is an extreme sport that can lead to sudden fire outbreaks and electrocution.
To get started, insert the black probe of the multimeter into the negative socket and the red into the middle socket hole of the outlet. With your multimeter well connected, check for the readings on the screen. Usually, it should have a zero reading or no reading at all. However, if another figure shows on the screen, then there is an improper wiring connection. Call an electrician to take it on from here, especially if you're not a pro. This way, you'll avoid electrical accidents.
Once you are done with determining the problem, remove your multimeter probes carefully by taking out the black wire before the red wire, writes I Fix It.