Kitchen Tips To Make Your Tools And Appliances Last

It's no secret that maintaining a home is costly. From utility bills to landscaping to unexpected repairs, it has a way of adding up. That's why you want to save green wherever you can. Believe it or not, there are a lot of little-known hacks that you can use to extend the life of both your kitchen tools and appliances. Most of them are very simple to carry out, making it an absolute no brainer.
Sears provides a breakdown of how long appliances typically last. First, they note that refrigerators and dishwashers usually last between 10 to 13 years. Gas ranges are cited to last about 15 years while stovetops have a 15 to 18 year lifespan. Finally, microwaves are usually good for between nine to 10 years. Obviously, you want to ensure your appliances last on the longer end of those spectrums or even beyond them, and these hacks can certainly assist in making that wish come true!
Keep your garbage disposal clean and clear with ice
Have you seen this hack that can help you clean your garbage disposal with a common household item? This hack has seemed to take TikTok by storm, and with good reason. Ice is the secret ingredient that will allow you to keep your garbage disposal in great condition and clean as a whistle. To use this hack, Apartment Maintenance Pro explains that you'll need quite a bit of ice. Before you get started, go under the sink and make sure the pipe of your disposal is securely attached. Next, dump about five pounds of ice into your sink.
From there, push as much ice as you can into the disposal as you can with your hand. Be sure to do this step before you turn the disposal on. Then, turn your faucet on about halfway with cold water flowing into your ice-filled sink. Turn the disposal on and gently guide the ice from the sink into the disposal, but be careful not to put your hand in the drain. As the disposal grinds the ice, dirty water will begin to rise from the disposal, exemplifying the purge of gunk that you're getting out of it. Continue feeding the disposal ice until it comes up clear and clean. That's how you know your disposal is clean!
Clean your microwave with the help of lemon juice

Scrubbing your microwave is far from glamorous, and you'll be glad to know that there's an easier way to clean it. Even those crusted, stuck-on spots can be loosened up with this simple hack. LifeHacker shares that to make the cleaning process easier and more effective, you should simply squeeze lemon juice into a small bowl, leaving the actual lemon in the juice. Add half a cup of water to the bowl and pop it into the microwave. Set the cooking time to three minutes and then let the microwave steam for five minutes after "cooking." This should do a great job loosening up any debris that is stuck onto the shelf, walls, or ceiling of your microwave. Use a damp sponge to wipe it off, and you're set! Plus, it will smell lemony fresh. Best of all, this hack doesn't use any harsh cleaning chemicals and is super affordable.
Use this hack to clean your fridge's condenser coils with a straw, packing tape, and your vacuum

Something that goes neglected in many kitchens is the condenser coils of a refrigerator. However, keeping them clean is important to the health and lifespan of your fridge. That's because, as House Tipster notes, the coils attract dust, dirt, and even pet hair. When the coils get clogged with debris, it prevents the fridge from releasing heat. That means that the fridge compressor has to work harder and run more frequently to work correctly. This can reduce the lifespan of your fridge or cause the need for more frequent repair.
Since a fridge is a costly item to replace, you'll want to take care to use this clever hack.
Howididit details how to clean the coils with ease. Take your normal household vacuum nozzle attachment. To make it more targeted, use packing tape to attach a plastic straw to the end of the nozzle. Just like that, it'll be so much easier to clean the coils of dust and debris.
Get more life out of your plastic food containers thanks to dish soap, water, and paper towel
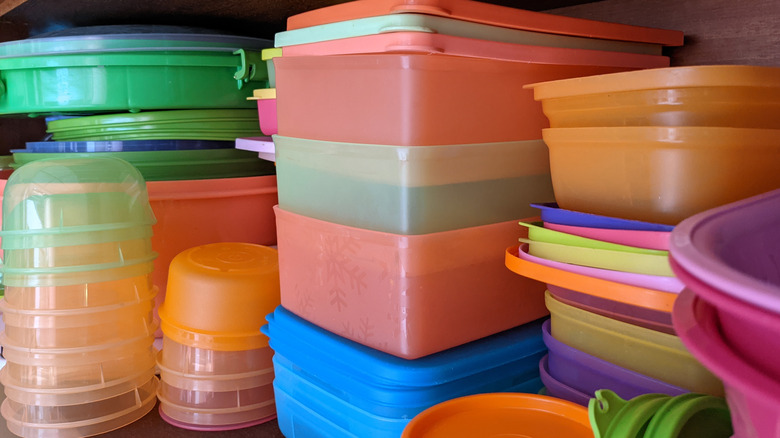
Sure, plastic food storage is nowhere as expensive as appliances, but it's a kitchen must-have. Constantly throwing out containers and having to replace them can add up quickly! With that being said, plastic dishes are prone to carrying greasy stains that discolor the container. These stains are stubborn and refuse to come off even in the dishwasher, causing many homeowners to throw the container in the trash. However, that doesn't have to be the case!
NowThisNews shared a tutorial on how you can revive these stained containers. Put a squirt of dish soap into the container and then add warm water to it. Then, take a few pieces of ripped paper towel and submerge them into the water. Then, put the top on the container and shake it up so the water touches the entire inside. Do this for about a minute and then remove the cap. Now, dispose of the paper towel and rinse the container with cold water. You'll be amazed to see it's back to its original clarity and has shed that greasy feeling.
Sanitize your sponge by throwing it in the dishwasher
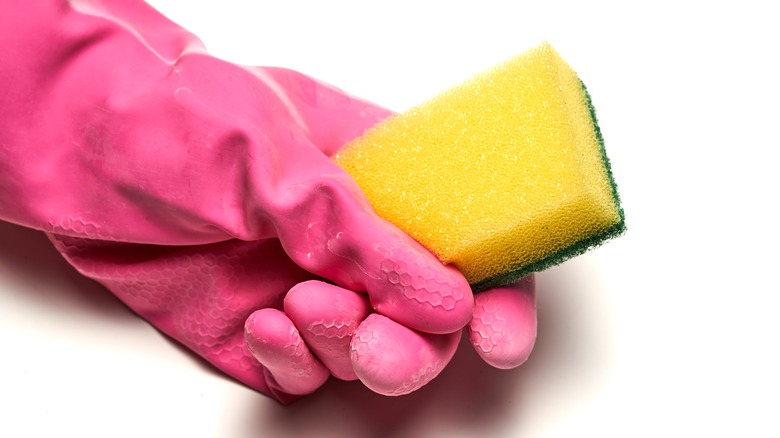
Sponges are another kitchen staple, but they're also another item that you may fly through and have to be constantly repurchasing. That's because all too frequently, sponges end up smelling foul. Wondering why this disturbing phenomenon happens? Well, House Notebook explains that because you use a kitchen sponge to clean dirty dishes and countertops, crumbs and food pieces get stuck in the sponge. Once these begin to decompose, your sponge starts to smell. Using a sponge that smells means that it is filled with potentially harmful bacteria, many of which can cause illness.
Thanks to Women's Health Magazine, you can now clean your sponge with ease. The trick is to throw your sponge in the top rack of your dishwasher when you run a cycle. Just be sure to squeeze out the moisture before throwing it in. If you can, use the heated dry option for best results. After that, your sponge will be good as new!
Clean your dishwasher with baking soda and distilled white vinegar
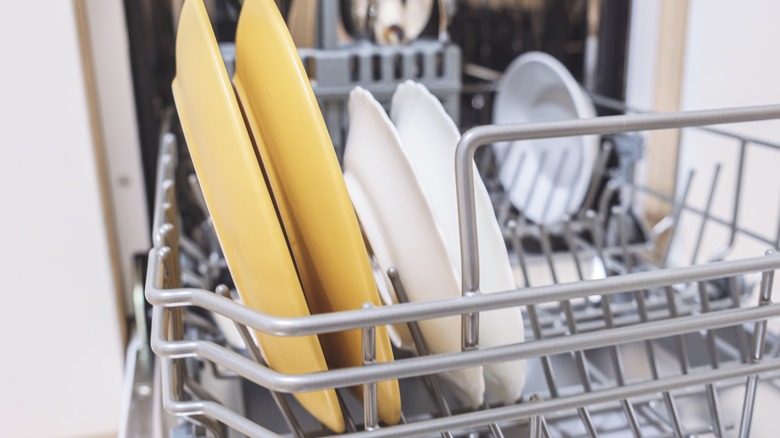
Your dishwasher itself is responsible for cleaning the things you eat off of, so you want to make sure that this appliance is well cared for and clean. Doing so can ensure that you get the most life out of your dishwasher, which is important since it can be costly to replace.
The Scott Brothers share a tutorial on how you can clean your dishwasher with common pantry staples: baking soda and distilled white vinegar. Start with a completely empty dishwasher. Pull the bottom rack out and sprinkle a cup of baking soda into the bottom inside of the appliance, where the filter sits. Then, put a cup of white wine vinegar in the middle of the top rack. Close the dishwasher, and run a hot water cycle. Just like that, your dishwasher will be nice and clean and you can rest easy, knowing that your dishes are getting their best clean every time you run a cycle.
Get crumbs out of your toaster by flipping it on its side

Toasters are another small appliance in your home that likely get quite a bit of use. Over time, crumbs probably get stuck in the bottom of the toaster. Leaving an abundance of crumbs in the bottom of the toaster can affect the way it operates and cause it to wear out quicker. However, as Clean Freak & Germaphobe explains, a lot of people go about cleaning it out the entirely wrong way. Instead of turning your toaster upside down over the garbage can and shaking it, go about it the right way. This commonly used method actually poses a potential fire hazard, as it brings crumbs up to the burners of the toaster, where they may end up lodged.
Instead, unplug your toaster and turn it on its side so that you can access its bottom. Many toasters have "traps" on the bottom that you can easily open with just your hand. Open them, clean out any crumbs, and wipe them down for a toaster that feels brand new!
Wash your coffee maker with denture cleaner to help it last longer
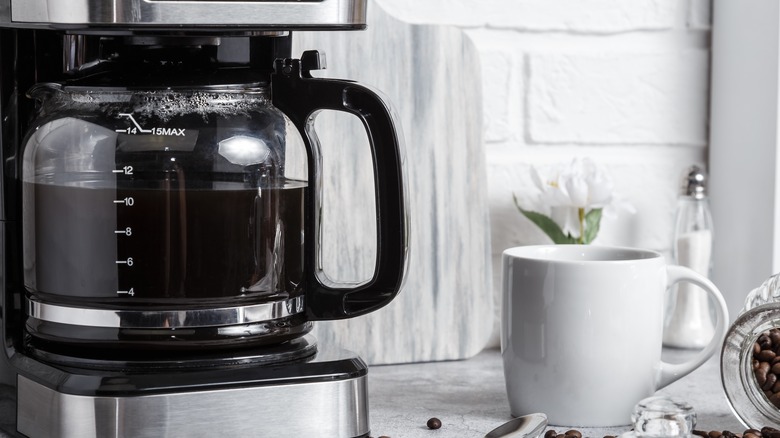
Your coffee maker may be one of the important appliances in your kitchen if you rely on that morning cup of java to get you going. But especially for coffee pots that are frequently used, it might have a buildup of gunk in it that's actually affecting the machine's health. Plus, you want the freshest brew possible every time you get a cup!
USA Today shares that denture cleaning tablets are effective in cleaning a coffee maker without having to put in much effort. To do so, fill the water basin of your coffee machine and add the denture tablet to the water. It will float to the bottom and automatically start dissolving. This will work to descale your machine and get rid of built-up bacteria. After it's completely dissolved, run the coffee machine like normal but without any coffee in it. Once done, empty and rinse it and you're set. This is an affordable cleaning method – much cheaper than many marketed coffee cleaner kits – and it works on virtually any type of coffee maker!
Pantry staples work better than cleaning solutions on your range hood

Your range hood is most likely not something that's part of your normal kitchen cleaning routine. However, that doesn't mean it doesn't need attention from time to time. In fact, as The Washington Post notes, since a range hood is – by design – made to collect grease, dust, and smoke, they can get pretty dirty. The debris trapped inside a range hood has to go somewhere, and it can't do so and operate seamlessly without regular cleanings.
Thoughts for Happy Minds shares a hack for cleaning a range hood that works better than most commercial cleaning solutions. In fact, using regular cleaning solutions could actually damage your range hood filter. Instead, take a large rectangular tray and fill it with boiling water. Sprinkle a generous helping of both salt and baking soda into the water and mix it up until dissolved. The more dirty and greasy the filter is, the more salt and baking soda you should use. Add the filter to the water and pour distilled white vinegar over the filter, going back and forth several times as you pour. Let the filter soak and simmer in the solution for up to ten minutes. You'll see the grease rise to the surface of the water. Take it out of the solution, rinse it, and use a scrubby brush with some dish soap for a final once-over. Once it dries, you can install it back onto your range hood and it'll be good as new!
Read and reference instruction manuals

Somewhat of a hack for getting the most out of your appliances is to actually read the instruction manuals that they come with. While this may be a bit boring, these manuals come with the appliances for a reason! They contain helpful information that will assist you in maintaining the appliance, operating it correctly, recognizing and troubleshooting issues.
These manuals may have a tendency to get lost in your home. To prevent this from happening, Refined Rooms shares how you can seamlessly organize them. Take a three-ring binder and use the velcro binder pockets to stuff manuals into. You can label each pocket for the room of your home that they coordinate with. Also, have one specific pocket for all relevant warranty information. Having everything where you need it makes it so much easier to decipher a problem when it arises with the help of your handy manual!
Keep your appliances dust free

Dust can build up around and in your appliances quicker than you'd think. Especially when it comes to smaller appliances that don't receive a lot of use, they could end up collecting dust and debris that will affect their operation and even lifespan.
To prevent this from happening, Rismedia's Housecall provides some tips and tricks. One is to clean these appliances from time to time, even if you haven't used them in a while. Wipe them down with soap and water or a dust cloth to keep them tidy and clean. Another thing you may not have thought of is that you should have your air conditioning serviced regularly. Your AC is responsible for the flow of air within your home, and if the filter has an abundance of dust caught in it, it could be making your home dustier. In turn, your appliances will collect dust as well.
Use a dishwasher pod to keep your sink sparkling clean

Of course, you use your sink to wash dishes and your hands, but how often do you actually wash your sink? Since your sink gets so much use, it can easily accumulate a build-up of grease, crumbs, and food particles. This can quickly get out of control, breeding bacteria and making your sink a less-than-ideal place to clean other items. Plus, when you put things in a dirty and germy sink, it can actually affect the lifespan of those items.
For that reason, it's important to clean your sink regularly. A foolproof and easy way to do this, as explained by Hunker, is to place a dishwasher pod in the sink. Throw it into the sink with the drain covered. Add warm water to the sink and leave it for at least an hour, if not longer. This could be a great chore to do overnight, letting the pod do all the work for you. Once the pod has fully dissolved and the soapy water has soaked, drain the sink. Use a cleaning brush or sponge to scrub the sink one time, rinse it, and admire how sparkly clean it is!
Use baking soda on a cast iron skillet

Cast iron skillets are notorious for not being cleaned the way that traditional pans are. These pans cannot be washed with dish soap, which begs the question: how can you keep it clean? Delishably shares a simple way to clean stuck on grime without compromising the health of the pan. To do so, use a sprinkle of baking soda and a splash of water. The baking soda will do a great time killing germs and deodorizing the pan of whatever odors it might have stuck to it from its last use. Use a brush to scrub the pan and the baking soda should act as a paste to aid in this effort. After it's clean, rinse the pan with cold water. Repeat as needed until the pan is completely clean. Since your cast iron pan is probably seasoned from cooking with it, you don't want to go too crazy scrubbing it, so keep that in mind.
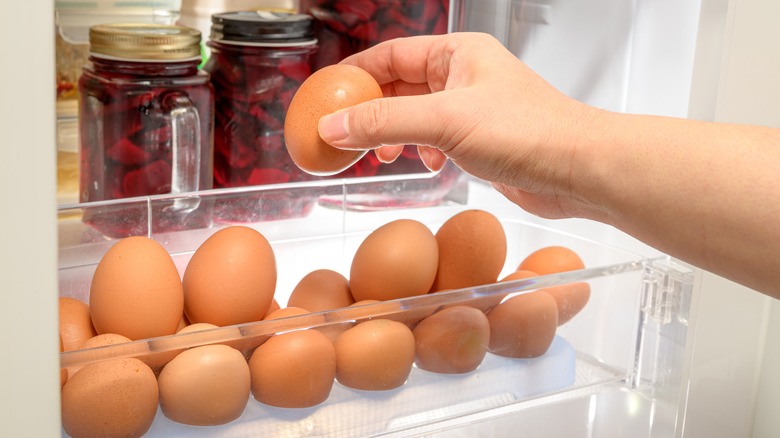
Fridge storage bins do more than just keep you organized
A fridge or freezer bursting at the seams with food items is not only frustrating when you go to find something, but it can actually be bad for the health of your appliance. In addition, having so many items that demand you store them close together or on top of each other is also bad for your fridge.
For that reason, use fridge storage bins to keep things organized and a safe distance apart. Food52 shares that adding these to your fridge will allow you to organize items into zones, making them simple to locate when you need them. They also allow you to maximize the space in your fridge without crowding or overloading it. Best of all, simple bins aren't the only thing you can buy for your fridge. Lazy Susans, divided bins, and bins with compartments specifically for things like condiments or yogurt exist. Make organizing your fridge into a fun DIY project and this appliance will surely breathe a sigh of relief!