How To Dry And Style Your Favorite Flowers
If you want to dry flowers for a craft project, or perhaps save flowers associated with a precious memory (such as a big accomplishment, a gift from a loved one, or your wedding day), it's not too difficult a DIY to do. A fresh floral arrangement will last around 10 days if you care for it properly, but if you take the time to dry those flowers, you can display them almost indefinitely, according to Lambo Dried & Deco. By taking all the moisture out of the flowers, they become preserved and won't rot.
Dried flowers don't need to be cared for like fresh ones, but you can do a couple of things to keep them looking good for as long as possible. A crucial precaution is never to put them in water. You don't need to worry about keeping them alive; instead, it will cause your flowers to mold. You also shouldn't display them in direct sunlight because it'll bleach the color of their petals. Otherwise, drying and styling flowers is a relatively simple process that requires no upkeep.
Air drying flowers
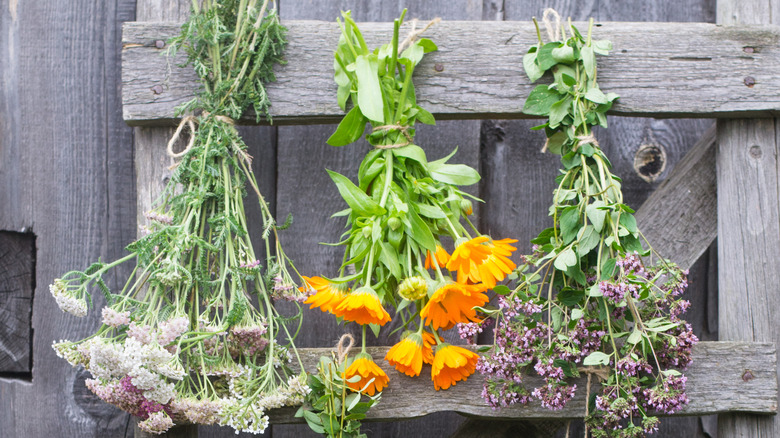
To air dry your flowers, you'll need your favorite flowers, twine, scissors, and a place to hang them. First, prepare your flowers by trimming the stems to your desired length and removing some of the foliage. You can remove it all or leave some of the leaves if you like the look of it. Then divide your flowers into small groups and wrap their stems with the twine.
Finding the proper location to dry your flowers is important to the preservation process. 1st in Flowers explains that it should be somewhere that isn't humid and has good ventilation. A basement or attic, for example, would work well. Once you have your location, there are several different ways to suspend your flowers. For them to dry the best, you want them to be upside down. You can either tie them to a stick hanging on the wall, attach them to a hanger, or put them onto hooks. After about three weeks, they should be dry.
Drying flowers in a microwave
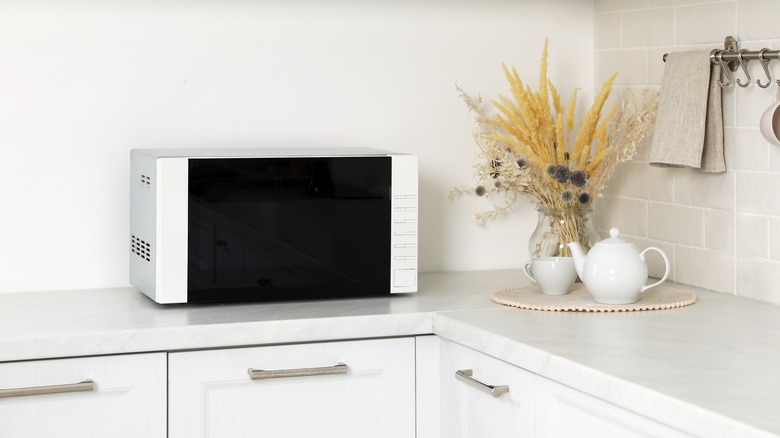
There are quicker methods if you don't want to wait weeks for your flowers to dry. The microwave can dry them, but you also risk burning the petals. To do it this way, you'll need either cat litter or silica sand, as well as your microwave. First, trim the stems and greenery to your liking. Then in a microwave-safe container, add a layer of the litter or sand. You need to use one of these because they aid in adsorbing the moisture from the flowers.
All Free Crafts recommends drying flowers one at a time, or at the most two at a time, to prevent burning in the microwave. First, add your kitty litter to a bowl large enough to hold your flower. Place the flower in the litter, then pour another layer of the litter or sand over the flower, ensuring it gets in between all the petals. Set your microwave to half-power and heat the flowers in 30-second intervals. You'll need to microwave them for about 2 to 5 minutes. Once they're dry and cooled down, take them out of the container and dust them off.
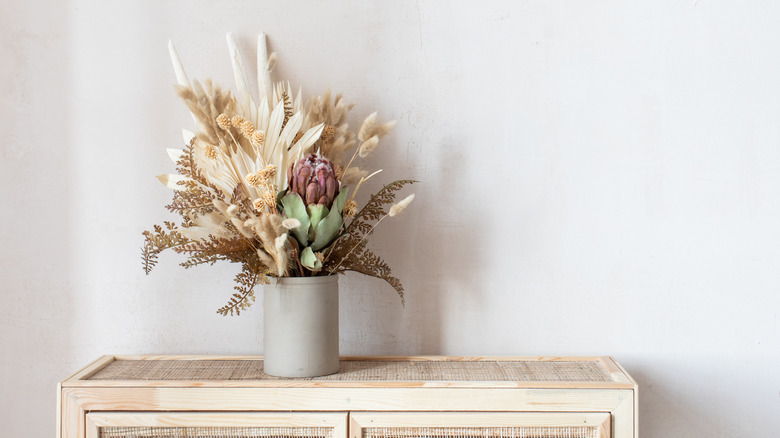
Style your dried flowers in a vase
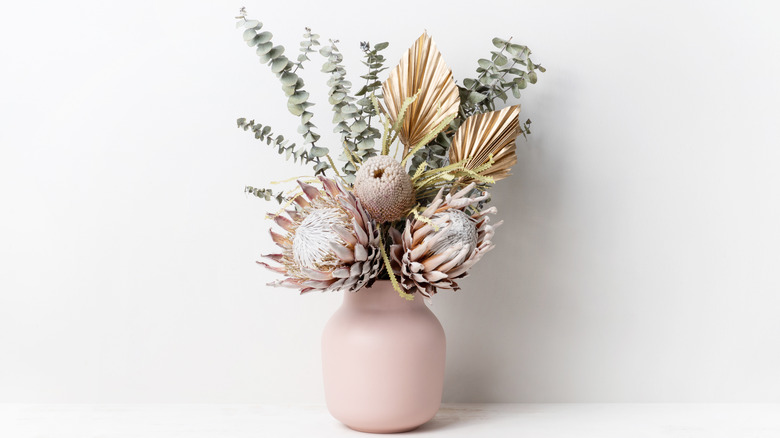
Displaying dried flowers in a vase is one of the easiest ways to style them. You can simply place them in a glass vase, antique wine bottle, or mason jar, and they'll look good. Or you can create a floral arrangement, adding color and dimension to your home. For a floral arrangement, you'll need dried flowers and foliage. It will be even better if you use different types of flowers.
Garden Therapy recommends using tape to create a grid on the top of your vase. Doing this will keep everything in place as you add or remove things. You should add your foliage first. Then you can add your focal flowers. To keep the arrangement natural, place them in a zig-zag pattern and cut their stems to different heights. Lastly, add smaller filler flowers to make it feel complete, with no empty spots. Spin your vase around to ensure it looks good from all angles, and you're ready to display your dried flowers for years.
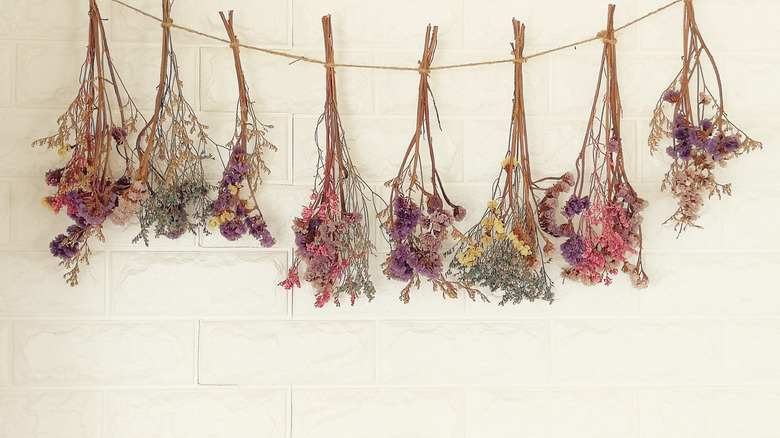
Use them as colorful, natural wall decor
If you like how your flowers look when hanging to dry, why not display them on your wall? There are multiple ways you can do this. One easy way is with hooks, particularly if you already used hooks to hang the flowers to dry. Then, you don't have to take them off the wall once they dry. Although, if you go this route, make sure you use a trendy twine or ribbon to bundle them for drying.
Another way to use your flowers as wall decor is to build your own hanger to dry them on. It can be stylish and functional after you stain or paint it to match your decor. Life on Summerhill takes a plank of wood and drills two holes in it for every bundle of flowers. These holes should be 1 ½ inches apart, or you can make the space larger if you plan on using larger bundles of flowers.
Once positioned, lace twine or ribbon through the drilled holes; this is how you'll tie the flowers to the wood plank. To display the DIY hanger, attach brackets to the back, or you could drill two holes on each end of the plank and hang it up using a piece of twine, jute, or ribbon.
Create a one-of-a-kind craft wreath
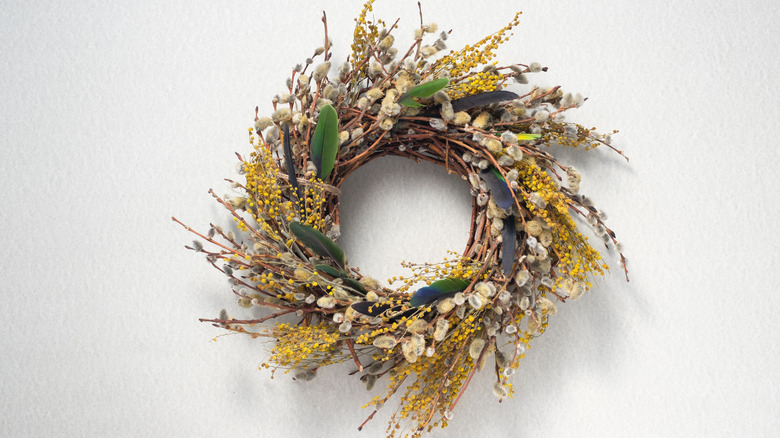
Using your dried flowers for a wreath is another way to arrange them into a beautiful display for your home. Other than flowers and foliage, you'll need a wreath form. Single Girls DIY recommends using a 14- to 16-inch grapevine wreath because it'll be easier to stick the stems in it without needing to use glue. Sturdy flowers will work best so they don't fall apart when creating the wreath. These are flowers like roses, lavender, coneflowers, baby's breath, and hydrangeas.
Before you add anything to the wreath form, use some floral wire or twine to create a loop on the back. Doing this allows you to hang the wreath. The base layer goes on first; this is your foliage and filler flowers. Simply insert the stems, and the grapevines should keep everything in place. Then add your focal flowers. Your placement doesn't have to be perfect or symmetrical; it'll look more natural if you add your dried flowers wherever you like.