How To Style A Garden Bench

We may receive a commission on purchases made from links.
Backyards are excellent places to spend time on your own or with friends and family, especially if you have a garden. And learning how to style a garden bench can convert this space from a backyard to an outdoor living area. Some things to consider when choosing garden benches are who will use them, what they will be used for, and how much wear and tear they can expect. Gabberts also recommends considering the size of your space and what plans you have for it. Whether buying premade or building your own garden bench, wood, metal, cement, plastic, wicker, and rattan are all traditional options.
You also need to think about the location of your garden bench. This may change over time, as the best place in one season might not be the best in others (via Ferns and Feathers). Sun, shade, and dampness can all affect your bench placement. Don't forget to include plants that can accentuate your garden bench's placement and desirability. Shrubs and vines on either side of your seating can make the area more inviting.
Finally, decide whether or not you want a backrest and if you'd like to include storage underneath. This could be an ideal place for your gardening tools. If your under-bench storage is big enough, you might even be able to stash some extra pillows and throws to swap out your look as your tastes or the seasons change.
Plant built-in gardens in your benches
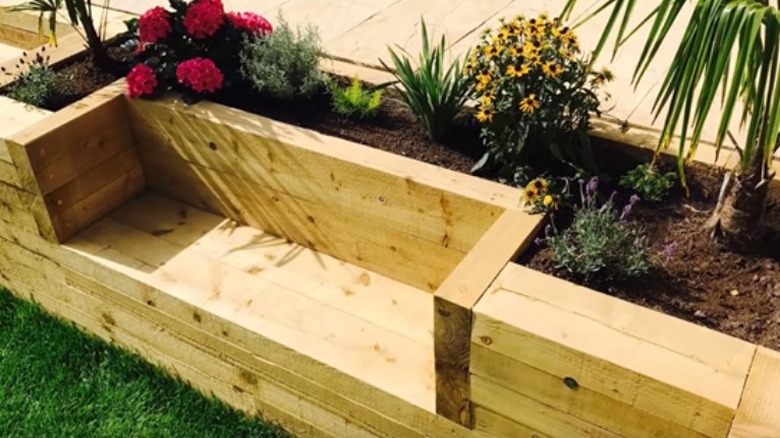
Instead of planting your benches in your greenery, why not consider planting some vegetation in your garden benches? This is also an excellent choice if your outdoor area is short on space. For a small, simple option with a single planter beside it, follow the step-by-step instructions from Construct 101.
You can build a bigger, fancier version if you have more space. Some include storage, privacy screens, or even separate potting areas. This is a perfect fit if you want a lot of plants but don't have a lot of space. And if you want to go all out, you could consider a design that includes waterfalls running through your garden bench and ending in a small pool (via Jackson's Fencing).
They used pea gravel and succulents in the lower levels, but you could just as easily use shrubs in this space. For the upper planters, climbing plants and vines work best. You could even string a line across the fencing behind your garden bench to help keep the vines in place when they begin climbing. Then run a waterfall feature under the upper levels that spill into a pool below. And voila. You've created a perfect oasis.
Create a floating or drop-down bench
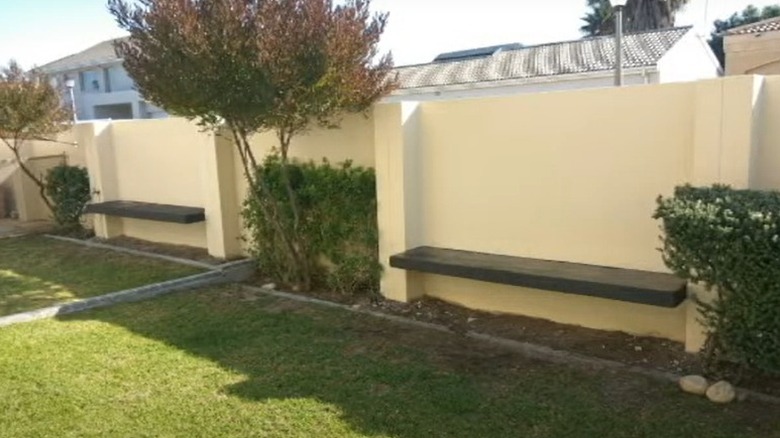
A drop-down or floating version could suit your purposes if you have enough room for a garden but not a bench. This is a lovely option if you prefer the garden to the seating area but want someplace to curl up with a book and a cup of coffee.
These are also excellent options for dealing with a tiny space, like perhaps an apartment or condo balcony. Who said your garden couldn't consist entirely of potted plants? That's exactly what these plans from Mena's Smart Home are designed for, and the step-by-step instructions on YouTube will help you create something that works for your space, no matter how big or small.
There are wooden versions of these space-saving floating benches, but the most common ones are metal. Some contain simple hinges, while other, larger versions use chains to ensure they are weight-bearing. If you need something sleek that conserves space but not so much that it folds away when not in use, you could consider a floating bench that attaches to the wall but remains upright whenever you need it (via Astra Street Furniture).
Corner the seating arrangement
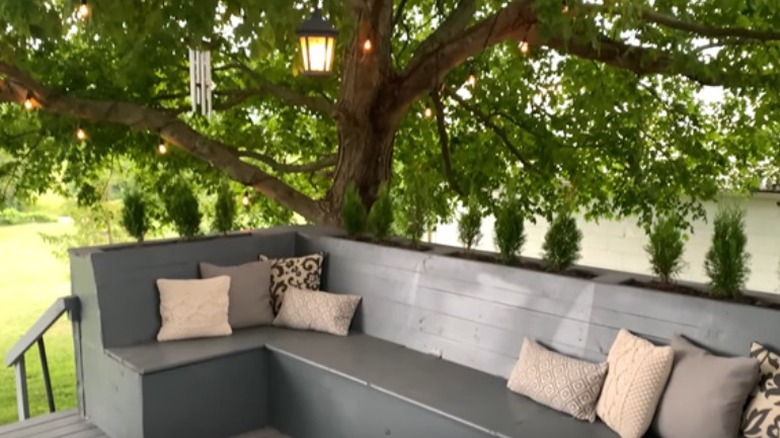
L-shaped benches can add seating to small spaces where they might not otherwise fit. Abbotts at Home has instructions to make a DIY garden bench according to your home's specifications. She also discusses things to consider when deciding what style will work best in your home. Consider how it will be used, by whom, and the environment where you'll be using it. Will it be used near a pool, water feature, or perhaps adjacent to your garden? If so, you'll want something water-resistant. Think about what materials you want – wood, concrete, plastic – and which will best suit your purposes. Driplines and cannonballs into your backyard pool aren't the only garden bench water concerns. You will need weatherproof materials if your garden or patio area isn't covered.
Even if you're someplace like California or Arizona where it doesn't rain often, don't forget the dew and condensation that can mount on your outdoor furniture in the mornings. Not to mention the sprinklers required to keep your garden alive. Once you've decided exactly what you need, you can get to work building the perfect bench for your space. You could even build a version with built-in storage (via YouTube). Depending on your garden bench goals, you could use this for gardening supplies, pots, soil, cushions, and decorative accent options.
Work with wood
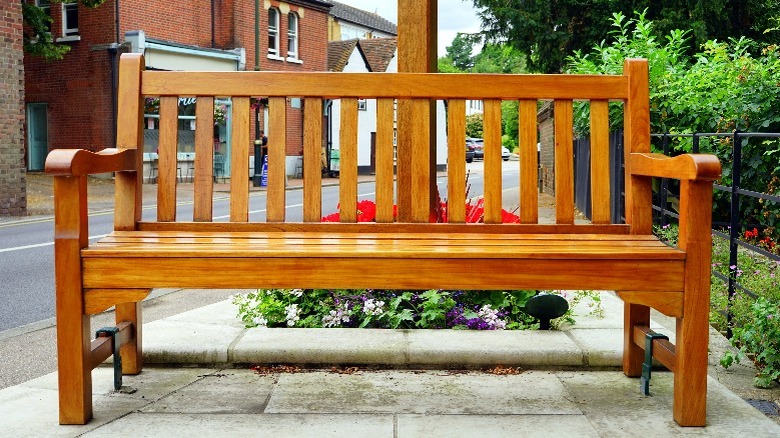
Wood can be an excellent choice if you're working with a covered space or are willing to weatherproof your materials. It's less expensive and easier to work with than other mediums and certainly less time-consuming to craft with than concrete. Deciding which wood to use can be a challenge, though. Wood comes in a variety of colors, prices, and durability. Some have natural water-resistant properties that make weatherproofing less critical. Where you're placing your bench matters, too, but you have plenty of options.
As Today's Homeowner explains, Acacia might be the best choice if you want a wood bench but are concerned about deforestation and sustainability. In fact, it grows so well in regions it is native to it is considered an invasive species, or in layman's terms, a weed. You will want to seal Acacia if it is exposed to the elements to avoid discoloring. Cedar is another excellent choice. It is lightweight, takes paints and stains well, and is naturally resistant to insects and rot. You can seal this wood or not, according to your preferences; it will grey over time if left unsealed. Cypress also works well outside. It does not need to be weather treated, but it does best with an occasional treatment with oil. It will grey over time if left unsealed but isn't susceptible to any wood distortion due to exposure. Unfortunately, it may be more difficult and expensive to procure.
Go sleek and modern
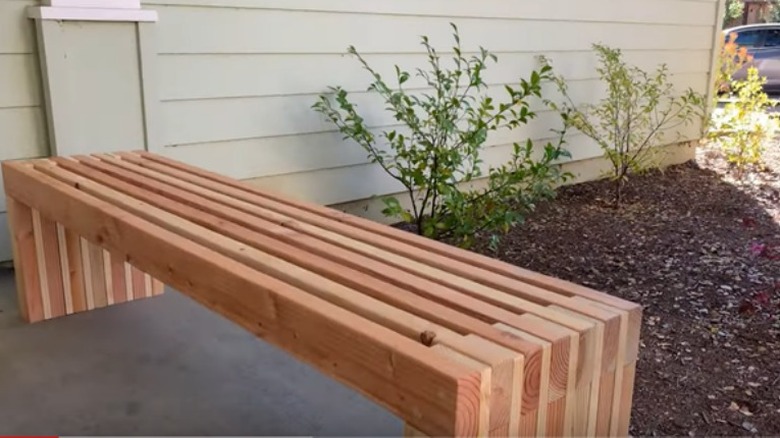
Sleek, modern designs are based on clean, simple lines, which make them ideal DIY projects. DIY Montreal has a version that uses only glue, 2' x 4' pieces of lumber, stain, and sealant. Their step-by-step instructions take you through preparing your wood, assembling the tongue and groove design, and staining and sealing it. This style of assembly is known for its durability and sustainability. It doesn't require screws or other metal equipment that could rust being exposed to the elements.
Another aspect of these tongue and groove designs, assembled only with glue, is that they are inexpensive to produce. For only $35 in supplies, you can build this style of bench, including the necessary weatherproofing to leave it out in the elements (via DIY Candy). These simple stool-type benches look lovely but aren't always the most comfortable. Chairs and benches with backs can be more accommodating if you plan to sit for long periods. If you're looking for a simple design with a back that you can make yourself, other options are available (via Ana White). This design does use screws – 120 of them to be precise – so it will be slightly less weather-resistant than its tongue-and-groove counterpart.
You will also need more wood to create a garden bench with a back, so if time or money constraints are an issue, it may be best for you to stick with the tongue-and-groove design.
Plump it up with pillows
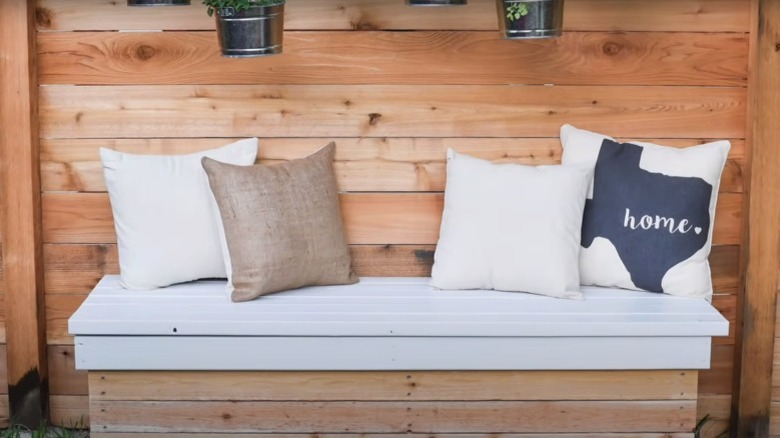
Pillows can help add comfort to your garden bench and a bit of pizzazz. Choose colors that complement your existing décor or ones that speak to your personality. According to Design Within Reach, pillows are an easily exchangeable way to decorate your garden space. You can swap them out when you feel like changing your color scheme or even matching the colors of a gathering you're hosting in your backyard.
Colors aren't the only options you have with garden bench pillows. Different shapes and sizes contribute to your garden and bench's overall look and feel. Square, round, and rectangular lumbar pillows influence the style of your garden bench. Cushions with fun themes can jazz up your garden area. Consider color blocking, stripes, and pom-poms (via The Lily Pad Cottage). Floral-patterned or colored pillows can add much-needed color, especially with unstained versions of Acacia or cedar wood. And large cushions can do double duty. Consider using them on the ground for extra seating if you have a few more guests than you counted on at your next get-together.
Consider using your garden as inspiration if you're stumped for color choices. What colors are the flowers and shrubs in your environment? If you have a fledgling garden, or you're planning the seating and the landscape simultaneously, take a stroll through your local nursery and see what colors pique your interest and tickle your fancy. Then choose cushions or paint for your bench that either matches or complements those tones.
Fold it up
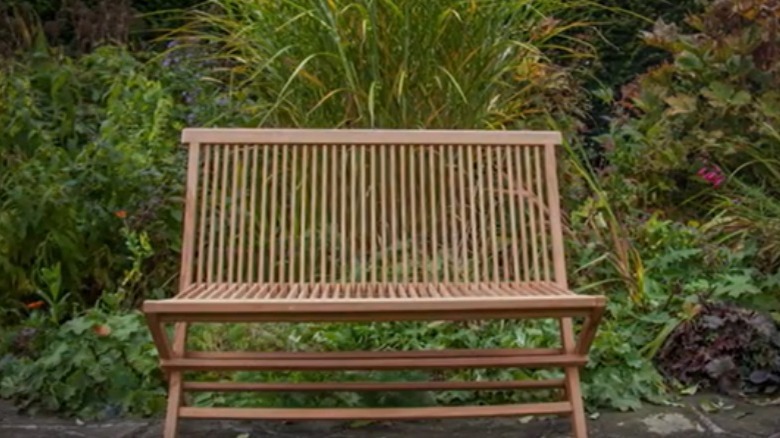
A fold-up garden bench may be the best option if you have limited space. Like your floating and drop-down options, these can be collapsed when not in use. But unlike your floating and wall-mounted options, these can be moved around the garden and perched in the precisely correct location. This means you can follow the sun, or shade, to your heart's content while you lounge in your garden.
Home good stores and locations like Lowe's and Home Depot carry premade versions, or you can assemble one yourself. Designs by Studio C provides simple step-by-step instructions for making a bench that operates like an old-school fold-up chair. It will take some time to assemble, as each slat in the seat and the back needs to be cut and attached individually.
It's not a space saver, but if you have the room and like to host large groups in your garden, you could craft two benches that fold out to form a picnic table between them (via Wilkerdos). The beauty of this design is that the backs of your benches are what convert into the table. So, if you're just sitting on the benches, you can lean back and get comfortable. But if you'll be eating, those backs are what become the table you eat or drink off of.
Repurpose your pallets
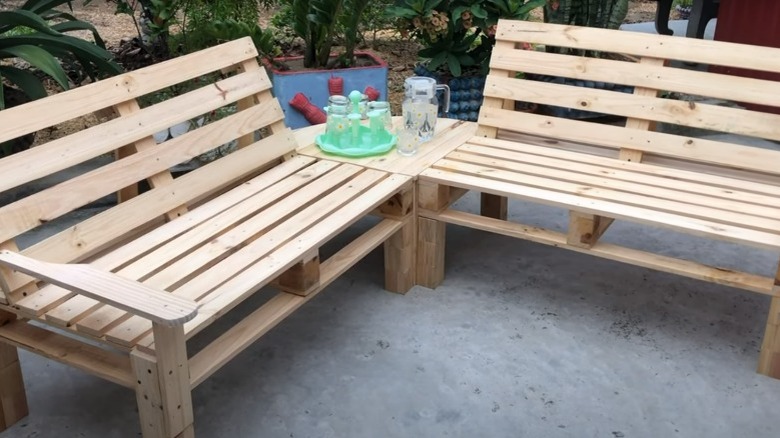
If you're concerned with sustainability, you might be looking for a way to repurpose items you already have or that can be easily obtained. Most places have pallets they don't need. That was the design inspiration for R.K. Black, Inc. and their pallet garden benches. Using their list of supplies and simple instructions, you can create your own garden bench out of pallets in under three hours. Besides being economical, this type of garden bench is adaptable (via Ideal Home UK). You can build them into chairs, benches, or even L-shaped, corner seats.
Several online retailers offer cushions explicitly designed for pallet furniture. Seek these out to dress your new pallet benches. You might also want to consider staining or painting them. The material pallets are made of works well with stains and paints, meaning you can choose any color you want. Then mix and match your pillows and cushions to create a look that is uniquely you.
Craft it from concrete
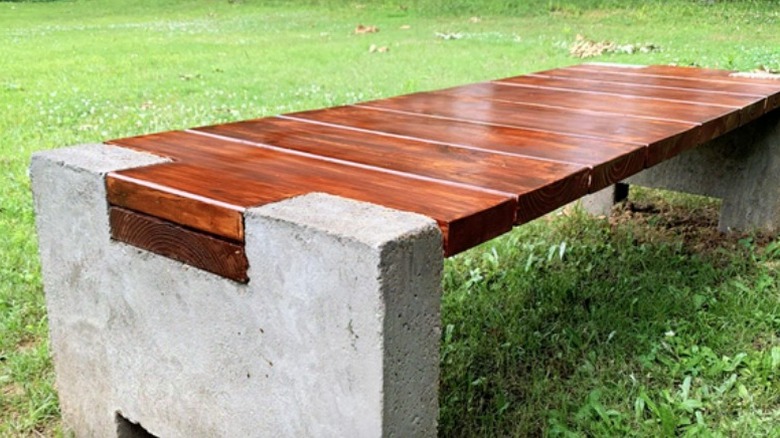
Concrete benches are durable and low maintenance, making them an excellent addition to your garden space. But it's not the only benefit they can provide, according to Lowell Russell Concrete, Inc. Unlike other options, concrete isn't a look that will go out of style and become dated. And ultimately, it can be recycled, which is a plus if you care about sustainability and protecting the environment.
You could make one if you're willing to put in the time and effort (via Today's Homeowner). You'll need rebar pins, Quickrete, or another advanced polymer to hold the piece together. If you're looking for something more manageable, you could opt for a version using concrete legs but a wooden top (via Man About Tools). This eliminates a large portion of the work and allows you to stain or paint the top of your bench, which would be difficult, if not impossible, with a concrete design. But if DIY is not your thing, or you think these plans are beyond your abilities, you could purchase a bench premade from a hardware store or nursery.
Round it out
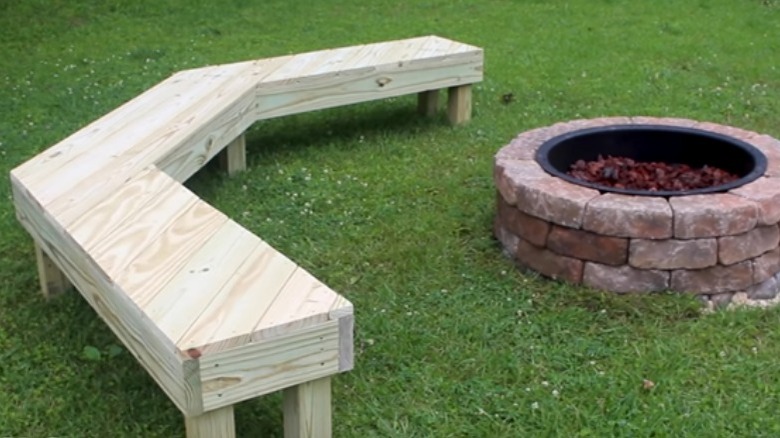
Round garden benches work wonders in areas with firepits. You can design them to hug your firepit's immediate area or spread things out further. If you like spending time in your garden in the evenings, this could be an ideal option. They also work well for seating large groups if you want to host gatherings in your garden. Many retailers offer these premade, or you can design your own. You could create this campfire bench from Canadian Home Workshop if you live alone or if it's just you and your significant other. It fits one person comfortably or two cozily.
If, on the other hand, you live with your family or plan to invite friends over, you can build a bigger version, but it will take a bit more work (via Instructables). This is the best option for large groups of people, but it involves many steps and tools. So if you're DIY skills aren't up to par, or your patience isn't on point, you may want to consider a premade or custom item instead.
Build it from cinderblocks
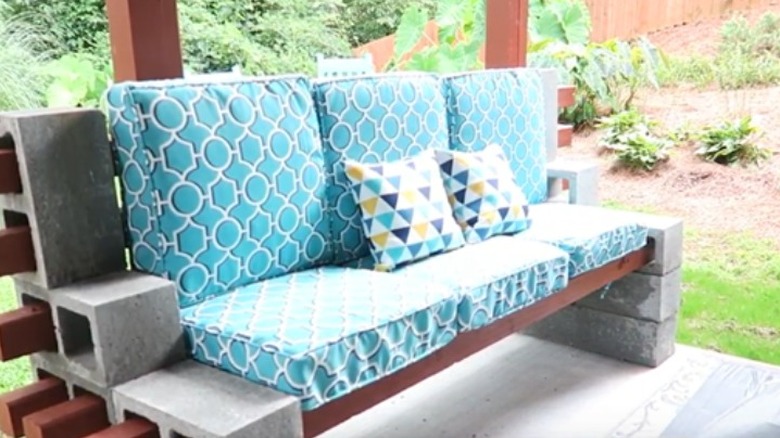
This is one of the easiest types of garden benches to build. The supplies are incredibly accessible, and you don't need hardware to attach the pieces. Your wood slats fit directly into the spaces in your cinder blocks. Artsy Pretty Plants points out that this project can be tough on your legs because you are working on the ground with 35-pound blocks, painting, priming, and sanding.
The end result is gorgeous, but this is a more complicated version of a cinderblock bench design. It's best suited to those who want something conventional and low-key but with a kiss of style that makes it stand out from the pack. This design is for people who want a basic-plus look in their garden.
If that's not you, or if you don't want to go to that trouble or feel you're not up to it physically, you could forego the priming and painting and use the blocks as is (via DIY Joy). These plans use the cinder blocks in their natural state and thread the beams through them. Then it tops these items with cushions and adds candles as accents. Styling your garden bench this way creates a little isle of serenity right in your backyard.
Use as a privacy screen

If you didn't know before the pandemic, it became clear pretty quickly that having your own space is essential. If you're sharing a backyard garden area with housemates, adding a privacy screen to the back of your garden bench can create two separate spaces that will give you and them some much-needed personal space. You can do this with built-in or standalone benches, and Mother Daughter Projects walks you through a DIY version built from scratch.
The first thing you need to consider when taking on a project like this is the size of the space that you're seeking privacy from (via Home Depot). Building onto the back of a bench may not block out everything, but it's a start. And even if all your blocking is what's behind your benches, you still need to know your wood purchase dimensions and construction plans.
Once you have assembled your bench and privacy screen, you can add things like pillows to further obscure the view and make your seating arrangements more comfortable.