How To Build The Perfect Outdoor Shower

The value that the outdoor space around your home can provide to your lifestyle is incredible. There is often so much untapped potential in this natural environment that lies just beyond your front or back door. Whether you've chosen to capture this energy with a deck installation, a pool, or your own vegetable garden, the reality is that making use of this space has become an integral part of modern homeownership today.
For those thinking of improving their outdoor space even further, the addition of an outdoor shower can really amplify the value and utility that your outdoor environment offers to the ambiance of your home more broadly. Building the perfect outdoor shower is all about understanding your needs and any potential constraints that might limit certain features or design elements in the build.
Regardless of the exact shower that you select for your property (Outdoor Shower Company notes that these can run the gamut), having this addition available will give you the ability to clean off after a day of swimming in the pool, a weekend sporting event in the rain (and the accompanying mud and grime that likely traveled home with you), or simply the capacity to wash yourself in nature rather than the clinical environment of an indoor bathroom.
Keep reading to learn how to select and plan the perfect outdoor shower build for your home.
Decide on your specific use case
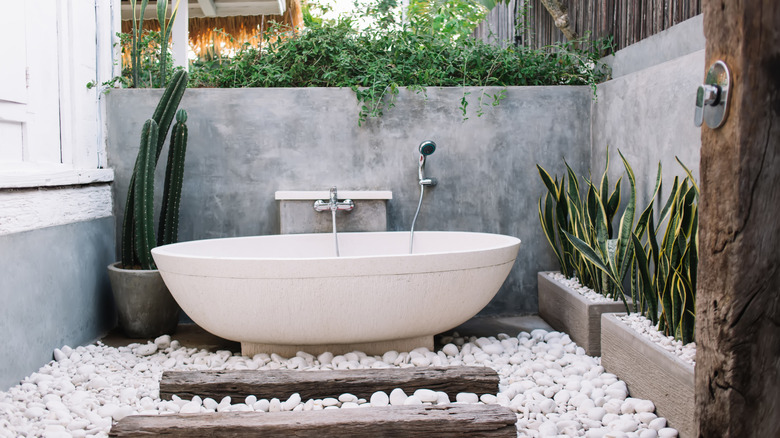
The first thing you'll need to do when crafting a new shower in your yard comes in the form of planning. Outdoor showers can be built in a variety of different general layouts, and these often differ based on use case. If you intend to use this facility as you might a traditional shower (i.e. shedding all of your clothing and bathing in this addition to your property), then building walls and a more robust overall frame will be necessary. This will give you the ability to take your morning prep routine outdoors if the weather is particularly beautiful on a warm and sunny day. Cleaning yourself in nature can be an immensely enjoyable experience (via Entity Magazine), but if you haven't built your outdoor shower to facilitate this kind of use, then it may not be possible to achieve this level of comfortability with the outdoor feature.
Alternatively, you may only require this feature as a means to rinse off after playing outside or swimming in the pool. Regardless of what you plan to use the shower for, thinking about the potential use cases and how this feature will fit into your lifestyle is important because it will dictate the kind of build that you follow as you assemble the shower.
Identify a location and measure dimensions

After you've decided on the kind of shower feature that you want to install in your yard, the next step is to identify the location where it will be constructed. It's important to select a place that is easy to access while remaining out of the way of walking paths and sitting areas.
Once again, the type of shower that you're planning to install can play a role here. For an outdoor reproduction of a full-service showering facility, you might want a more secluded area of the yard to play host to this project. Placing this shower in a far corner of the yard and creating a path that connects it can provide you with both the isolation you'll be looking for and easy access that makes the feature enjoyable to use whenever the occasion arises. Alternatively, a shower that will function as an after-pool rinse facility might only require a simple installation in an area adjacent to the pool itself (via Bear's Workshop).
Once you've found your spot, it's time to measure and develop a building plan for the shower feature. It's always a good idea to measure everything more than once. This goes both for materials that you'll be cutting and for locations that you're intending to build on. Ensuring that you have your measurements correct will help you purchase the right materials and save you from repeat trips to the hardware store or lumberyard.
Collect materials and begin preparing the space
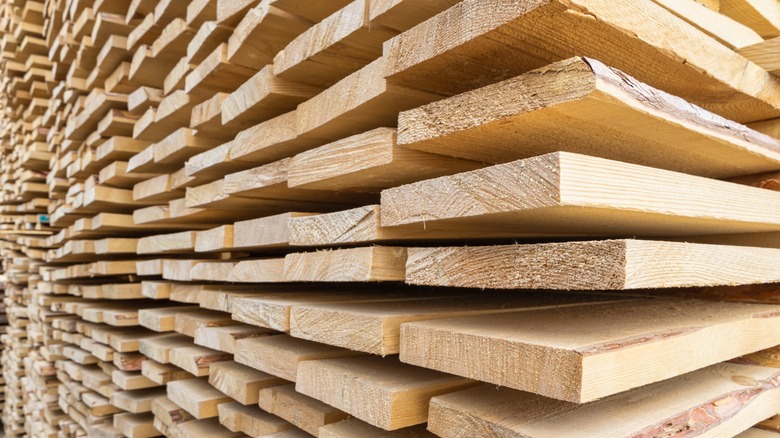
After you finish measuring and building a materials list, you'll need to go to your local retailer and procure all of these materials. You can build an outdoor shower out of many different base materials, and popular options include stone, wood, or even living bamboo plants. Wood is perhaps the easiest option to work with, and it's immensely simple to source as well. There are many great lumber options out there, and you can opt for a trip to your big box hardware store or any other supplier who deals in hard or soft woods.
If you're planning on using stone, this is typically a good option for the flooring segment but not as a wall component, and lumber will once again play a central role in the walls or showerhead structure that you'll be installing. To build an outdoor shower, you'll need to purchase timber, outdoor shower hardware (often made of PVC or metal pipe), and fastening materials. Talbert Building Supply reports that anytime you're building with wood outdoors, you'll need to use pressure-treated lumber in order to protect the feature from the elements. It's also a good idea to consider the use of sealant solutions on this wood because it will be exposed to both the elements that exist naturally and the routine flow of water across its surface from the shower itself.
Build the structure of your new outdoor shower
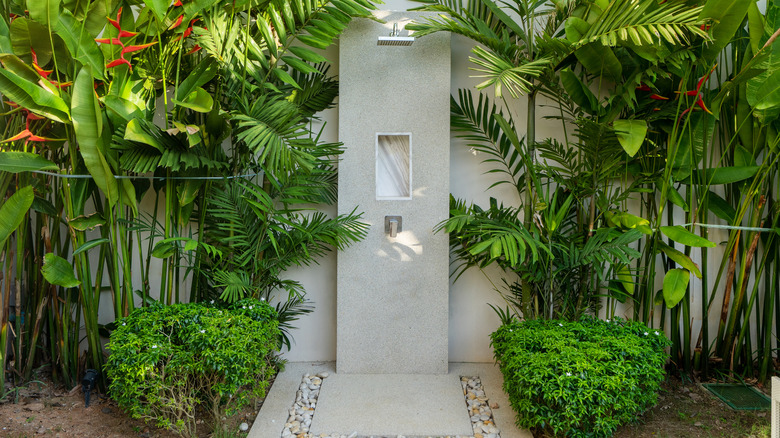
It's finally time to build your shower, and the best way to accomplish this is by starting with the base. Using gravel or stone can make this a little trickier, but the basic framework remains the same no matter how you construct the shower. You'll want to craft an overarching frame around the perimeter of this space. You can fill in this box framework with more timber or any other kind of material that fits the aesthetic you're searching for. But the timber framing is crucial because it will be used to support any part of the structure that rises vertically above the ground. Kreg Tool notes that breaking down a build into bite-sized pieces and starting from the foundational elements will make any DIY effort more manageable.
If you are building a feature that incorporates shower walls, then this is the next segment you'll be working on. Once again, you'll want to build a timber frame and then attach slats that run vertically (or horizontally) across the dimension to provide you with the privacy you'll need. In order to elevate this feature, you might consider using a router or table saw set up to cut a shiplap groove in the boards. This will allow them to sit in an interlocking fashion rather than face-to-face along the wall. Small details like this can transform the construction of your shower and make it into a more luxurious amenity.
Connect your plumbing and start using the feature

Lastly, you'll need to build out the piping system that will bring water through the switching mechanism and up to the showerhead. Whether you're using a garden hose or plumbing this system into your home, the interior parts will remain the same.
The last thing that needs to occur before you can start using the shower is this plumbing element. A simple garden shower can be built using a standard garden hose to supply the water. Attaching the garden hose at the base of the shower and running the water up through your faucet to the showerhead will create a consistent flow of liquid that you can use to rinse off after a day working outside, playing on the pool deck, or otherwise. For a more comprehensive build, you might consider plumbing the system into your home. This might require the help of a plumber (via Home Climates), but the end result will be a much more substantial home amenity that provides a more luxurious experience every time it's used.
The choice is really a personal one, either option will provide you with an excellent shower facility that performs its duty admirably. Once you've plumbed the system and water is flowing freely through the shower head, the only thing left for you to do is start using your new outdoor shower.