6 Mistakes Everyone Makes When Painting Concrete Floors
Whether in your basement or garage, concrete as flooring can be a boring and dull material to look at. Covering it with vinyl or other flooring options might not be affordable, or it might not even work in the space. So instead, paint it! Painting a concrete floor has many benefits, including making the area look better. In addition, concrete will slowly break down over time and cause microscopic dust particles to float and cover everything in the room (via All Garage Floors). Painting it can keep the material intact and reduce the cleaning you must do. Additionally, it makes it easier to maintain the floor as well.
Depending on the color you choose, painting the concrete floor can improve the brightness of the space. It's also an affordable and easy DIY that almost anyone can do. However, to ensure you have the greatest success with this project, here are some mistakes to avoid when painting concrete floors.
1. Not preparing the surface

When you're excited about a project, it's easy to jump right in and skip a few steps that don't seem as important. When it comes to painting floors, not preparing the surface properly is not a step you want to skip. If there were clumps of dirt on a wall, you wouldn't paint over those; the dirt would flake off with the paint and leave ugly chips. The same goes for painting a floor, especially concrete ones since they are often in locations where oil drips and dirt gets packed into the surface.
Genesis Pro Painting & Restoration says to vacuum the surface thoroughly, then clean it with a degreasing paint to ensure everything is stripped off. Genesis also warns that this type of cleaner is often harsh, so ensure you cover and protect your eyes and skin while using it. Then, rinse the floor with clean water and vacuum again once it is completely dry. Not properly cleaning the area will result in amateur results that won't last.
2. Not planning for good conditions

When you're excited to start on a new project, it can be tough to delay the process. First, however, you'll want to consider the conditions in which you're painting before you get started. Temperature is an essential aspect of painting. It can affect how the liquid dries and cures. If it's too cold or too hot, it won't dry properly, and you won't get the professional look you're trying to achieve. Hirshfield's says the ideal temperature for latex paint is between 50 and 85 degrees Fahrenheit. If the floor is outside or in the garage, where it's hard to control the temperature, you should wait until the weather changes. If it's inside, set the thermostat between those temperatures.
Humidity is another factor to check before starting your project. Hirshfield's says the perfect level is between 40% and 70%. If it's an outdoor project, you'll need to look at the forecast to see if any rain is expected within the next eight hours. For paint to dry and cure correctly, you'll need at least that amount of time to go by without any rainfall. If it's inside and your humidity levels are outside the ideal range, you could invest in a dehumidifier or a humidifier to help even things out.
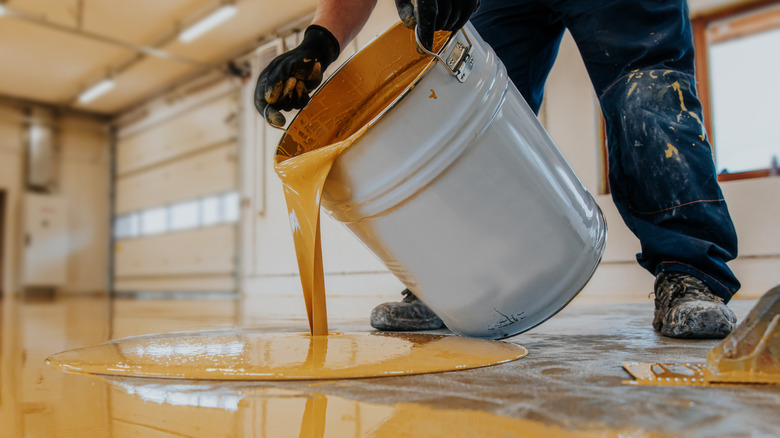
3. Using the wrong or cheap paint
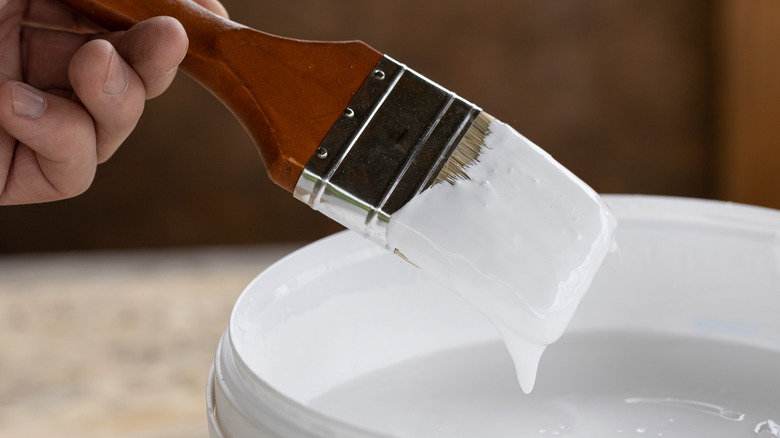
One of the best aspects of painting a concrete floor project is its affordability, but that doesn't mean you should go as cheap as possible. Investing in the proper, high-quality paint isn't a waste of money. In fact, TA Paints says you'll likely save in the end. On the other hand, with cheaper paint, you're risking the pigment's durability and longevity. You also won't get as professional of a finish, and the completed project will be a letdown.
Ensure that you're purchasing paint that is made specifically for concrete. Using the wrong pigment will derail your project and cause complications that could be very hard and expensive to fix. For instance, Sarah Hearts says she regrets not using better paint in her documentation of her own concrete floor project. According to Moving, acrylic latex concrete paint and epoxy concrete paint are the best options to go for. While acrylic latex goes on like traditional wall paint and might be more familiar to work with, epoxy is preferred by professionals because of its superior durability and professional look.
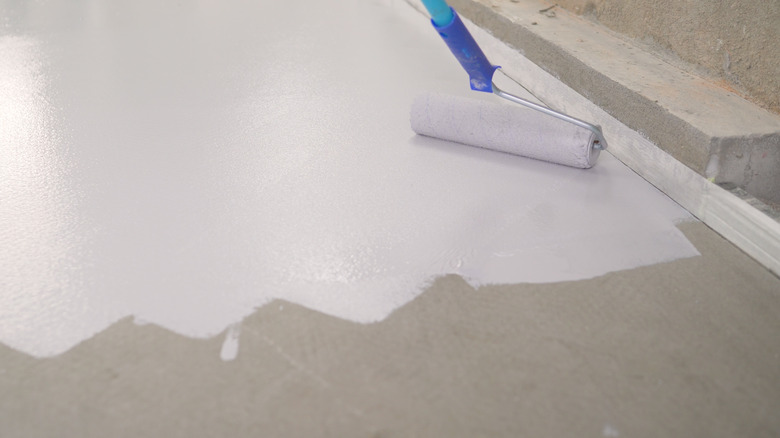
4. Not using enough paint
Assuming you have chosen the suggested paint for this project, you're looking at $50 worth of pigment for every gallon (via Moving). Depending on the size of the room you're coating, this can add up very quickly. But, again, this is a cheap project compared to most home remodeling undertakings. You might also be trying to save time after all the prep work required for this revamp. Those gallons and hours add up, and it's very tempting to save time and money by applying a thin amount of paint.
However, not using enough paint makes the color not as saturated and results in a weaker finish. Applying a proper amount is especially important with epoxy paint, where a good seal and protective layer are desired. Professionals like Paintzen say that a couple of thinner coats are better than one thick layer. This is because thinner coats dry faster and more evenly. Two coats are usually enough, but you can go for more if the color needs to be stronger.
5. Skipping the sealant

Painted or stained concrete is a very slippery surface; however, a sealant can give it a grip and protect it from spills and damage from normal wear and tear (via Gambrick). In locations where there are concrete floors, like garages and basements, the surface tends to see more heavy use than any other place in the home. In addition, exposure to outside weather and sunshine in a garage could result in a muted or faded color over time. A sealant will protect the paint, the color, and the floor from these elements.
You'll have to choose a sealant compatible with the tint you used. For example, Gambrick says that with epoxy paint, you'll have to use a sealer that has been specifically engineered to work with this paint type. The layers of pigment will also need to be completely dry before applying the sealant. Lastly, sealers can be toxic to breathe in, so be sure you're correctly ventilating the room while using them. Open the windows, turn on a fan, wear a mask, and take breaks as needed to ensure you stay safe.
6. Rushing the drying

After you've taken the time to properly clean the space, applied the right amount of paint onto the floor, and even invested in a sealant, you're probably ready for this project to be done and over with. But not allowing the floor to completely dry before you start walking around on it can ruin all that hard work you've spent so much time on.
Paint drying and paint curing are two different things. When it's on a wall, dry paint is enough to start moving stuff into the room. However, when it comes to painted floors, you'll have to wait until the coats have cured. According to Salvaged Inspirations, this is when the paint has reached its maximum hardness and is ready for normal traffic and activities. To check if the pigment has cured, Salvaged Inspirations says to use your fingernail and press it into the floor. If it leaves a mark, it's not cured, but if it doesn't, you're ready to go!