Critical Garden Maintenance You Are Probably Neglecting
If you're doing it right, winter isn't "downtime" away from gardening chores, refinements, and planning. There's a lot of work to be done that improves your soil, makes your equipment work better and last longer, eliminates risks to your home and garden, and gets rid of pests when they're easiest to eliminate. Of course, everybody has something they can be doing during the colder months, and there are certainly things you can do to prepare for it too.
Throughout fall and into winter, master gardeners like Elaine Mylander will be planting bulbs and perennials, repotting the odd container plant, and tidying up (via Fremont News Messenger). Those lucky enough to have both a green thumb and a greenhouse will keep growing until the last minute — or later. And the odd homesteader (aren't they all?) might very well be growing whatever might possibly grow, whenever and wherever they can. But there are a few things even disciplined gardeners with a checklist (the University of California Master Gardener Program of Contra Costa has a good one) and a schedule routinely forget to do, and these things can be pretty important. Let's take a look at some of the common, and less common, tasks that are all critical in their own ways to next year's gardening success.
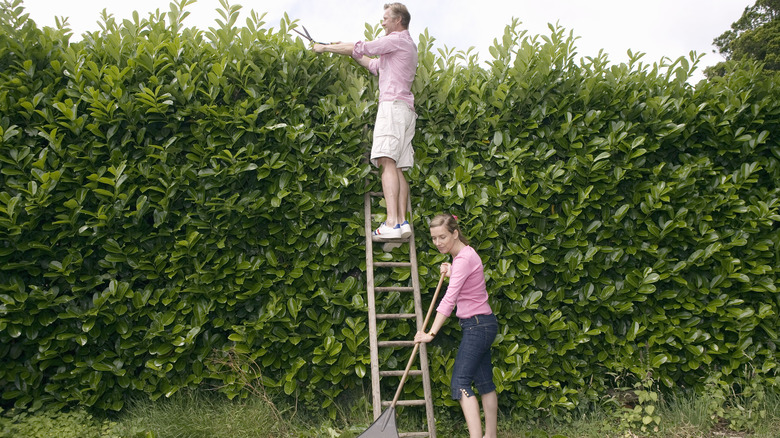
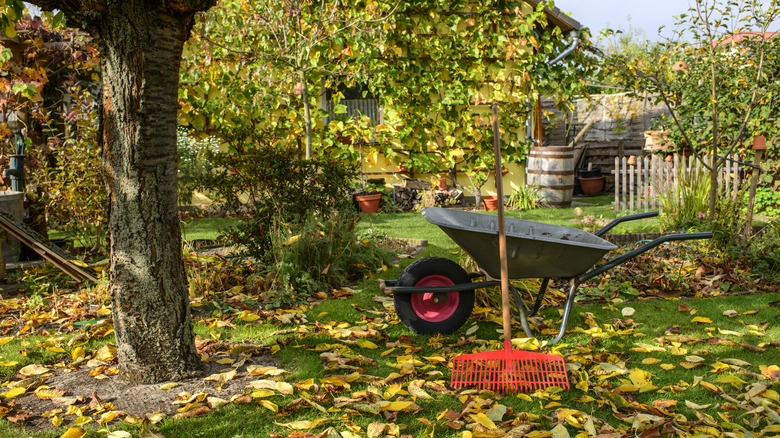
Annual or seasonal hand tool maintenance
There are tasks we know we need to perform to keep our gardening hand tools in good condition, but there are probably a few you aren't thinking of that can pay big dividends in next year's garden. Hand tools rarely escape our attention completely because they're relatively simple and, well, hand-held. You can see the rust and dirt, and feel the joints scraping or wobbling, which is why you've probably remembered to tighten and oil the center nut on your pruners or shears. So, what are you forgetting?
Garden Tool Co. breaks down hand tool maintenance into cleaning, sanding, sharpening, and oiling. If you've tightened that center nut, you've probably remembered to sharpen those and other tools for the same reason: Their slow degradation is a constant reminder. Experts urge preserving the original angle of your blade's edge when sharpening, since it's optimized for its purpose and for long-term wear. (Nothing dulls faster than an over-sharpened blade.) There's no end of elaborate tool-sharpening tools, and probably tool-sharpening tool sharpeners, but try just using a flat file, the simplest and most universal sharpening tool.
Oiling is another task that might be obvious, and not just oiling that shiny new center bolt. If you happen to have done any of your gardening outdoors, you've noticed that even the possibility of rain, humidity, or any other moisture will instantly coat most tools with rust. If you are already experiencing rust, try soaking the tool overnight in a vinegar and water solution, cleaning with soapy water, and coating lightly with boiled linseed oil to protect the metal (via Garden Design). What you might not have thought about are your tools' wood handles, which weather and wear over time. Sand and oil them (with boiled linseed oil again) at least once a year.
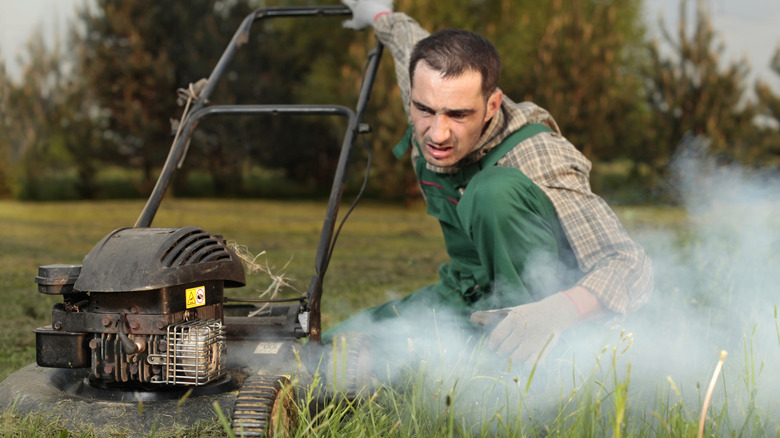
Ordinary maintenance of gasoline-powered equipment

Owning gas-powered equipment like lawn tractors is, in some ways, more involved than owning a highly computerized car that costs five times as much. After all, one of the reasons your car has that computer is to minimize maintenance and repairs. Your lawn tractor, on the other hand, has a lot of moving parts that get banged around and, in some cases, even come into contact with foreign objects with some regularity. These things will fall apart quickly if you don't keep them in good shape.
Basic annual maintenance of a riding mower, for example, includes an oil and oil filter change, spark plug change, gas filter change, gas removal or stabilization, air filter cleaning or replacement, and the sharpening and balancing of blades. Most of these are pretty simple, and YouTube is your friend when it comes to figuring out specifics about your particular model. Some tips: Drain your used oil into an oil pan or other approved container. Don't just wing it; oil will dissolve some plastics, leaving you with quite a mess. Oil the rubber ring around your new filter before installing it to condition the rubber and maintain a good seal.
When you replace the spark plug, remember to replace all of them. Most small engines have only one spark plug, says Cub Cadet, but it's not uncommon to have two or more cylinders and, therefore, two or more spark plugs. Check and adjust the plug's electrode gap, even for pre-gapped spark plugs; gaps can get out of whack during shipping and handling. And check that your plug wires are in good shape while you're at it. To keep up with seasonal tasks related to your mower, try making a checklist from Tractor Supply Co's maintenance calendar.
Engine fogging
Some of the maintenance tasks you're ignoring might be victims of infrequency... you just forget about them over the course of the year. Others, like engine fogging, are things you might have never even heard of, and it's probably not what you think it is. A gas engine left idle for a season or two will lose much of the protection of its internal lubrication, says Lawn Doctor, which means that your protection from rust and corrosion will be minimal or nonexistent. This is exacerbated by moisture in the air and, when weather is changing, condensation inside your engine.
How on earth, you might be wondering, do you get aerosol oil into your engine to prevent all this nastiness? It's a two-step process. First, you remove the air filter and spray a product like Sta-Bil Fogging Oil into each cylinder's air intake. Then shut off the engine and carefully remove the spark plugs. The engine was just running and could be hot, so be careful. Spray fogging oil for three seconds into each cylinder using the tube supplied with the oil. Then replace the plugs (via Gold Eagle).
Greasing and lubricating moving parts
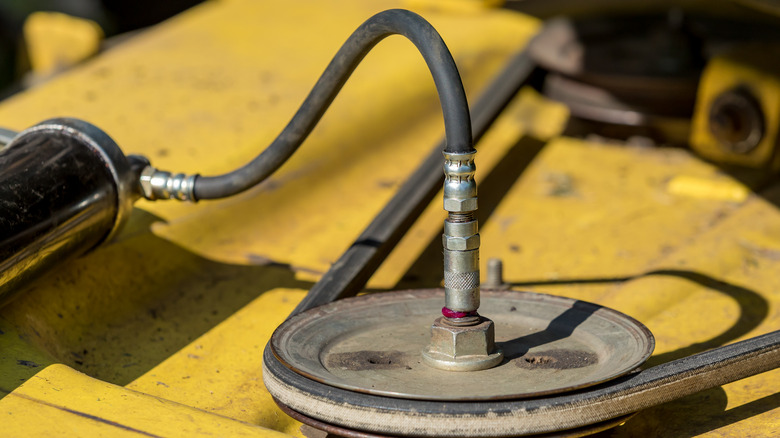
You probably know, down deep, that you need to be oiling all the squeaky and increasingly stiff bits on your mower or tiller, but odds are you aren't actually doing it. The good news is that the chore is simple, inexpensive, and pays off hugely in terms of the longevity of your equipment, according to Briggs & Stratton. For this task, you'll need a grease gun, which will be about the best $20-30 you ever spend on your garden.
The first step is to consult your mower's manual for instructions, including where to apply lubricants, and which ones to use. You'll want to add grease to all fittings, which should be listed in your manual. This will include the cutting spindles and front axle spindles, the front axle pivot, the deck lift pedal (if there is one), and wheel bearings. Simply attach the grease gun's coupler to the zerk fitting and squeeze the gun's handle until grease flows out of the fitting. Wipe excess grease off the fitting and move on to the next one (via AET Systems, Inc.). Don't forget to grease the mower deck's mounting point pivot bearings and any other parts needing lubrication. Consult your manual for any other lubrication points.
Push mowers have a whole different set of lubrication issues. You can often get away with using a spray lubricant, like WD-40, for some parts of a push mower, but you will need to use spray lubricants more frequently than you use grease. You might, for example, benefit from applying grease to exposed gears, axles, reel bearings, and any other high-friction mechanisms (via ProMow, Inc.).
Planning crop rotation

Some off-season tasks are cleaner than others, and almost all of them are cleaner than greasing mower parts. One of the cleaner and more pleasant tasks is planning. A lot of the planning gets done when you're having a warm drink (or at least one that makes you feel warm) during the cold months, and the most important planning is crop rotation. Some plants don't need to grow next to each other (while others actually benefit from companion gardening), and some shouldn't be grown in the same space without at least a few years in between.
For this, it's best to get a notebook, if you don't already have one. Find one with a durable, fairly water-resistant cover that can open flat. The University of Minnesota Extension recommends starting by making a map of the year's crops, while you can still recall where everything was. Keep these maps for at least four years, so you can be sure to give the plots a break of a few years from each plant family. Your goal is to distribute the nutrient depletion evenly across as much of your garden as possible, and to minimize plant diseases in the soil by not overexposing any particular patch to the same types of plants year after year. When you have issues with disease, note them with reference to your map to make it easier to keep track of things.
Composting in winter

If you are a composter, or at least own one, don't plan to take the winter off. Things get a little easier in the winter, but no less important. And look at all those leaves all over the place! What to do with those? With a few tweaks, the composting process during winter is essentially the same as the rest of the year. You'll layer green and brown material and let the compost pile or composter do its work, says the University of New Hampshire. Cut the items you're composting more finely during the winter to help them break down faster, and don't turn the pile at all during the coldest months as that can stall the decomposition process. Just because a lot of wood ash is suddenly available from fireplaces, don't get carried away. Over-using ash can change the pH of your compost for the worse and inhibit the microbes trying to do all the work for you. There will also probably be an abundant supply of leaves. Gather them and use some immediately in your compost, stockpiling the rest for the growing season ahead. (At least, this is one perspective. We'll address another approach below.)
The University of Minnesota's Digital Conservatory offers a comprehensive guide to composting and mulching yard wastes. The free PDF download is a thorough and easy-to-understand guide to all aspects of composting leaves, grass clippings, etc. It doesn't feature a lot of guidance specifically about winter composting, but many of the general rules will still apply.
Don't do anything (with leaves and old plant materials)
But what if you don't want to do anything with all those leaves and dead annuals from last season? Well, then, don't do anything with them. Depending on your situation and goals, this could be a reasonable choice, and some argue this approach is better for the flora and fauna in your area. That's because all that leaf litter is where many insect eggs and larvae spend the winter when they simply can't survive being exposed to the elements. They probably wouldn't care much for being composted, either.
This approach, advocated by some experts like horticulturalist Sylvia Schmeichel of Smithsonian Gardens, is not the mainstream view. Gardening is, in part, a tension between natural processes and the intent of the gardener. You'll use nature to help you accomplish your goals, but stop short of sacrificing your vegetable harvest or the beauty of your flower garden to natural pests. There are obvious benefits to helping insects survive winter among the leaf litter, old garden stalks and seed heads, and fallen logs you might otherwise be inclined to move. What benefits those insects also benefits the plants they pollinate or protect. The USDA also says this approach is better for many purposes, from fertilizing your garden to managing soil temperature to reducing runoff.
Wait... do something about those leaves!

On the other hand, Susan Martin of Garden Crossings, and many others, argue that leaving leaves in place fosters fungal diseases, deprives the soil of oxygen, and smothers small, desirable plants. And, she adds, you're as likely to provide a nursery for pests as for pollinators if you don't rake. She recommends shredding the leaves, perhaps using a mulching mower, and returning the fine mulch to the garden beds, since composted leaves can provide practically every nutrient your garden plants will need in the coming year.
Whichever way you decide to go, you will not want to allow leaves to stay on the ground where they could block light for grass or cold-weather plants you want to stay healthy (via New Garden Landscaping & Nursery). Nor should you leave them on walkways, which can become dangerously slippery. And don't neglect to remove weeds, even if you leave dead garden plants standing until the spring, since that will almost certainly result in a profusion of new weeds the following year (via Gardeningetc.).
Winterize your irrigation system
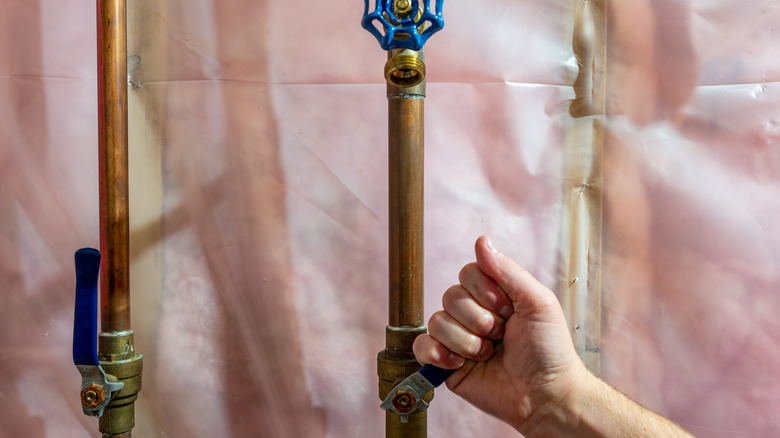
If you've been gardening for a year or more, you've probably already learned that there are some winterizing tasks you simply can't evade without things getting unpleasant and expensive. This is particularly true for irrigation systems, which can be destroyed by the simplest act of neglect coupled with a hard freeze. The reason for this is, of course, water and its unfortunate habit of expanding when it freezes. Failing to properly winterize your irrigation system, however advanced it is, can lead to damaged components, including pipes, sprinkler heads, backflow preventer devices, and valves, according to Pannone's Lawn Pros & Landscaping. Those damages eventually result in at least a little (and probably a lot) of water leaking where it's not supposed to be.
Preventing your pipes from freezing and winterizing a typical irrigation system involves shutting off the water and draining the lines, turning off controllers and timers, disconnecting monitoring devices, and insulating valves, pipes, and backflow preventers. Take particular care to protect your main shut-off valve from freezing, since it's the only thing standing between your landscape and free-flowing water (via Rain Bird). Take care not to close any valves that could lead to standing water that can freeze.
Ordinary garden hose maintenance
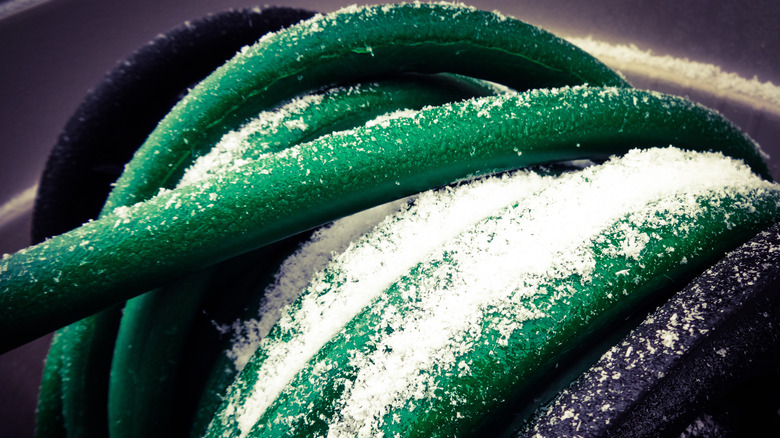
Of course, expensive irrigation lines aren't the only water pipes around. Un-winterized garden hoses, very expensive in their own right, are almost certain to burst and, far worse, can even cause your home's interior plumbing to do the same. This wizardry isn't the product of some vengeful garden gnome, but the simple fact that an attached garden hose can prevent water from draining out of a hose bibb, freeze-free or not. This water can freeze and burst the hose bibb anywhere along its length and usher in quite an unexpected flood, says The Scottish Plumber.
The solution is to disconnect your garden hoses, coil them into 3 foot circles, and store them in a dry shed or garage. After they've completely dried, put end caps on the hoses to keep pests from hiding in them and clogging up the works (via Swan). You can store them outside, but hoses left exposed will degrade faster than properly-stored hoses, and it's critical that they be completely emptied of water to avoid bursting from freezing. This can be quite difficult with longer hoses (via the Oregon State University Extension Service). Using devices like the hose blowout connectors from Vibrant Yard should make clearing water from long hoses considerably easier.
Off-season care of garden hose fittings
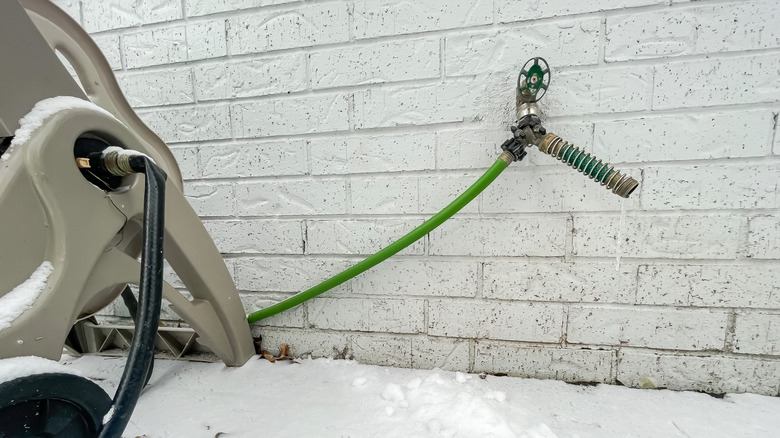
Entropy is the worst garden pest of all, and while brass blowout connectors might be immune from most of its effects, not all hose fittings are. Remember how pleased you were when you finally had your quick-connect fittings installed on your garden hoses and accessories, and suddenly the act of managing water became 100x more pleasant? Well, it can all disappear overnight if you don't take proper care of those fittings.
Plastic fittings degrade when exposed to weather just like hoses do, and they will certainly be prone to freezing and breaking if they're not completely dry. Plus, they can trap water to freeze in your plumbing even more easily than hoses can. It's best to remove them for winter and go ahead and replace the rubber washers inside the female connectors. If you've gotten a late start, break any frozen couplings free with warm water. Take them indoors to dry, then store them.
With apologies to Marlo Stanfield, who could imbue the most dimwitted of sayings with gravity, if this sounds like one of those good problems to you, you might be hankering to take the next step in life's journey of garden hose connectivity. If so, you could do worse than to check out Dengarden's guide. Keep in mind that brass will almost always be more durable than plastic, especially for the purposes of winterization neglect.
Plant pots and trays
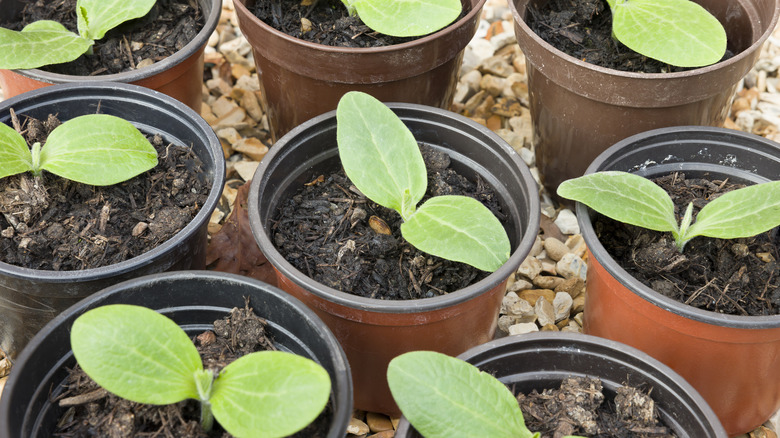
If all this seems like a lot of mechanical maintenance, maybe it's time to take a break and plan for another critical off-season task. Even if your plants were healthy enough this year to show no signs of disease or distress, that's no guarantee the same will be true next year. And if you don't properly care for your plant pots and trays, you almost certainly will have problems sooner or later. So, let's get down to the business of killing harmful microbes, fungi, etc.
In fact, a reasonably warm winter day is a good time to clean your greenhouse, potting bench, plant and seedling trays, pots, and anything else that might harbor nasties. Without this cleaning step, you're basically overwintering the pests that cause tomato blight, damping off, powdery mildew, gray mold, white flies, spider mites, fungus gnats, and others, says Eartheasy. Almost any effort will help, but seedling trays sometimes require special attention, and you can find step-by-step disinfection instructions at The Prairie Homestead.