How To Create Chic DIY Paper Snowflakes For Your Holiday Decor
We may receive a commission on purchases made from links.
Since the '60s and '70s, paper snowflakes have been an important part of many children's younger years, per Love To Know. Around the holidays, kids are taught how to make these crafts to improve their motor skills and use of scissors. However, these snowflakes don't have to look like the ones you used to make in preschool (though those types are quite adorable). In fact, they can appear quite chic and sophisticated while still having a playful and nostalgic touch.
These snowflakes can fit into any aesthetic, color palette, or décor style. You may also be surprised to discover that 3D paper decorations are a current décor trend this holiday season. According to Stone Gable, these pieces are perfect to use during the festive season because they are easy to make, can be reused each year, and always look stunning.
Below, you'll first learn how to make 3D snowflakes, followed by four ideas for decorating with them around your home.
How to make 3D snowflakes
To begin, gather your supplies, which include six white sheets of paper (printer paper works, but cardstock is more sturdy), a stapler, scissors, and tape.
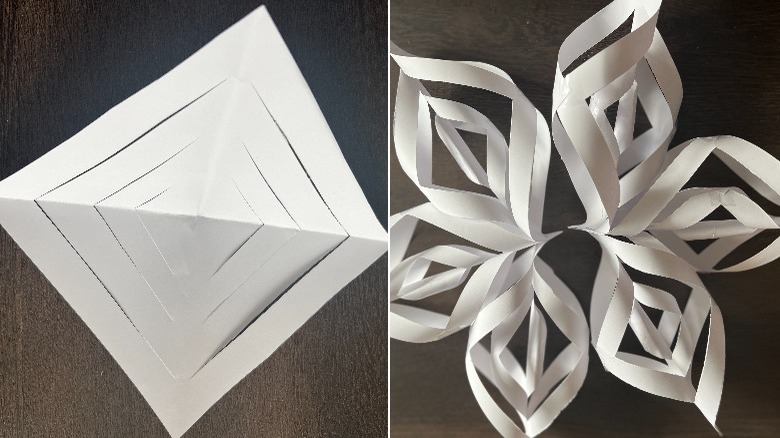
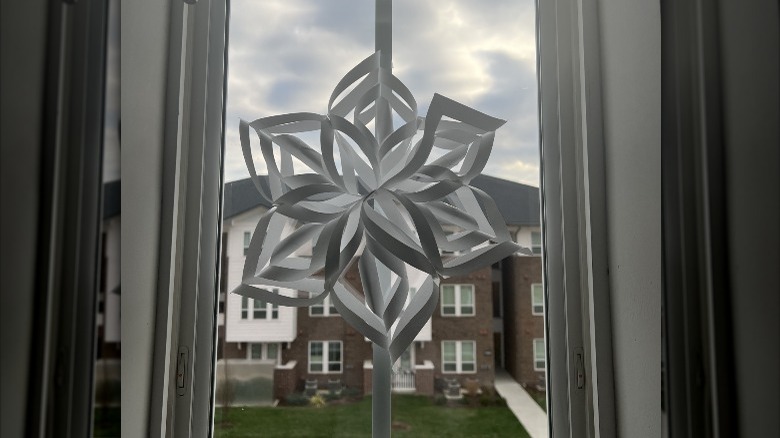
You'll need to create six of the same-sized squares that are each folded into a triangle (you can change the size of the snowflake by using larger or smaller squares). If you're using printer paper, fold one corner until it meets the edge of the page, then cut off the excess on the top. Once you have your six folded pieces, fold them again into smaller triangles. Then, you'll need to cut three diagonal slits in each of them — but don't go all the way through the paper, and make sure you start from the side that can be unfolded (not from the creased edge). When you open up your squares, they should look like the first image above.
Next, it's time to break out the tape. Starting with the two smallest innermost cuts, wrap them into a cylinder and tape them down. Once this is completed, flip the square and connect the next two flaps, and continue flipping and taping until each piece is connected. After you've finished doing this to all the squares, it's time to wield the stapler. Begin by stapling two groups of three together from their tops, then connect each of the piece's sides (so that they don't flap down when hung). Finally, staple the two groups and their connecting pieces together.
Hang them on the tree
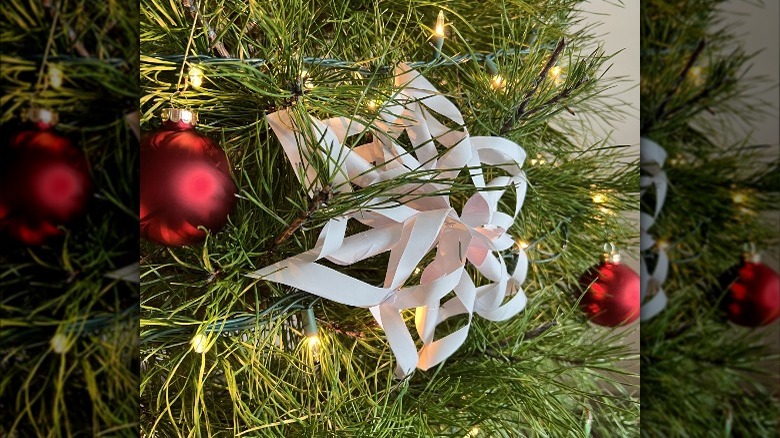
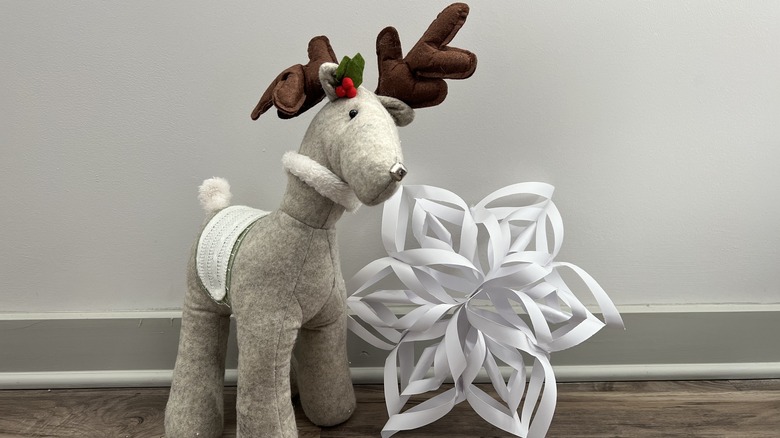
These snowflakes can be used in two ways on your Christmas tree. First, to make a statement, use a fairly large one as the topper. To do this, you can either staple it right onto the highest branch or punch holes in either side and tie it to the branch with a ribbon. You may also need to attach a popsicle stick or something similar to the back to keep the piece upright. However, keep in mind that this would work best for a tree pushed up against the wall, as it may not look picturesque from the back.
The second way to use them on the tree is as oversized ornaments. They can either sit directly on the branches or be hung by punching holes and threading ribbon through the top. For example, Mad In Crafts adorns their Christmas tree with many paper snowflakes. To make them appear more cohesive with the rest of the tree's design, they create a full snowy display that only uses silver and white pieces. If you want to follow in their footsteps, begin by wrapping your tree in white ribbon, then add only white or silver ornaments, and then incorporate your paper snowflakes.
Create an icy garland
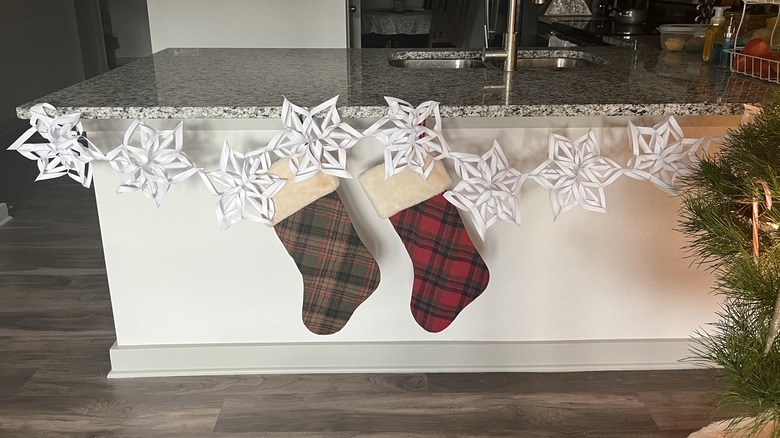
You can also create a garland out of many of these 3D snowflakes. To do this, simply staple them together by their ends. This unique garland can be extended across a fireplace mantel, above a bed, or along the edge of a mirror. Because we don't have a fireplace in our apartment, we suspended ours above our stockings, which are hung on the edge of our kitchen countertop facing the living room.
Oh Happy Day. says that a snowy garland would be a great addition to any winter-themed party décor. Or, this piece could also look extra purposeful if you're using all neutral decorations this holiday season. Further, perhaps you hate having to vacuum up needles from greenery every day. If so, this could be the perfect replacement for a regular garland as it requires no upkeep. Another benefit is that this decoration is extremely light, so it can be placed anywhere with ease. And, because it only requires a few cheap supplies, it could save you some money, as pine garlands can be quite pricey.
Place them on windows
The Journal of Environmental Psychology says that decorating the exterior of your home for the season has a number of benefits: It can help you feel more excited about whatever holidays you celebrate, it may make your neighbors believe you're more hospitable, and it can make you feel like you're truly a part of your neighborhood.
However, while many decorate their homes with bright lights and extravagant Christmas décor, some don't want to spend loads of money on embellishments. Further, others live in apartments that don't have large outdoor areas. If either of these scenarios resonates with you, you can replace outdoor decorations with these snowflakes by hanging them in your windows. Because they're made of paper, they'll need to be kept inside, but they'll still be visible from your street and will make your home look more welcoming. And, when the sun shines through your windows, gorgeous shadows will dance across your walls and make your space feel even more magical. To hang them, simply tape them to the window or suspend them from a curtain rod with a ribbon.
Add interest to an empty wall
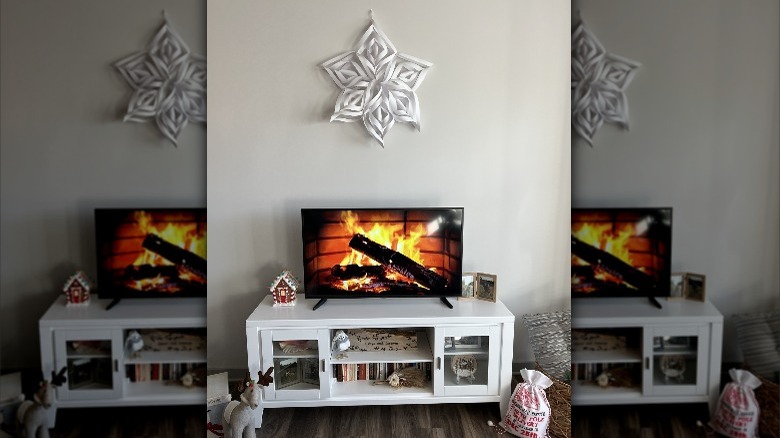
While some walls can and should be left blank, filling most of those in your space with personal touches can create a cozy feel and make your home's design appear more put together. To that end, Mom By Design points out that the size of the item you use on a wall is very important. So when trying to find the right piece to hang, first consider the length and height of the wall. If it's fairly large, you'll need an oversized piece.
This holiday season, to add more interest to the empty space above our television, we hung a huge 3D paper snowflake. Ever since we moved into our apartment, this empty wall has been bothersome to us. And while we may add something more permanent like a gallery wall later on, this oversized snowflake is the perfect temporary solution. To make one as big as this one, simply use larger squares and cut additional slits.