4 Low-Cost Ornaments We Made For Our DIY Christmas Tree

It's the most wonderful time of the year, and let's face it, also the most expensive. No matter how many ways you try to cut down on your holiday spending, it feels like your wallet is being pulled in a hundred directions. That's especially the case when it comes to Christmas decorations, which we only get to use for a few weeks out of the entire year (no judgment if your holiday lights make an appearance into the spring though). To keep that budget a little more under control, consider getting out the craft kit and twine and try your hand at some homemade Christmas tree decorations. Plus, it's a great way to involve the whole family in Christmas decorating.
While this may sound like an intimidating at project first, especially if you tend to compare yourself to the Pinterest-perfect tutorials, it's actually very easy, satisfying, and gives you total holiday bragging rights. To show you how, we tried our hand at making four low-cost DIY ornaments that even a crafting novice can handle.
Dried citrus and twine ornaments
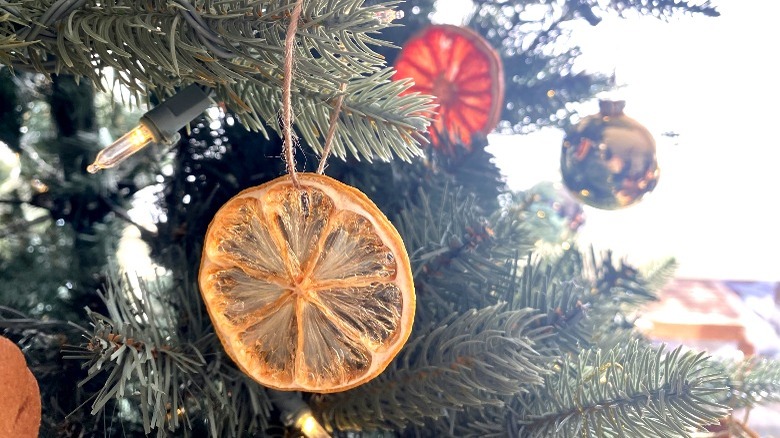
Ever wondered why we associate citrus fruit, especially oranges, with the Christmas season? According to Smithsonian Magazine, one of the reasons is because gifting the bright and cheery fruit was an exotic but more affordable alternative to gold. To honor these old world traditions, try to incorporate these vibrant fruits into your holiday décor. You don't need to spring for that bag of pre-made citrus ornaments or even an expensive bag of potpourri; you just need some twine and a visit to your grocery store produce aisle. Pick a few fruits to take home — you can choose any you like, but keep in mind that they will shrink significantly after being dehydrated. For that reason, we recommend skipping the smaller fruits like limes and clementines. Instead, we chose to work with lemons, grapefruits, and oranges.
Using a serrated knife, slice thin rounds off of the fruit, a little thinner than 1/4-inch. If you have a fruit dehydrator, use that to get the moisture out of the fruits. For our project, we used a rack and baking sheet in our oven, which we preheated to 200º Fahrenheit. Leave the citrus rounds in for two to three hours, or when the fruit peel is dry to the touch but before it's started to brown. Then using some twine and a pointed object like a pen or toothpick, make a loop in the fruit, tie, and there you have a homemade citrus ornament.
Gingerbread cookie ornaments

Gingerbread is a quintessential holiday staple throughout much of the western world. Though ginger was first grown and discovered in ancient China, says The Guardian, Germany is responsible for creating the close association between Christmas and the confection. In Sweden there's nothing that says Christmas like gingerbread or pepparkaka hearts, so we decided to create some ourselves, but you can use any cookie cutter shape you like. Use your favorite gingerbread cookie recipe, or buy a roll from the fine people of Pilsbury — no judgment here!
Roll out your dough to about 1/4-inch tall, then cut out your shapes. Be sure the dough stays cold so the shape will hold while baking. The last step you need to take before putting them in the oven is using a drinking straw to puncture a hole just below the dip in the heart so you can actually string up your ornaments. Bake until they're just slightly soft in the middle, and rest them outside of the oven. You want them to be firm and hard, but not brittle. Then run twine or your choice of ribbon through, and hang them from your spruce branches.
DIY pinecone ornaments

Fallen pinecones, twine, and a little cheap hardware is all you need for these rustic homemade pinecone ornaments. While the origins of the pinecone and its connection to the Christmas tree may seem obvious, you might not know that was German Christians who were first responsible for using evergreen trees to celebrate Christmas; they started the tradition in the 1500s, with the intention of symbolizing a constant, living connection with God, says Ambius. However, evergreen trees appear to have been used to celebrate the winter solstice long before that in ancient Rome and Egypt, according to Michigan State University.
To get your tree looking a bit more natural, whether you've got real or faux pine needles in your living room, add a few darling pinecones to the branches. We just walked around our local park and walking trails to find fallen pinecones, which we collected and took home in a cloth bag. Be sure to check for bugs if you go for this thrifty method. Before you turn your cone into a hanging ornament, you can spray paint it gold or silver if you want a more glam finish. Then, just using pressure from your hands, insert a cup hook, like these from Ace, then tie a loop of twine for hanging. Then you'll have the perfect, nearly-free, and woodsy Christmas tree decoration.
Mini embroidery hoop ornaments

This is the only ornament on our list that has a little bit of a learning curve, but with a little practice and an understanding of the basics, can be very easy to master. We had one beginner and one intermediate threader try their hand at this craft, and you can see the result of that above. One top tip for novices is to start small, making this mini ornament craft great for beginners. You'll want to order a bamboo ornament set — we used this one from Amazon, which includes 12 3-inch hoops.
You can choose from a variety of designs from Pinterest just by searching for easy embroidery ideas; we freehanded ours after taking in some inspiration, but there are plenty of patterns available online. After you've finished sewing, just use hot glue to seal the loose edges around the loop. You can add a back panel of fabric, or leave it as is. Then tie some twine or a ribbon around the metal fastener, and you have a hand-embroidered Christmas tree decoration.