What Is A Paint Pad And How Can You Use It?
We may receive a commission on purchases made from links.
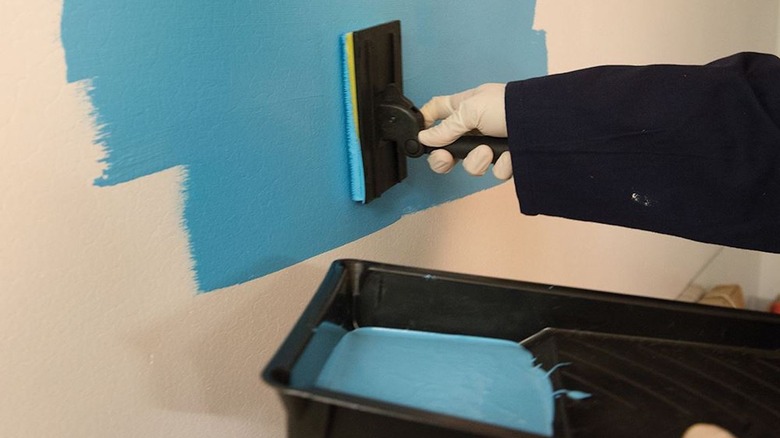
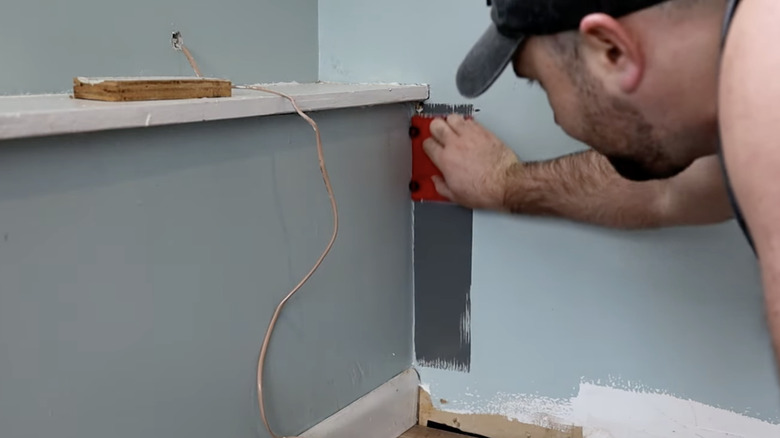
Painting any room in your home a new color gives you a fresh start and elevates the ambiance of your abode. It's all fun and games when looking at color swatches and picking out your favorite. Then the second you buy paint cans, it's time to start painting, which can be exciting. However, we know painting tight inner corners can be tricky, so using a paint pad can be helpful. It's a flat sponge attached to a plastic handheld device that soaks up the paint, allowing you to drag it easily in straight lines along trims, corners, and edges. The paint pad evenly spreads the color on every surface.
Conversely, hand rollers don't always get the paint close enough to the inner corners of the walls, along the door frame, or where the wall meets the ceiling. You might go back in with a handheld brush to paint those places, but using a paint pad is more beneficial. In addition, paint pads help you avoid spilling or dripping paint on the floor, especially if you have carpet. You won't have to worry about doing extra cleaning once you've finished painting your space. Instead, you can wrap up and toss the masking tape and paper. Here's everything you need to know about a paint pad and how to use one.
Things to know before using a paint pad
When you're looking for a paint pad, buying an entire kit with a loading tray, airtight lid, and wheels on the device is best. The wheels will guide you along the surface, ensuring your painting is straight. If you're using a paint pad for the first time, it can take some time to get the hang of it. While the paint pad will get close to any edge, you'll still want to use masking tape along any trims to prevent the wheels from leaving traces of paint. Also, keep in mind that when you dip the pad into the paint, you're covering the device's entire bottom, including the tracking wheels. So while the pad will only paint the surface it's covering, the wheels will do the same.
As you paint the trims and inner corners, you want to ensure you're refilling the tray with fresh paint so you're not left with a dried-out pad. It also helps prevent the tray from drying as the paint depletes. If you pause and take a break, place the airtight lid over the tray with the pad inside to keep them from drying out. Then, you'll be able to pick up where you left off.
How to use a paint pad
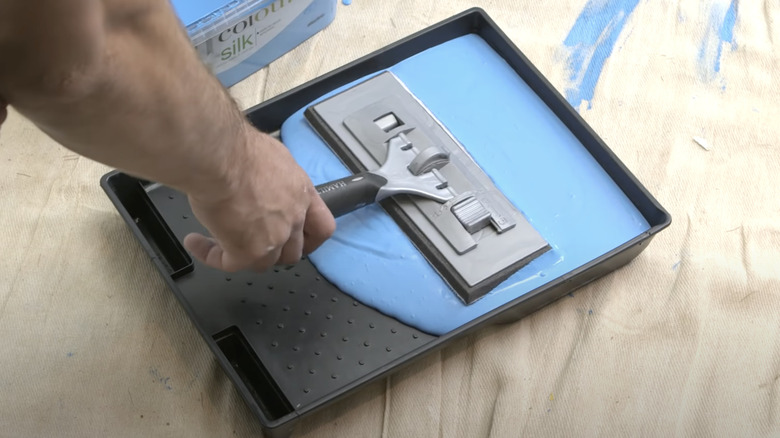
Since you have a paint pad kit, you won't have to worry about buying extra trays to pour the paint into. Start by filling a fourth of the tray with paint. Filling the tray a small amount at a time will help prevent the pad and wheels from completely submerging into a full paint tray. Instead, they'll get a nice dip to soak up the pad. As you dip your pad, wiggle it to cover every part of the foam. Then, when you remove the pad, lightly drag it on the edge of the tray to get rid of excess paint. You don't want drippings to fall on the floor or press them into the wall, where they'll leave behind large blobs.
When you begin, start at the top and work your way down to prevent drips and streams. Even though you've scraped the excess paint, some drops will still appear. So, once you reach the bottom, you can just run the pad to the top to smooth out the streams. The paint pad picks up a lot of paint, so you'll be able to run the pad over twice to get an even finish. It's essential to cover at least 24 inches of the surface you're painting so you don't end up with a thick layer. After the second stroke, lift the pad from the wall and place it in the tray for a seamless blend.