How To Repair Your Fiberglass Shower

While fiberglass is an affordable and aesthetically pleasing option for your shower or bathtub, you may start to notice cracks, chips, or holes in the material with time. Fiberglass doesn't always break easily, but if you drop a heavy shampoo bottle while showering or a wrench slips out of your hand while you're trying to adjust your shower head, you may end up with a damaged bathtub or shower. When you notice a crack in your fiberglass, it's important to fix it quickly, especially if it's in the base of your shower, as water can leak through the cracks. With a bathtub repair kit or some epoxy-like filler, you'll be able to repair small cracks yourself.
While this DIY project is fairly simple, it's important to note that safety gear is a necessity. Some epoxies or similar fillers contain chemicals that are dangerous to inhale. Working in a well-ventilated area and wearing a ventilator mask is a must while repairing your fiberglass shower. It's also essential to wear protective goggles and gloves while working with these materials, and in no time, your shower or bathtub will look beautiful again.
How to repair a fiberglass shower
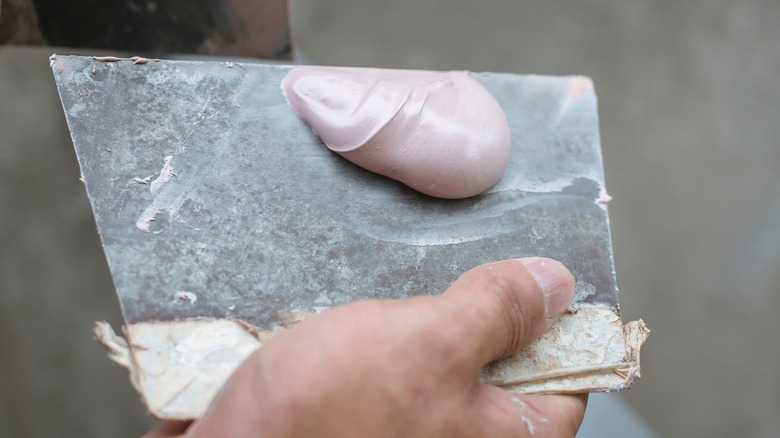
For this repair to be as easy as possible, you'll want to purchase a repair kit that includes all or most of the supplies you'll need. Paste kits are generally the simplest to use and come with a catalyst paste, epoxy-type pastes meant to match the color of showers, toners that can darken or lighten the color of your paste, sandpaper, a buffer bar, and a top coat. You may also need acetone, a drill with a sanding element, and a utility knife.
First, you'll need to cut in the shape of a V around the damaged area, making sure to get down past the fiberglass color layer, which is usually 1/16 to 1/4 inch. After cleaning the spot with a dry cloth, you can use sandpaper to add texture to the area, which will allow your paste to stick to the surface better. Make sure to use sandpaper that's 220-grit or lower since you just want a slight roughness.
Now, you can clean the damaged spot of your shower with acetone, put on your protective equipment, and begin mixing your paste per the kit's directions. Usually, you'll add either the toner to the paste to ensure it matches your tub's color before adding the catalyst. Once your materials are thoroughly mixed, you can fill in the cracks with your paste. Don't be worried about overfilling since you'll sand the area later.
Finishing your DIY fiberglass shower repair
After you've applied the epoxy or filler, you'll want to give it at least an hour to harden, following your kit's directions. Once it's hardened, you can sand the surface again, starting with 220-grit sandpaper and slowly increasing to 600-grit. It's best to wet the area with a damp rag while sanding. Now, you can wipe away any dust or debris, buff the area with a drill and attachment or with a buffer bar, and apply the top coat.
To prevent your fiberglass shower from cracking, it's best to steer clear of abrasive cleaners, like bleach, and use something milder, like dish soap or baking soda. Sometimes, cracks can be caused by structural issues, so if you have a lot of cracks or very deep ones, it's a good idea to call a professional. While repairing small cracks yourself is cost-effective and simple, hiring a professional will allow you to fix the underlying issues causing the damage to your shower.