How To Remove And Replace A Toilet Bolt Cap
Replacing a toilet bolt cap is a relatively simple DIY. You can do so in about 10 to 30 minutes, depending on what your toilet-bolt situation looks like. But it's a home repair many of us will likely need to address at some point, as these small plastic caps found at a toilet's base aren't the most secure items. While inconspicuous most of the time, you'll definitely notice if one of these caps suddenly goes missing or if you're constantly dealing with one that's loose (perhaps due to damage) while cleaning. Whatever the reason, it's likely you will need to remove and replace a toilet bolt cap someday, and, as said, it's easy to do in most cases.
Most of the time, you can remove a toilet bolt cap simply by twisting and pulling. However, if the cap is stuck, you may need to use a flat tool to pry it off; or, if that doesn't work, you will need to cut it off. The longer the toilet's bolts have been in place, the more likely the bolt cap will be stuck, thanks to rusting and deterioration.
Once you've removed the old caps, though, replacing them is pretty simple, as long as you purchase caps that correspond with the toilet system you have. Your new toilet bolt caps should simply snap into place over the toilet bolt (with the proper placement of a washer). However, there are situations where that may not work, and you'll need to use a threaded adapter to make it fit.
Removing toilet bolt caps that won't budge
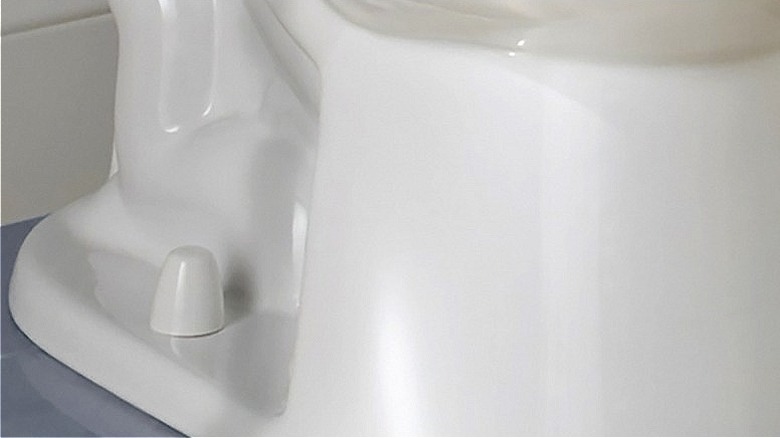
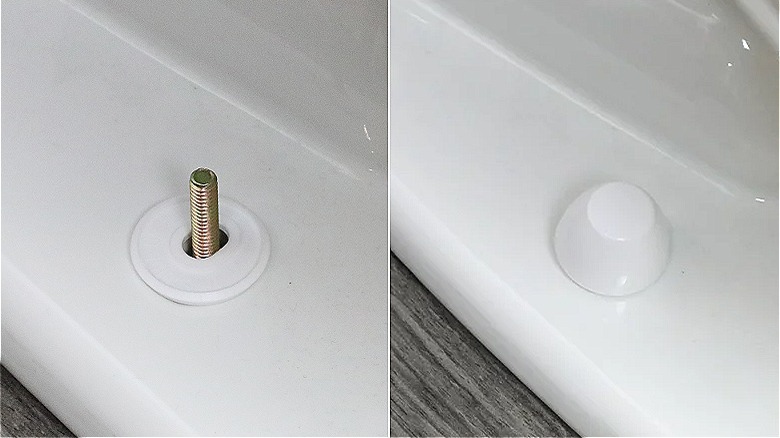
The toilet bolt cap simply covers the bolt that holds the toilet in place to keep it from sliding around the bathroom floor. The bolts pop through two holes in the base of the toilet, and then a washer and a bolt cap are fitted over the top. The problem is that, over time, the bathroom's moisture and simple wear-and-tear can cause some toilet bolt caps to become nearly impossible to remove. There are a few solutions, however, to help with removing them if they don't simply pull off. First, start with a lubricating spray applied as close to the edge as possible. Let that sit briefly, and then try removing the bolt cap.
When that fails, you can use a putty knife or another flat-edged tool to try to pry the caps off. This is a bit dangerous since the knife could slip, causing a cut. Wear protective gloves to minimize that risk and to create more of a grip. You may need to apply pressure to all of the edges around the bolt cap to loosen it.
A final trick to getting rusted-on toilet bolt cap covers off is to put some vinegar into a spray bottle and then spray the edges around the base of the cap. The vinegar will work to dissolve some of the built-up material after it sits for a few hours. If none of these tips work, though, you may have to try cutting the caps off.
Replacing the toilet bolt cap
One key thing to remember while removing toilet bolt caps is that it's easy enough to purchase replacements. Damaging the existing ones isn't a problem as a result. If you have a toilet with a unique bolting system, finding a replacement could be a bit harder, but that's not usually the case. What's more, you may take this opportunity to install some quirky and stylish options to add to your bathroom's look.
Once you have the necessary bolt cap replacements, most often, you'll just need to slide it over the top of the toilet bolt and then snap it with some downward pressure. It should fit snugly onto the base washer that comes with it.
For a bit more durable hold, you may wish to purchase threaded caps. If so, there are a few simple steps to using them. The first is to ensure the toilet bolts aren't too long (if they are, you'll need to cut down the bolt to fit the cap using a metal blade like a saw.) Then, locate the threaded adapters, which come with the bolt caps.
You'll usually find two sizes available, which simply requires choosing the one that fits snuggly onto the size bolt you have. Next, thread it into place evenly over the bolt. Once that's done, you just need to snap on the caps and screw them down until they're even with the toilet.


