Tips On Removing Command Strips With Minimal Damage To Your Walls
If you love hanging art pieces, family portraits, or other decorative items on your walls, you might be familiar with the ease associated with 3M's Command strips. You also then are likely familiar with the potential damage these strips can cause your walls if you remove them incorrectly. If you pull the strips away rather than down, you're going to end up with a damaged wall, requiring you to patch the paint and/or drywall — or cover it up with another piece of art, frame, shelf, etc.
Miscues when using Command strips include being impatient, ignoring the weight restrictions specific to each strip or hook (which can lead to damage), and not preparing the wall surface properly before applying the strips. For this latter point, 3M recommends using isopropyl rubbing alcohol to prepare the wall surface, as a clean surface will allow the strips to adhere to the wall better. Of course, once bonded to a wall, if you ever wish to remove the Command strips, you'll need to do so properly so as to not damage your wall surface. And as said, there is a way.
Removing Command strips from walls
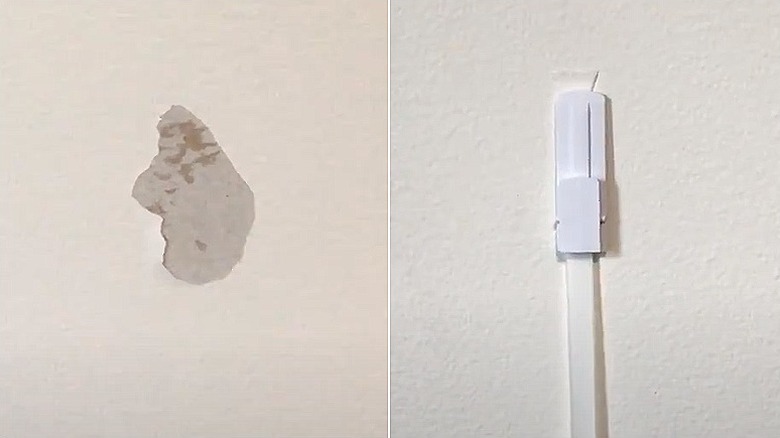
Perhaps the most common mistake made when removing Command strips is pulling the tab at the bottom away from the wall. But doing so will result in a situation like the above image on the left, where a chunk of paint has been removed along with the strip. To avoid this happening, all you need to do is pull the tab the right way.
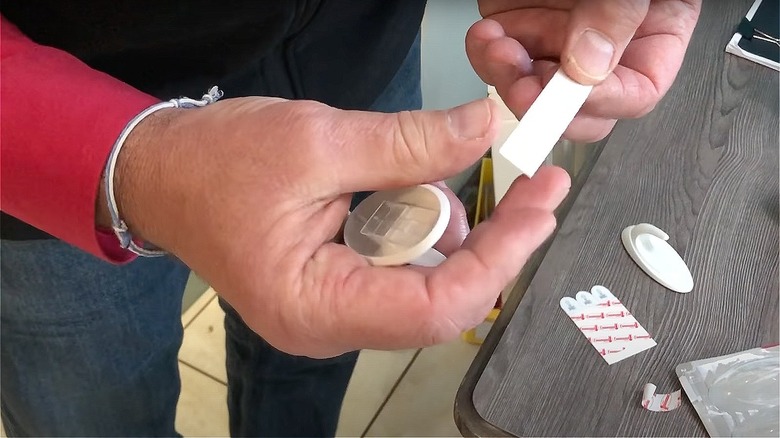
As seen in the picture on the right, hold the Command strip's tab and gently pull it down. If necessary, support your hands on the wall to get a good hold and continue pulling the strip until it completely detaches from the wall. Note the exposed strip can stretch up to 15 inches, so don't worry if the doesn't come off your wall right away.
But what happens when if the Command strip snaps midway through? It happens. Just grab your hair dryer and some dental floss. Focus the hair dryer on medium or high setting onto the leftover adhesive till it feels warm. Cut a small piece of floss and glide it beneath the adhesive before moving it up and down to detach the remaining part of the strip.
Tips for using Command strips
Besides hanging decorative pieces on your walls, you can use Command strips to install drapes and organize your household items, too. Of course, you'll want to employ the same best practices to minimize any potential wall damage in the event you remove the strips. As 3M notes, Command strips are a one-time-use-only product.
If you're using Command strips for the first time, be sure to go through and follow the instructions printed on the back of the pack. Refrain from using the strips on rough surfaces like brick or wood and wait at least seven days before applying them to a newly painted surface.
If you'd like to use them in a wet location like your bathroom, ensure you get the water-resistant version. Similarly, pay attention to 3M's weight and size restrictions before picking a pack of Command strips for your DIY project. Also, don't rush the installation process, and remember to clean the wall surface well before sticking the strips on. To ensure they fuse with the surface, press the strips for 30 seconds, and then wait one hour for the strips to truly bond before hanging your item.