How To Turn Two Dollar Tree Items Into A Stylish Side Table
Social media is an excellent source when you need inspiration for decorating your home. It gives you insight into how other people adorn their dwellings, showing you where they bought things or if they DIYed pieces. You'll see gorgeous end tables in living rooms, artwork displays, and trinkets scattered throughout the space. However, finding affordable, durable, stylish furniture can take some time, but you can always re-create a few pieces you see. For example, if you've been looking for a side table to put in your bedroom or living room but haven't found one in your budget, TikTok user @meiralaryssa created two stunning side tables with two items, a bowl, and tray, from Dollar Tree, which you could replicate.
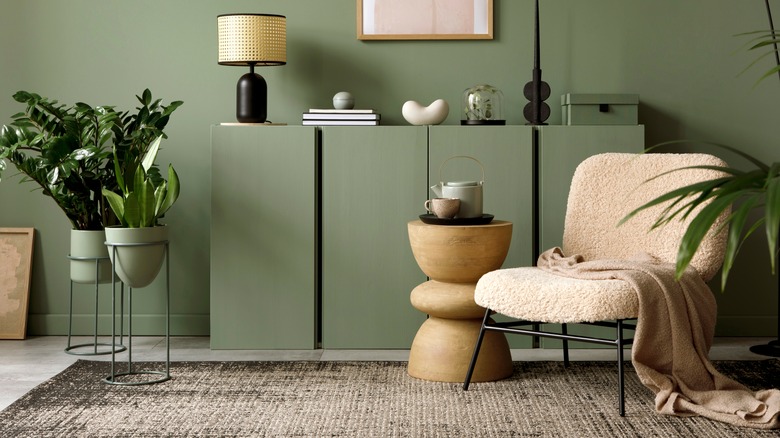
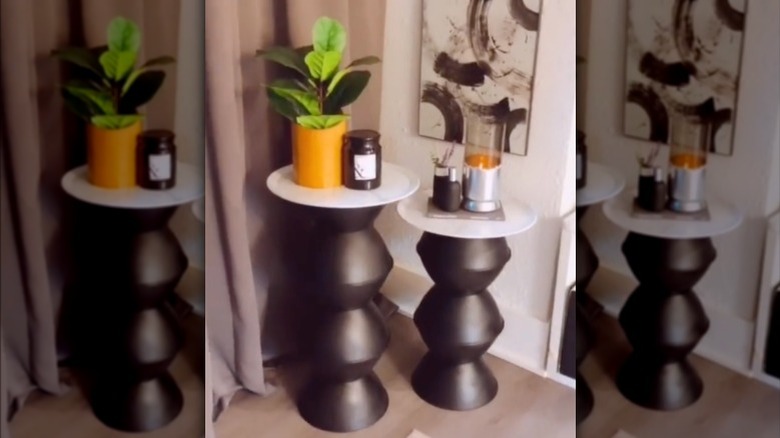
The side tables she made have an hourglass-shaped base with a flat top as the table's surface. The project cost an estimated $50, making it more affordable than buying one side table. When shopping for manufactured tables, the price varies depending on the furniture's style, materials, and brand. You might find a few that fit your budget, while others might not. However, replicating Laryssa's side tables is the perfect budget-friendly DIY project that you can customize to complement your home.
Steps to make the side table
Tiktoker Laryssa designed her side tables to be about 2 feet tall, so they can easily be placed in any room, such as the bedroom, living room, or bathroom. You'll need 11 plastic bowls, two trays, two different spray paint colors, a primer, a gloss clear coat, and E6000 adhesive glue. Laryssa painted her bowls black and her silver trays marble, but you can spray paint them with any color that complements your home.
Start by laying out all of your bowls on a table. Place one bowl upside down to look like a dome, then add glue to the surface and attach the bottom of another bowl to the glued area, creating an hourglass. Then, attach another bowl on top, but this time glue the top regions of both to look like a sphere. Repeat the process once more to add another sphere on top.
Next, allow the glue to dry and spray paint your base. While the paint is drying, prime and spray paint your tray, let it dry, and splash it with the gloss clear coat. Finally, glue the base to the tray by laying the tray flat on its face, gluing the top of the base, and connecting the two. This side table will use five bowls, making it a smaller furniture piece, so repeat the steps for the second side table, where you'll add an extra bowl to make it taller.
Tips to keep your side tables in good condition
Since you're building side tables with plastic items, treating them with care is vital so that they last you a long time. When letting the glue set, allow it to dry completely before putting anything on them. Whether you wait a few hours or a day, ensure the glue has dried. You want to avoid accidentally moving them so they go off-center and collapse. Re-gluing the bowls would be more complicated because you would need to scrape off the excess to have a smooth surface.
On the other hand, when you're decorating your side tables, use lightweight items on the trays. While the pieces should hold together well, adding too much weight can cause them to fall, especially if one side of the table is carrying more weight than the other side. So, distributing the weight is essential. TikToker Laryssa decorated her side tables with books, a candle, room spray, and a small plant, but you can include different items on yours. Lastly, when cleaning your tables, use a Swiffer to pick up dust instead of cleaning solutions to prevent peeling the spray paint. However, applying the gloss coat will seal its color and protect it from most cleaners.