15 Genius Hacks That Will Keep Your Shower Squeaky Clean
We may receive a commission on purchases made from links.
A long, hot shower should make you feel refreshed but when the inside and outside are full of soap scum, hard water stains, and bacteria, the experience is far from ideal. The best hacks to keep a shower squeaky clean use clever tricks that make the space sparkly and sanitary. Some use household supplies and others are based on the idea of working smarter, not harder; they rely less on elbow grease and more on getting the job done effectively.
One of the first signs of a neglected shower is mold on the grout but nasty things can also start growing on the shower walls and floor. Those microbes multiplying down there can also cause fungal infections like athlete's foot. Even though deep cleanings should remove those unwanted problems, better products and methods will get to the root(s) of them. Some of the squeaky-clean hacks below are huge time-savers; others aren't, but rest assured that they all work beautifully. Try one or two or more, and you'll see what a difference it makes.
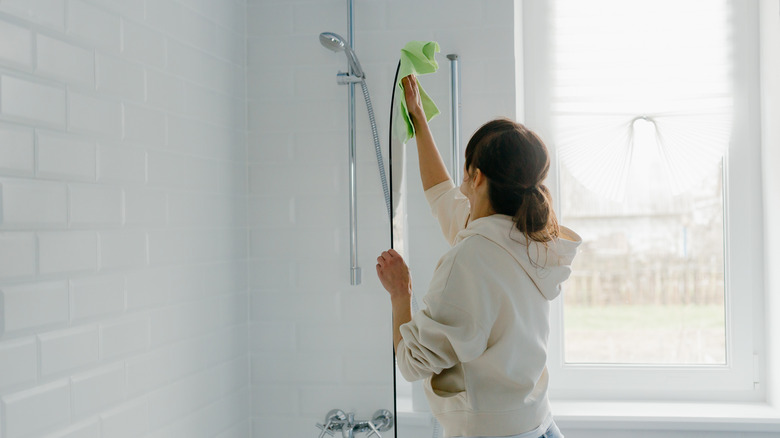
1. Vacuum it before scrubbing
Although bringing a vacuum cleaner into a bathroom might seem awkward at first, it can cut down shower cleaning time by as much as 50 percent. When there's enough room for it to fit, a vacuum can be brought into the stall and rolled back and forth using the floor height setting. Just use the extension hose for smaller areas, as well as to get on top of the shower doors, in between the fixtures, and everywhere else. All of the hair will get sucked up and won't need to be wiped away later. And it won't get stuck in the cleaning brush and need to be pulled out, ew.
The whole shower will have to be dried before starting though, or the suction won't work well. And to protect the shower floor, use a vacuum with a spinning brush or soft-fabric brush roll. Avoid using too much pressure with the appliance or the hose; it shouldn't be needed anyway, since the goal is simply to remove surface dirt and hair before cleaning.
2. Be patient with the process
Rushing to clean a shower might spare a few minutes but don't expect good results unless you give the process a few extra minutes. The right amount of heat loosens things like dirt and grime up so before the scrubbing starts, it makes sense to run the shower's hot water for a few minutes. The steam that builds up will work to your advantage and before things cool off, spritz on the chosen cleaning product or concoction.
But don't dig right in, because any cleaning products you use should also be given a few minutes to penetrate the gunk. Read the label to see if there's a recommended amount of time for this. If not, wait about three to five minutes. The areas will be squeaky clean once they're wiped down, with less effort on your part. Cleaning products cost money, so you may as well give them enough time to do the work they were designed for.
3. Clean all the chrome with lemons
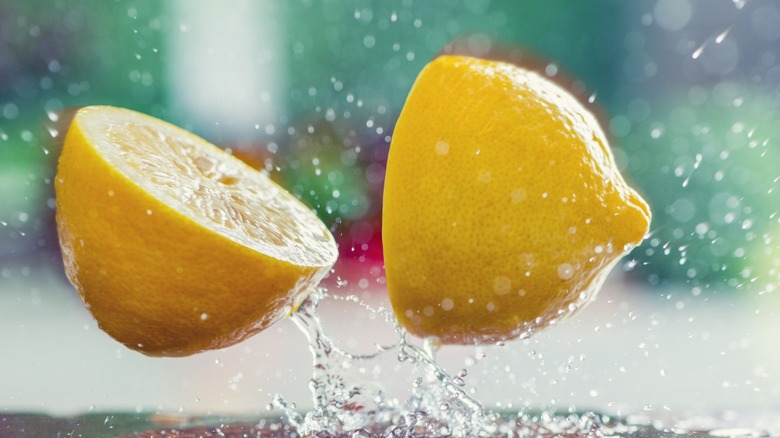
This genius bathroom cleaning hack is twofold because of how well it works and the pleasing smell it leaves behind. Chrome shower fixtures like knobs and drains quickly get dull, and many cleaning products won't make them super-sparkly. Lemons are known for their cleaning properties, so this is a useful shower-cleaning hack you'll want in your wheelhouse.
Grab a few lemons, cut them in half, and save the juice for another cleaning task. Then, simply rub the halves over the fixtures until the stains dissolve. For stubborn hard water stains (limescale), let the juice set for up to five minutes. Rinse the area with clean water, ensuring that no pith or seeds are left. If you're uncomfortable scrubbing with the lemon halves, pour the juice into a spray bottle instead. But make sure to dry the chrome well with a microfiber cloth or the water stains could come right back.
4. Remove stains and rust with Diet Coke
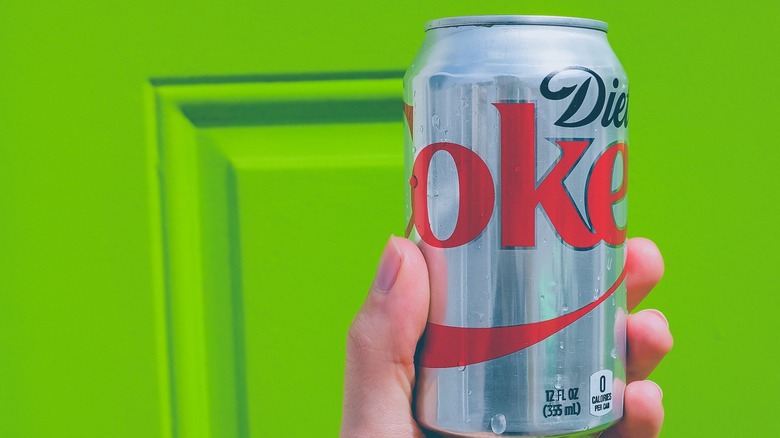
Few things taste better on a hot day than an icy Diet Coke, but people also use it to clean things around the house. This soda is acidic, with a low pH balance of 3.2. This means that it can eat away at a shower's hard water spots and make the surfaces shine. Diet Coke also contains citric acid, another potent stain remover that eats away at rust. Just keep in mind you need Diet Coke or Pepsi for this to work since they contain citric acid. Regular Coca-Cola does not have that particular acid.
Pour some into a bowl and wait until it gets a little flat so you won't have to deal with all the bubbles. Apply it to stains with a sponge and rinse well with soap and water. To remove rust, fold up a piece of tin foil a few times, pour the soda onto the rust, and scrub carefully.
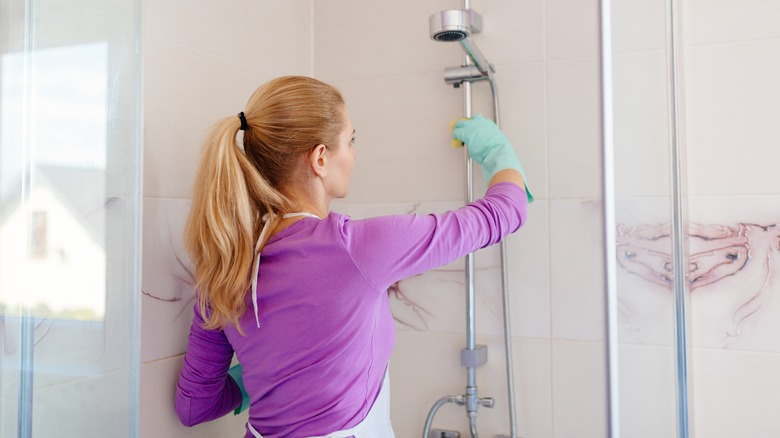
5. Soak the shower head in vinegar
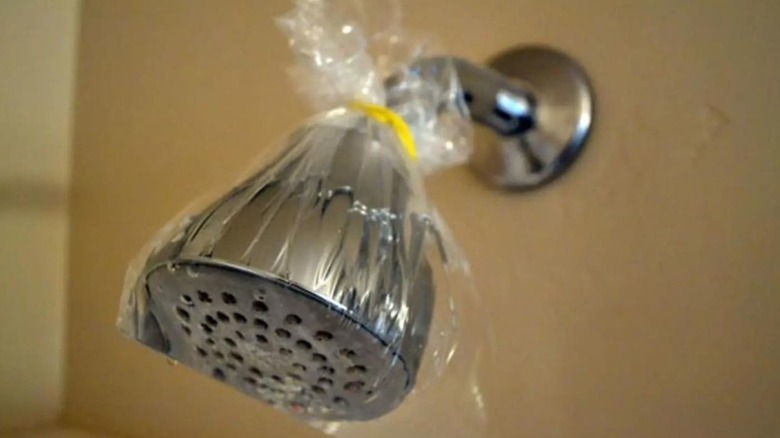
That limescale seen on the shower door and chrome fixtures also builds up inside the shower head, where it can block the holes and slow the water that's flowing out. Getting the showerhead squeaky clean will get the pressure back to where it needs to be.
There are two ways to clean a shower head. For the first method, remove the showerhead from its arm with a wrench and completely submerge it in a container of plain white vinegar. Leave it for about 30 minutes, reattach it, and run the water. If the showerhead can't be detached or you don't feel like removing it, fill up a large Ziploc bag with enough vinegar to cover the showerhead and attach it to the arm with a rubber band to hold it in place. Don't let the showerhead soak longer than half an hour if it's nickel, gold, or brass-plated because the vinegar could dull the shine.
6. Use oven cleaner

Oven cleaner works beautifully in showers as long as you use cans that read "fume-free"and not "heavy-duty." These products contain lye, a caustic ingredient that has to be used carefully: Keep the windows open, turn on the fan, and wear gloves and a mask when spritzing them. The Easy-Off Fume-Free Oven Cleaner label shows that this product shouldn't be used on painted surfaces or aluminum, and should be held 9 to 12 inches away from where it's being sprayed. It's also a good idea to remove the shower curtain and cover up metal fixtures before using these sprays.
Spray oven cleaner onto darkened fiberglass shower floors and walls to restore the shine, giving it about 30 minutes to work. The ingredients are also effective on stains that have formed on white porcelain, tile grout, and glass shower doors. Don't use too much at a time and rinse the area with plenty of fresh water when the time is up.
7. Swipe dryer sheets on shower glass doors

Store-bought dryer sheets also come in handy for cleaning hard water stains from glass shower doors and they also add a fresh scent to the area. That's because they contain fragrances plus softening agents like fatty alcohols that can dissolve soap scum, grime, and limescale. Dryer sheets are also slightly abrasive, which makes them work even better.
To use a dryer sheet to clean a glass shower door, dampen it slightly with warm water and wring out any excess liquid. This will wake up the chemicals in the sheet, and you can work in a circular motion until the stains disappear. These sheets can also be used on the shower walls and floors but remember to rinse the surfaces well afterward to remove any cloudy residue left behind. But wait – is there hair left in the shower after it's been cleaned? Dryer sheets also have anti-static properties so swipe one over that icky stuff.
8. Wipe a Magic Eraser over the shower door

Magic Erasers also make showers look ultra-clean and work especially well on glass shower doors. These firm little white sponges contain melamine resin that activates when wet. The resin turns into a sandpaper-like, abrasive foam that breaks up the stains on shower doors and absorbs them; the white eraser discolors as it works. These sponges are also great for fiberglass showers. Use them just like dryer sheets, without applying a lot of pressure.
Magic Erasers also break down and crumble after being used for a bit, but can be cut open to expose the white parts. Or, cut large ones into smaller pieces before using and you'll have more fresh sides to use. Magic Erasers don't have any caustic ingredients so there's no need to wear protective gear or turn on the fan. You might need to use several to thoroughly clean a shower door, though.
9. Remember to clean the shower door tracks
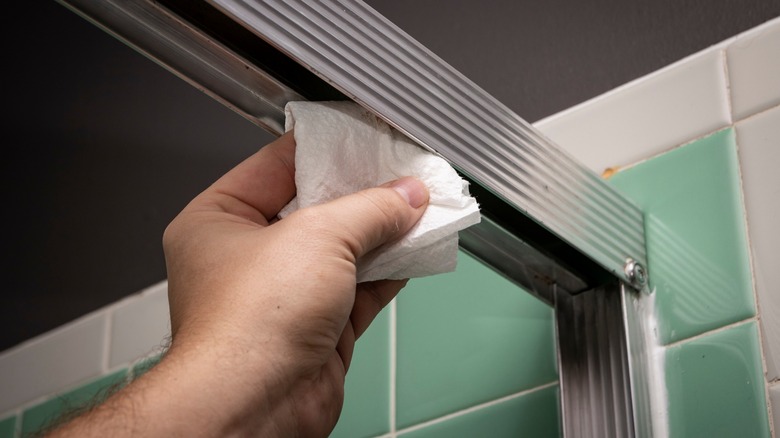
Dirty and moldy shower door tracks look unpleasant and can prevent the doors from operating smoothly but they are often neglected because it's hard to get into the narrow spots. A steam cleaner with an extended nozzle is the perfect tool for this but not everyone has one. Try using a grout brush, plastic knife, or an old toothbrush to get into the crevices instead – chopsticks and toothpicks are also great for getting into these tight spots.
The most effective cleaning agents for this task can be mixed into a spray bottle. One is a few drops of dish soap and a cup of hydrogen peroxide and another is equal parts of hot water and white vinegar. Some homeowners prefer a baking soda and water paste but that might be harder to remove since it's thicker. Rinse the tracks with water when finished. Use paper towels to dry them or wrap a microfiber cloth around whichever cleaning tool you used and work it back and forth until the surfaces shine.
10. De-rust that shower curtain rod
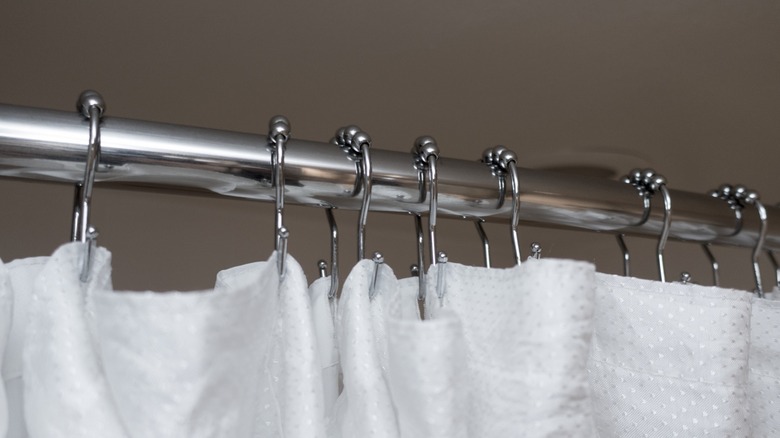
People might not clean shower rods often because they're higher up but they can get covered with dust, stains, and rust. It's common for the curtain rings to get stuck on these obstacles, which often build up on the unseen top surfaces of the rods.
The best way to thoroughly clean a tension shower rod is to remove it. That is typically done by grabbing both parts and twisting the smaller half to the right. Otherwise, just pull off the curtain and use a stepstool if needed. Place an old towel under the working area. Once the rod is wiped down, go after the rust with fine steel wool or sandpaper. Use a rotating motion around the rod to loosen up the corrosion and add shine. Wipe away the residue and clean the rod as usual. And to prevent the rod from getting corroded in the future, use an anti-rust spray like WD-40.
11. Clean shower liners and curtains in the washing machine
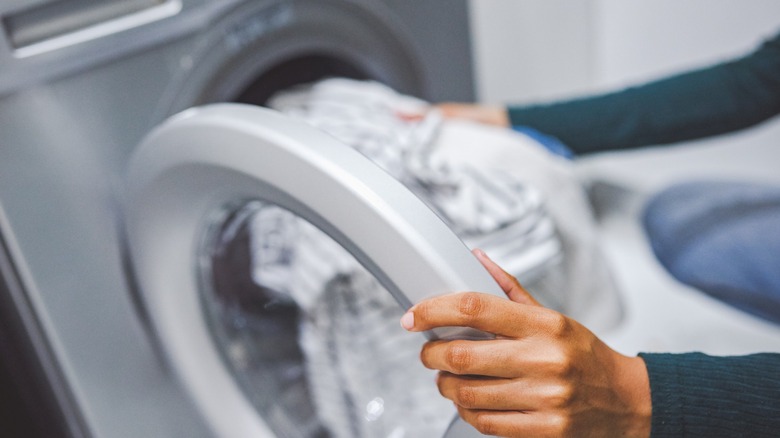
Unsightly mildew on the liners and curtains only worsens with time so maintaining them should also be part of any squeaky clean shower routine. There's no reason to keep buying new ones – the cost adds up over time and many of them can be cleaned in washing machines. How often should shower liners and curtains be cleaned? It depends on how much they get used. Since shower liners get wetter, they can develop bacteria and mold growth sooner than curtains and a red flag that too much time has passed between cleanings is black spots. Stay on the safe side and wash shower liners once a month.
Most vinyl, polyester, and nylon ones are machine washable in hot water with delicate settings. Add bleach and only use a small amount of laundry detergent. Wash plastic and cloth shower curtains separately with the same amount of detergent but add a cup of vinegar instead. Wash them in warm water on a delicate setting, and hang the liner and curtain up to dry after they're clean. Be careful with other shower liner and curtain materials as some are not machine washable; clean those by hand when recommended.
12. Clean it while you're taking a shower
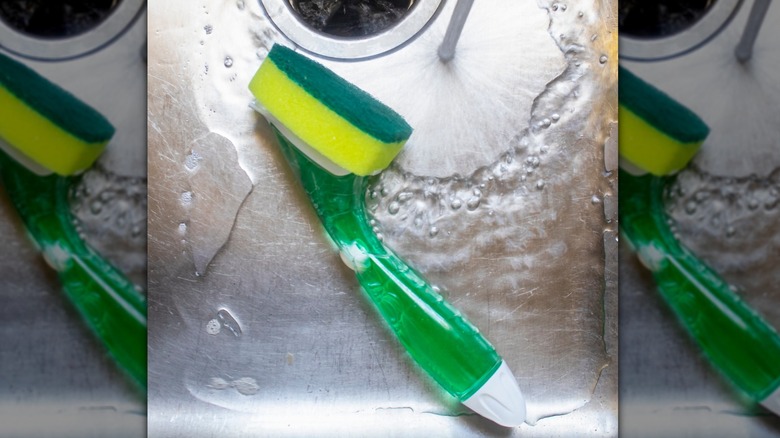
This is one of the easiest shower-cleaning hacks and it's also satisfying because of the multi-tasking angle. To try it, buy a refillable dishwashing brush that has a built-in dish soap reservoir and extra, replaceable heads. These cleaning tools have buttons that allow the soap to flow into the brush head, so you don't need to keep applying it onto the surfaces. Fill it up with a 50/50 mix of dish soap and vinegar and keep it in your bathroom or right inside the shower.
Clean the stall once a week when you're taking a shower and it will be squeaky clean all the time. The best time to do this is when the hair conditioner or hair mask you're using needs several minutes to work. Don't do it before lathering up, because the products will splatter. For the best results, rinse all that off first before using the dishwashing brush.
13. Remove soap scum with cooking spray
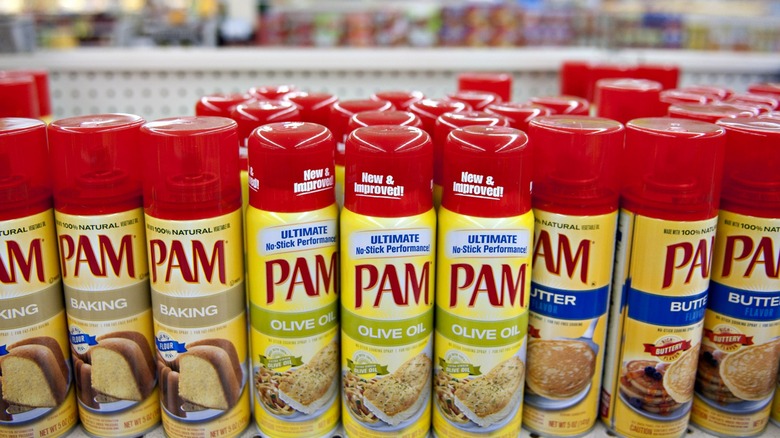
Cooking sprays prevent food from sticking and save calories, but they also target and eliminate soap scum. They contain lubricating oil and food-grade propellants. When sprayed onto shower surfaces, the ingredients loosen up limescale and make it easier to wipe away. And besides that, can be sprayed right where they're needed.
Don't spend extra money on a brand-name cooking spray for this – inexpensive, generic ones will do just fine. Cover up the shower and bathroom floors to prevent slips and falls and spray the product on the soap scum, standing about 6 inches away. It will need about 10 minutes to work and after that, wipe down the surfaces with a dampened microfiber cloth. Don't wait any longer than that, because the spray will solidify and be harder to get off. If the surfaces feel oily, rinse with soapy water and vinegar; the cooking spray is more of a pre-treatment.
14. Squeegee the shower door
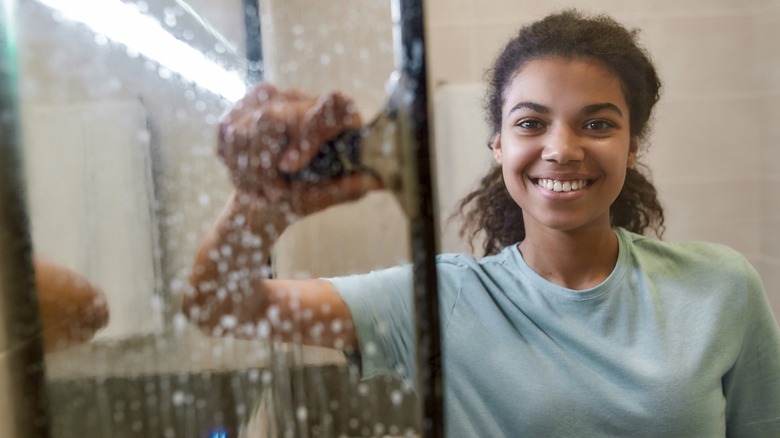
Just one shower will leave soap scum and mineral deposits on a shower door when the water isn't wiped away quickly enough. So when the goal is to keep it squeaky clean all the time, have a squeegee nearby. Made with a rubber blade built into a handle, this tool is designed to spread out liquids and make them evaporate faster. They are used to remove water and condensation from car windshields and do the same thing for shower doors.
Wipe down the glass after each shower. It only takes a minute and is a great habit to get into. The floor and walls can also be squeegeed if there's enough time, or save that for deep cleanings. But remember to wipe down the squeegee afterward or the moisture will encourage mold and mildew growth. If that happens, spray the squeegee with bleach and water and let it sit for 10 minutes before rinsing it off.
15. Give it a protective coating
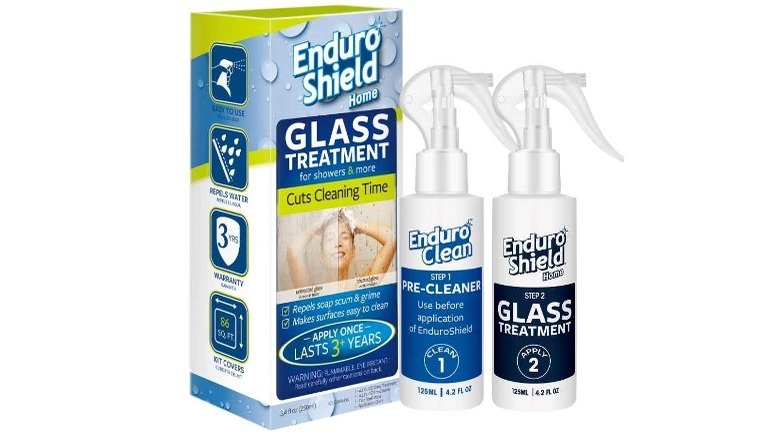
Squeegees and water-repellent sprays can prevent moisture buildup but a protective hydrophobic coating takes it to a whole new level. The pores of your tile and grout get filled in with the silica in the coating, keeping water and oil out. The coating also resists stains and scratches but must be reapplied every three to five years unless it has a longer warranty.
Manufacturers often apply invisible hydrophobic coatings to tub enclosures and shower doors, and you can expect to pay 30% more for these. There are also DIY kits that come with pre-cleaners, glass treatments, and application cloths. These typically have 3-year warranties and should be used according to the manufacturer's instructions. This coating is not the same thing as a shower cleaner but will reduce the time needed to get it squeaky clean. Check the kit's coverage area before buying; two or more may be needed for extra-large showers.