Keep Your Valuables Protected With This DIY Hidden Wall Safe
Having a safe in the home not only protects from possible robberies on some of your most prized objects but can also be a great way to keep sensitive items out of reach of guests and children. However, safes can be expensive, especially if it's one that is hidden in the wall of the home. A professionally installed wall safe can cost $450, depending on size, location, and who you've hired. Luckily for homeowners, this can be DIYed for a fraction of the cost.
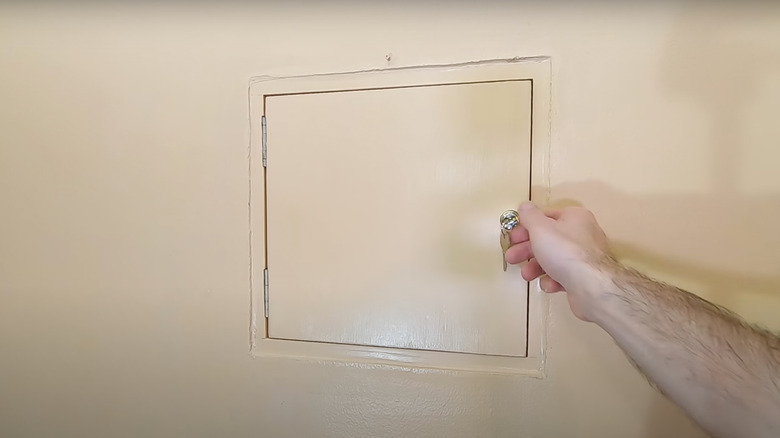
Doing this yourself and getting creative will save a lot of money as you can use whatever you've got lying around and shop for only a few necessary tools and materials. The great part about this DIY is how easily hidden the safe is, with you being able to simply place photographs or wall art over the door to conceal it from those passing by. Yet, you'll still be keeping it accessible. This project is also time efficient, and you shouldn't need to spend more than one weekend completing it.
Project prep
The first step in DIYing a wall safe is gathering the tools and materials needed to create the perfect cutout and build the box. It's best to have a stud finder, a drywall saw, and a drill at your disposal. Gather smaller necessities such as wall mounts, screws, hinges, a lock, and wood trim screws. Grab some wood for the box; whether buying it from a department store or using what you have, it just needs to be in good condition. Using wood rather than steel or buying a metal safe to shove into the wall will ensure easy extraction if ever necessary and will be much more affordable and DIY friendly.
Begin by finding the best spot to cut the hole for your safe, somewhere that won't interfere with electrical or piping. Use your stud finder to locate the nearest stud on the left side. Start to the right of the stud and begin sawing left until reaching it. Draw your left vertical line and then the top and bottom lines. Next, locate the stud to the right and cut toward it, drawing another vertical line and completing a square outline. At this stage, you should be able to cut along the outline and remove a square chunk of drywall, with the hole between the two studs on either side. The studs are essential for mounting the safe later on, so they must be prioritized when creating the cutout.
Building the safe
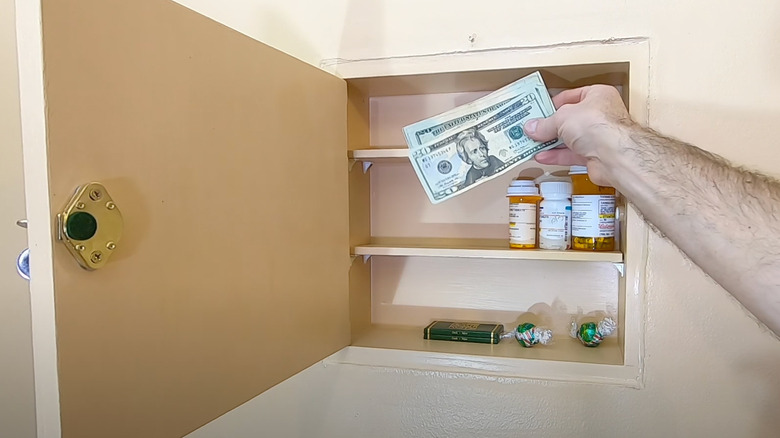
Cut your wood slabs to size using measurements from the wall's outline. You'll want a width slightly small than the outside of the wall so that it can fit snuggly inside later. Overall, you should have four pieces for the sides and two for the front and the back. With a drill and some standard screws, assemble all box pieces except the front. If you want to add shelves to your safe, add the shelf support clips to the back slab before assembling. Moving onto the front, create a cutout on the right that will fit your purchased lock. Then, screw hinges onto the left side of the door, and cut insets into the left side of the partially assembled box to close the gap between the door and hinge if needed.
Before you attach the door and complete the box, this is the best time to paint it. Choosing the same color as the wall it's being inserted into is most inconspicuous. And if desired, you can sand the door down after applying primer. Once dry, attach the door to the safe by the hinges and add the lock, using washers to flush the lock to the door. Create the necessary groove for the lock to slip into by cutting that indentation in the hinge's side. At last, the safe can be inserted into the wall, mounting with wood trim screws and using paintable caulk to fill in any gaps between the safe and the wall.