How To Remove Drywall Without Making A Mess
If you enjoy watching demolition videos on TikTok or YouTube, you'll enjoy removing the drywall in your home. In other instances, you might have to remove drywall if it's damaged or you need to get access behind the wall. While you can repair your drywall, sometimes it's best to take it all out and start fresh. However, detaching drywall can be messy, but when you work at a slower pace, you can prevent having to clean up a huge mess afterward. The secret is using an extra-long utility knife blade to give you easier access and a smoother cut. Usually, when you knock down drywall, you use a sledgehammer to make holes and tear down smaller parts with your hands, leaving you with large pieces on the floor and dust particles all around.
Extra long blades allow you to cut through the thick compound of the drywall. You don't have to worry about scraping your knuckles or punching unnecessary holes with a sledgehammer that will create enormous dust clouds. Plus, having the right tools can make the job easier. Before you remove drywall, here are a few precautions to take as you prep your space.
Prep and tools you'll need
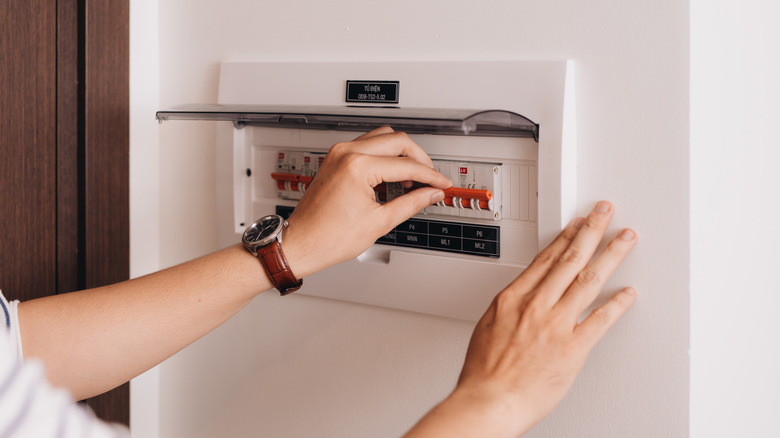
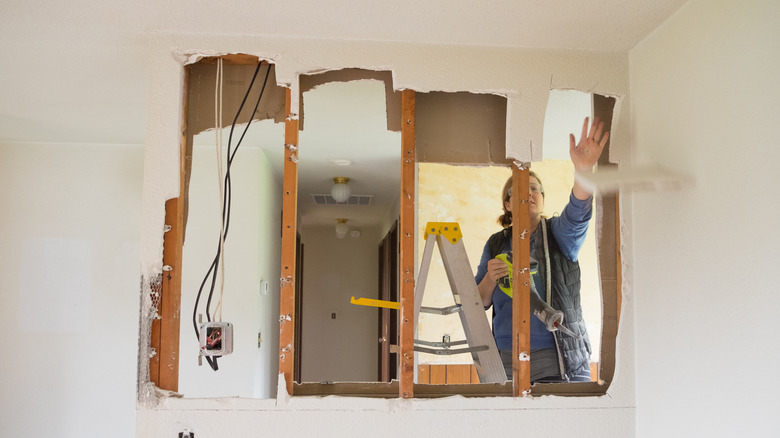
Before you start cutting into the wall, it's vital to turn off the utilities. You don't want to accidentally cut into the HVAC vents or electrical outlets. Remove their covers so you don't lose them or damage the outlets or vents. It will keep you from having to call professionals to fix any mistakes you make. In addition, using a stud finder can help you figure out other areas you should avoid cutting into when removing the drywall. You can mark the places the stud finder points out to remind you to avoid coming into contact with the areas.
After turning off the utilities in the room you'll be working in, prep the area with plastic sheets to prevent dust from leaving the space. Even though the goal is minimal cleanup afterward, some dust will appear during the task. You don't have to seal off every part; the door and the floor will be enough to keep the dust inside. If you lay a plastic sheet on the floor, you won't have to vacuum or sweep after; instead, you can wrap it all up in the sheet.
We mentioned how having the right tools will simplify removing drywall. A few tools you'll need are a C.R. Laurence 13-inch pipe handle cut-out knife, an extra-long utility knife blade, a drill, a Studball finder, a slide hammer nail puller, a short utility knife, a mask, and protective glasses.
How to remove drywall
Most carpenters dive right into the sledgehammering, but for an easy clean-up, you want to start with the corners of each wall. First, using the pipe handle cut-out knife, score the inner corners of the wall a couple of times, including the ceiling. You want to employ strong pressure to make a clean straight cut, and it'll prevent you from scraping your hand against the adjacent wall. Then, taking your drill, remove all the visible screws on the wall. For the hidden screws, use the Studball finder to locate and take them out with the drill. The Studball magnet will tell you directly where the screw is so you can make a single hole through the wall to get to it. In addition, use the Studball to find the nails and take them out with a nail puller.
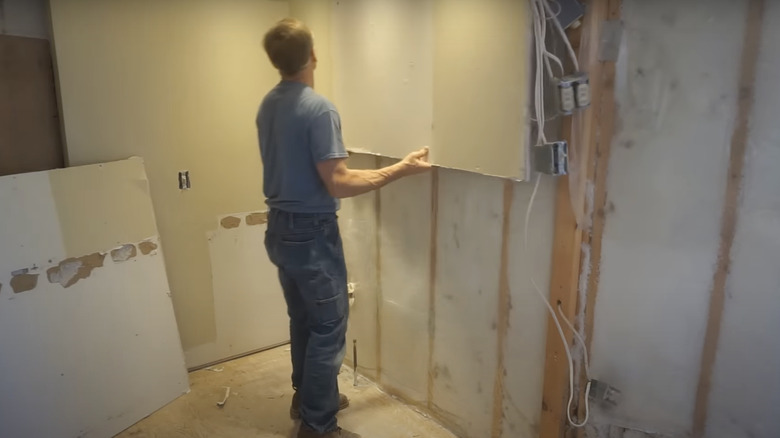
Once all the screws and nails are pulled out, you can gently remove the handle. Since the seams were cut, you can draw out the drywall in one go unless pipes or drains are in the middle of the wall. However, for a flat surface drywall, yank out one side and fanfold it as you pull across. You'll be able to carry it outside effortlessly. As a result of the multi-step procedure, you'll hardly have anything to clean up except the small dust the drill left behind and your tools.