Create Unique Floating Storage Around The House With This IKEA BESTA Hack
Setting up furniture around the house is tricky sometimes. When you have too many items taking up floor space, it can make the area look cluttered. While limited items open up a room with vacant flooring, too few items can create a cold, unwelcoming environment. Storage units are fantastic for decluttering your home by holding things you don't want to be seen but still allow space to display trinkets. Most storage units are often located in the living room or hallways and occupy floor space. However, IKEA designed their BESTA storage unit to be displayed on the floor or on the wall, creating a floating effect. The floating unit helps prevent taking up extra room on the floor.
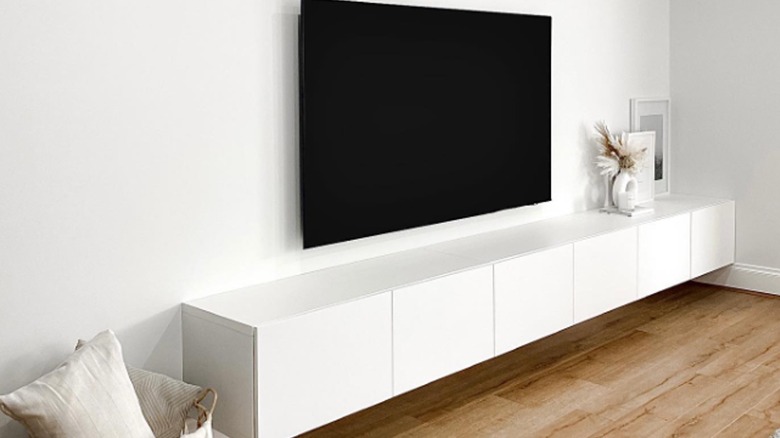
Some of IKEA's BESTA cabinets are typically used as entertainment centers that sit directly under the television. They're shorter in height but have a lot of storage space, making hiding books, game consoles, or seasonal décor effortless. Although the cabinets are perfect for storage, their height can make a wall look awkward. So, IKEA created a suspension rail that allows homeowners to hang the cabinets on the wall. You can recreate the look with a few things: two BESTA shelf units, four BESTA suspension rails, and two BESTA top clear glass panels (optional). You can modify the items to fit your space; two suspension rails fit one shelving unit.
Hanging the shelving units on the suspension rail
Setting up the IKEA BESTA suspension rail and cabinets is exceptionally straightforward. A few additional items you'll need are a stud finder, a level, a drill, and a pencil. Start by assembling your cabinets, following the instructions. Once they're ready to use, decide how high from the floor you want your cabinets to be; use the stud finder to locate the studs before marking to ensure you can attach the rail to the wall. Lightly mark each cabinet's top outer corner on the wall. Use the level on the cabinet to ensure the cabinet is even on both sides. Set aside the cabinets and grab the suspension rail. Place the rail upside down so that the holes are on the bottom in between the corners you marked and choose where you'll drill holes by marking the bottom holes with your pencil. Next, attach the suspension rail by turning it right side up and drilling it into the wall. Repeat steps with the other three suspension rails.
After the rails are attached, simply slide the cabinets on top of the rail, hooking them over the edge. Secure the cabinets to the rails with the screws, placing them inside the back corners of the cabinet's interior. Finally, give the entire unit one last level to ensure it's balanced, and add the glass panels on top. Decorate your new floating cabinets with picture frames, books, candles, and small embellishments to add texture and color.