We Tried Making A Side Table From A Stack Of Books With TK Results
We may receive a commission on purchases made from links.
If you've ever tried to find the right side table to complement your space, you know how challenging this can be, since there are so many size and style options to choose from. Some side tables can be found for as low as $20 at retailers like Walmart, while others can cost well over $200 depending on the specific elements you're looking for. Instead of trying to find a stylish side table to purchase, we tried making one at home using affordable supplies from Dollar Tree and books from the thrift store.
If you love to read, then a DIY project doesn't get more perfect than this. However, even if you last picked up a novel quite some time ago, this side table that's made out of second-hand books will still add a charming look to your home. Garnering inspiration from a DIY project by @RiasWorldofIdeas on YouTube, the table is built by stacking and gluing books together and topping them with some type of tray, glass, or board — all for a low cost. By thrifting most of your materials, you'll find that the result is entirely unique to you. However, one has to wonder how well the table will hold up, if it will be useful or just a decorative piece, and whether or not the time invested will be worth the finished product. Here's how completing this DIY went and what we think about the end result.
Sourcing materials
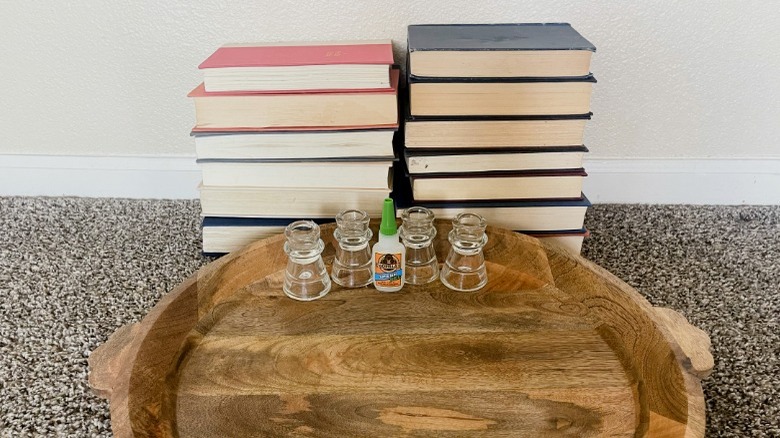
Sourcing materials for your bookish side table is one of the best parts of the project. Going to thrift shops and antique stores to find the right pieces offers space for creative thinking and allows you to hone in on making it uniquely yours. For our side table, we found 13 pre-loved hardback books for $1 each that were all similar in size and thickness. We also specially kept our eyes peeled for one larger and thicker book that would make a sturdy base for the table to be built upon. To accomplish your needed height, more or less books can be used. The measurement of our 13 books sat right under 2 feet, which was perfect for the space we were looking to fill.
While searching for books, we found a wooden serving tray at the thrift shop that was in good condition, complemented the overall aesthetic, and cost only $8. Next, we moved on to Dollar Tree to find decorative vases for the legs of our table. You can skip this step and rest the bottom book on the floor, but we liked the slight height boost and eclectic mix the vase legs added. Dollar Tree has various options of different sizes, shapes, and colors. We chose four smaller, clear vases for $1 each that flared at the bottom but slimmed out towards the top. Finally, we purchased Gorilla's Super Glue Clear Gel from Walmart for about $6 and used our hot glue gun as well.
Making your table
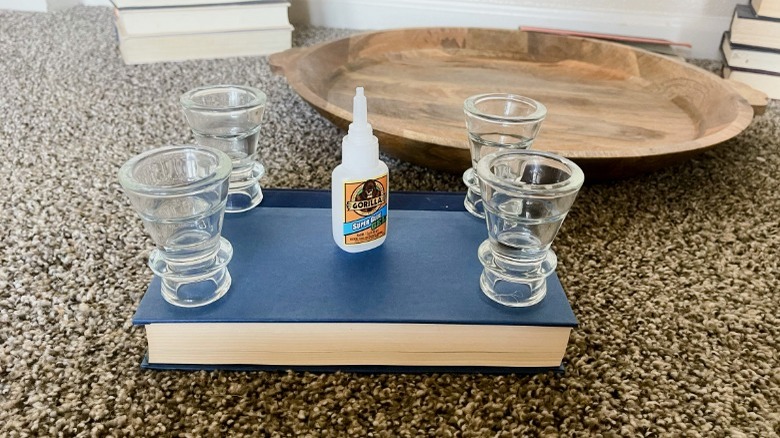
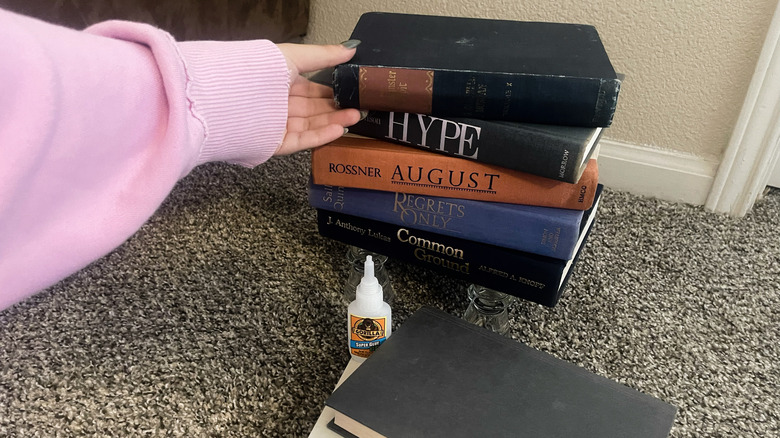
We first staged precisely how we wanted the table to look and had a clear vision of the outcome. We tried different organizations on the order of books, decided if the spines or pages should face the front, and if we wanted to stack the books straight or in a spiral or staggered layout. Once we felt confident in the final look, we began gluing it together. We glued one vase to each corner of the book we chose for the table's bottom. Through trial and error, we found that a hot glue gun did not work well between the glass vases and the cloth material of the hardcover book. The vases kept detaching, so we switched to the Gorilla glue, which worked like a charm.
With the legs of the table in place, we began attaching our books on top. With an alternation between warm and cool-toned books and staggering them to create more volume, we experimented with whether or not super glue or the hot glue gun worked better. The hot glue gun worked much better between the books than it did with the vases, and we didn't find that the super glue was necessarily more or less effective. Whichever form of glue works best for you will be fine at this stage. Finally, with all our books cemented together, we used super glue to secure the tray on top to finish our table.
The charming results
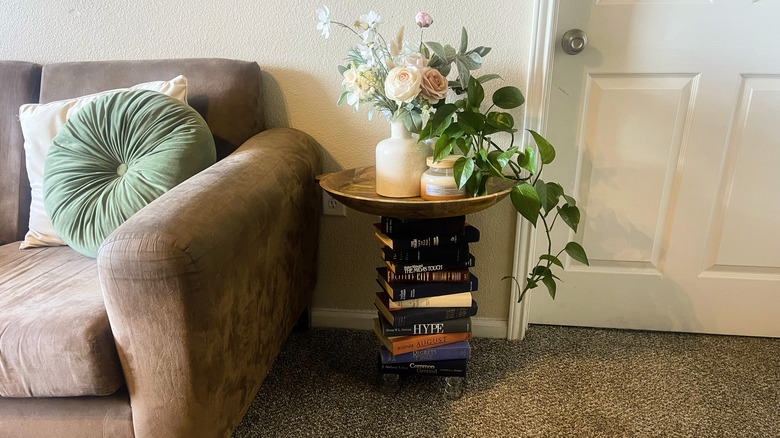
From start to finish, including shopping for supplies to piecing it all together, this side table hack was incredibly fun and gave us so much creative freedom. Gathering the supplies was an enjoyable outing that took us about an hour, but we won't deny being guilty of grabbing some other vintage finds along the way. That time, combined with the about 40 minutes it took us to create the table, meant we spent less than two hours on the entire project. Given the gorgeous, one-of-a-kind result, we'd say that the time spent was certainly worth it. Not to mention, the project only cost us about $30.
Contemplating things we may have changed or adjusted, choosing a smaller tray or doing two rows of books for the base might've been a good idea. While the top of the table is sturdy and will hold all the items we desire, we can also see the added benefit of making it a little more secure and proportional, especially if you have kids or active pets. Outside of our initial issues with the hot glue gun, the table remained well-built once we switched over to the Gorilla glue. Overall, it's a charming and unique addition to any space, fitting in with different design aesthetics depending on the books you buy and the topper you choose. Whether you want a contemporary look or a bohemian approach, the possibilities are truly endless, so let your artistic mind run wild.