The Easiest Ways To Get Your Overgrown Yard Under Control

You've just moved into a new home, and you're itching to make it your own. There's just one problem. The yard is a wild, overgrown mess. Or maybe you've been living in your abode for a while, but life's been busy, and your garden has incrementally gotten out of hand.
Very few of us actually want to have an untidy yard. In fact, survey results from Angi show that only 6% of Americans aren't concerned with the state of their lawn. But here's the kicker: An overgrown yard can feel incredibly daunting. Where do you even start trying to tackle the tangled mess? Fortunately, there are some easy ways you can get control over even the wildest of gardens without breaking your back — or the bank.
Unruly garden beds might look bad, but they can hold much more potential than a clear lot. Once you've cleaned away the weeds and debris, you may find you have more than enough plant species to start restocking. Unkempt areas can often be turned around and transformed back to their previous glory through trimming. These tips will help you approach the task systematically. This will reduce overwhelming feelings, make the process manageable, and help you work smarter instead of harder.
Identify what plants you have
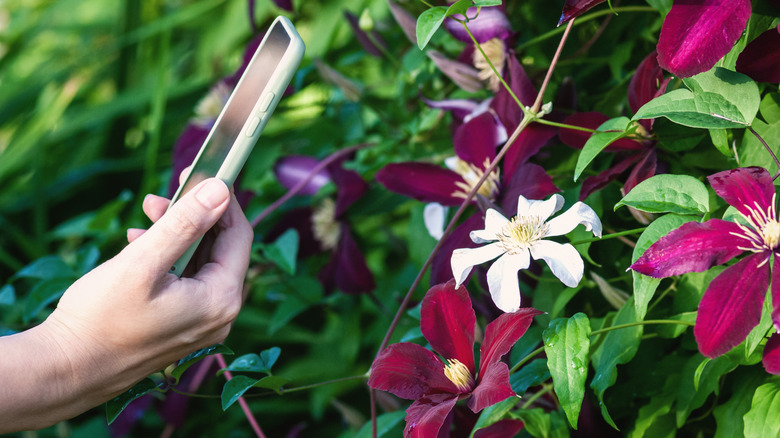
Maybe you're a bona fide plant expert who spouts off Latin species names in their sleep. But, if not, you might be scratching your head at the types of plants taking over your yard. If you're unsure what's growing in your garden, the very first thing to do is ID the plants you have. Once you know what you're working with, you can decide which species are unwanted, which are staying, and how to care for them.
If you have a knowledgeable friend or neighbor, you can ask them to help identify your plants. Or, you can simply download a plant ID app. Google Lens is also a handy tool for identifying plants. All you have to do is snap a picture and the search engine will display images and search results that are a close match.
From here, spend a little time researching the different species. Are they invasive, when do they bloom, and what conditions do they like? You might find that certain plants put on amazing flower displays, However, they might not be blooming well thanks to being shaded over by other plants and trees. Or, you may discover you have some shade-loving plants that have been planted in full sun and, as a result, look sick, yellow, and sad.
Get rid of invasive species and weeds
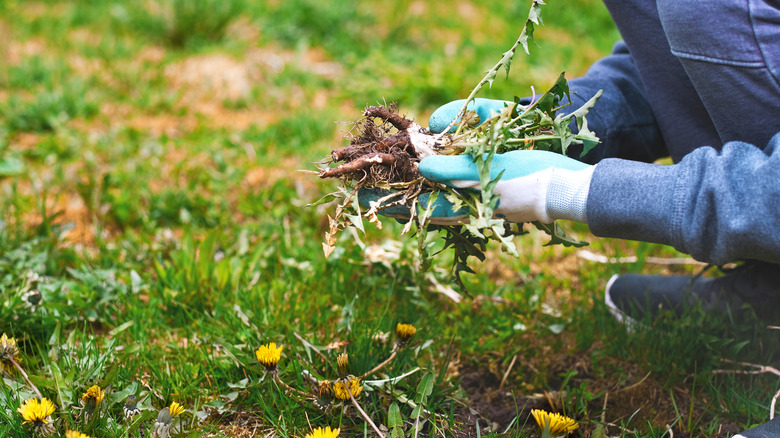
If your yard is overgrown, there's a good chance invasive plants have moved in. The US is plagued by invasive species and many thrive in residential garden environments. Not all non-native plants are invasive, but the ones that are can be a real pain in the neck (and back) to keep under control. Unless you want to constantly battle aggressive growth, it's best to rid your yard entirely of invasive species. Some are even illegal to have in your garden, and particularly aggressive aliens like Japanese knotweed can cause structural damage to walls, foundations, and plumbing lines.
Identify which plants are weeds or invasive and figure out an eradication plan. Watch out for sneaky remnants that may trigger new growth. For example, Tradescantia zebrina, aka the silver inch plant, is invasive in the South. It can be particularly difficult to remove thanks to its delicate stems, which break easily and resprout if left in the ground. You must also ensure that any invasive plants you pull out don't regrow. If you place them in the compost or on a pile of garden waste, they can take root and create a whole new infestation. So, make sure to dispose of them properly and permanently.
Brush-cut overgrown lawn areas
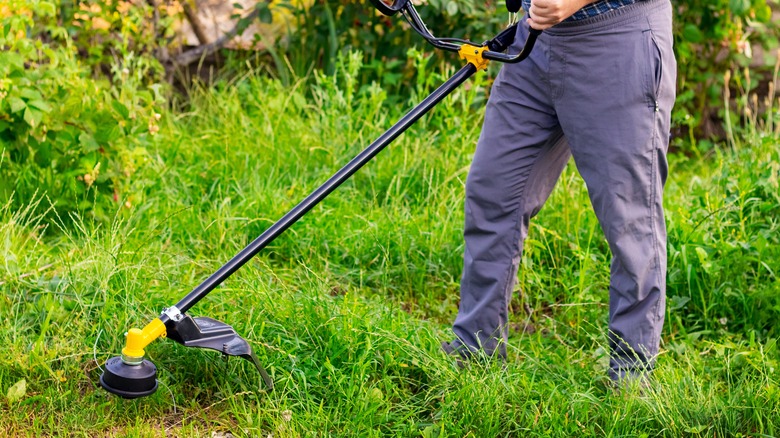
If you've got a badly overgrown lawn on your hands, you may be tempted to rip it out and install fresh turf. While this is an option, long, neglected lawns can often be salvaged with consistent cutting. One mow won't trigger overnight results. However, regular trimming can trigger new growth and encourage a thicker, denser structure.
A lawn that's grown too long for your mower to handle will need to be brush-cut. Just be careful not to cut too close to the ground. This is one of the most important mistakes to avoid, whether you're taming or maintaining your turf. Ideally, you want to trim the grass blades, not cut down into the stems or crown area. Aim to cut off half of the grass length the first time around. After a few days, you can go back in and trim slightly lower. This will allow the freshly exposed stems to harden up and avoid shocking the plant.
If woody plants have taken root in your lawn, remove them before cutting. You should also rake up the cut grass. Do not let super long clippings lie, as they can smother new growth. But, for short, well-maintained lawns, they are a valuable source of fertilizer. So, you can leave the grass clippings on after you cut.
Master the basics of pruning

One of the quickest ways you can rejuvenate a wild yard is through pruning. But before you head out with the shears, arm yourself with some basic techniques. For trees and shrubs that are choked with growth, thin out any awkward branches that are growing inward or crossing over each other. Make your cuts close to the parent branch, just above the "collar." If you want to cut back large shrubs and hedge plants, you don't have to cut branches off at their base. Just make sure you snip carefully above a growth node.
The old saying "can't see the wood for the trees" definitely applies to pruning. It's easy to get lost in the process, so take a step back every so often, examine your handiwork, and determine what to cut and what to keep. If you're not sure where to start, focus on removing dead and diseased growth and trimming overgrown bushes that are blocking windows or growing into other plants. If you have trees in your yard, consider removing their lower branches. This pruning technique can lift the canopy, let more light in, and create a spacious, high-ceilinged effect.
Create a compost heap
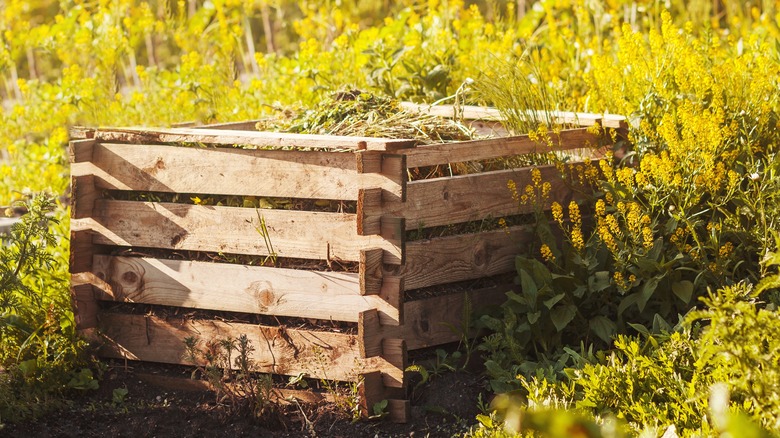
Clearing an overgrown yard will invariably leave you with a lot of waste. If you have the space, create a DIY compost heap where you can generate humus to feed your garden beds. If you're feeling intimidated by the idea of building one, don't stress. Decomposition is a natural process that happens automatically, and you're just helping it along.
Pick a place for your compost pile and start by stacking a thin layer of small branches and twigs. If you want to keep things neat and orderly, you build a frame to keep your compost heap contained, but this isn't mandatory. A plain ole' pile can work just as well.
Aim for a mix of brown and green matter. In composting language, "browns" are things like cardboard, sticks, twigs, and dead leaves. "Greens" are things like fresh grass clippings, weeds, and trimmed foliage. Don't forget, you can also add kitchen waste like produce scraps to the compost heap. Cut up larger pieces of waste and don't create thick layers of lawn clippings, as this can compact and get soggy. You want to aim for a nicely aerated heap, kind of like a tossed salad. Finally, don't add weeds that are in flower. This can spread the seeds to your entire garden when you harvest and use the compost.
Define your borders
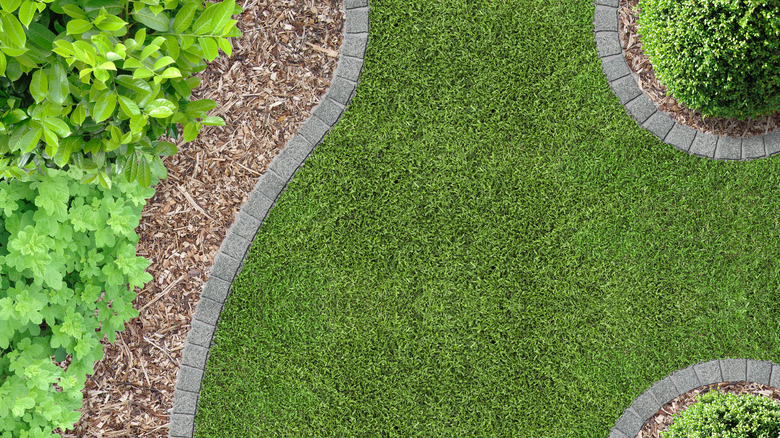
Neat garden beds are one of the things that separate well-maintained yards from overgrown, wild ones. If you've got plants growing out of yours, lawn haul out that spade because it's time to put some flower bed boundaries in place. However, creating a perfect line can be surprisingly tricky. Here are two tried-and-tested tricks for getting crisp, pristine border edges.
Decide whether you want straight, rectangular beds, or ones with rounded, sweeping, or curvy edges. If you're going the rounded route, you can create smooth, organic curves by laying out your garden hose and using it as a guide. For straight, angular beds, scrap wood boards can act as a good guide. Simply lay them out where you want your bed to start, place your spade against the edge, and drive it down with your heel.
Once you've spaded out your bed edges, you can demarcate them with small pavers, bricks, rocks, or rolls of bed edging. If you don't have the time or budget for building border edges, you can also leave them as a spaded line and slightly pile the excess soil into the bed. When well-maintained, this can look just as neat as a hardscape border.
Divide and replant
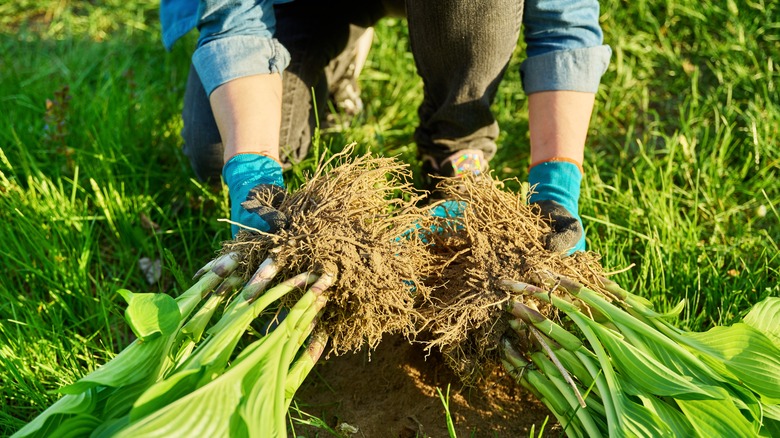
If your garden is overgrown, there may be lots of plants that can be split. Look for clumping plants, like ground cover that can be divided to make new plants. You also may have bulbs you can spread and tuberous roots that will resprout when cut off and replanted. Have your plant ID app open, and check which plants can be divided, the proper methods to split them, and the conditions they like.
As you're dividing your perennials, be mindful of their placement. Try to match sun, shade, and moisture requirements to different areas of your garden. Shade-loving plants that like water will be suited to the sides of your yard that don't see a lot of sun. Plants that like hot, dry conditions often do well against sun-soaked south-facing walls. To create a feeling of continuity, try to intermix plant species where possible. A garden isn't a supermarket shelf where nothing should mix. Think of it like a bouquet, naturally growing out of the ground.
Layer plant heights, colors, and blooming times
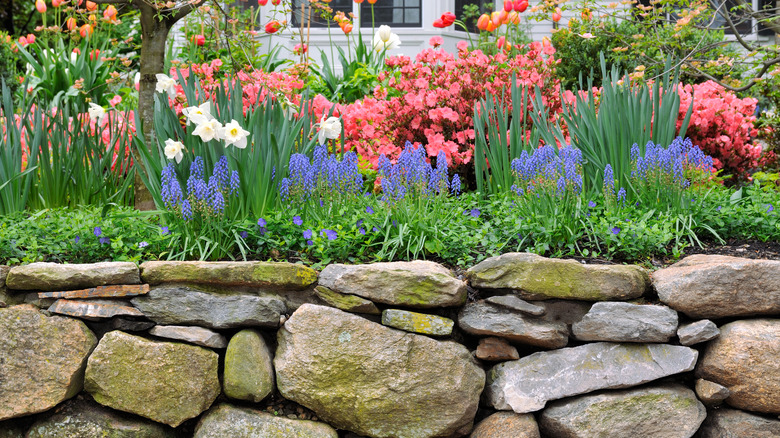
When placing your plants, you should also think about height, color, and texture. Relocate low-growing shrubs and ground covers to the edges of your beds and move taller, bigger bushes towards the back. This will prevent tall-growing species from blocking and shadowing smaller plants. If you need to start from scratch, consider digging up an entire bed or area's worth of plants. Then, sort them and replant them in a more orderly way. Make sure to properly water and fertilize any freshly transplanted foliage.
If you want a garden that's full of color year-round, it can pay to plan out the placement of blooming plants according to their flowering times. Envision how the bed will look in different months of the year. What will be in bloom when? You should also take leaf colors and textures into account. Move plants around to combine varying shades, sizes, shapes, and leaf textures for a dynamic and interesting look.
Create a clear swath around your house
Plants growing right against the walls of your home can trigger dampness, cause mildew, attract pests, and force you to repaint more frequently. If there are shrubs growing up to your walls, clear a swath at least three feet wide at the back of any beds that butt against your home. This will allow you to access the walls, clean the windows, and check any downpipes.
If the plants closest to your home have very aggressive growth habits, you may want to remove them entirely and replant the borders with more manageable species. Think carefully about the growth patterns of the plants you're putting in. Will they grow up and block the windows? Could their root systems interfere with your plumbing or pose a risk to your foundation? There are many plants you shouldn't grow next to your home, with some of the biggest offenders being bamboo, horsetail, and ivy.
Feed and mulch your soil
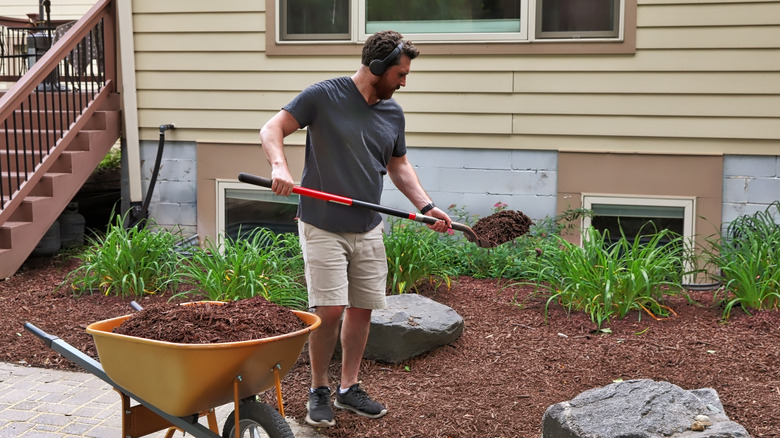
Overgrown yards might look fertile (why else would there be so much growth?) but this isn't always the case. Gardens that have gone wild often have poorer soils, as most of the nutrients have been consumed by the plants. If you want your pruned shrubs and newly planted species to thrive, you may need to fertilize, and the best way to do this is by adding organic matter and compost. This will lighten the soil, add nitrogen and beneficial soil microbes, and supply your plants with the building blocks for healthy growth. You can also use a lawn and garden fertilizer designed to balance the nutrients of the soil.
Mulching your beds and borders can also help rehab your yard's health. It can conserve water, discourage weeds, protect the soil, and help to create a more diverse microbiome. And, over time, the mulch will also break down, releasing carbon and nutrients into the soil.
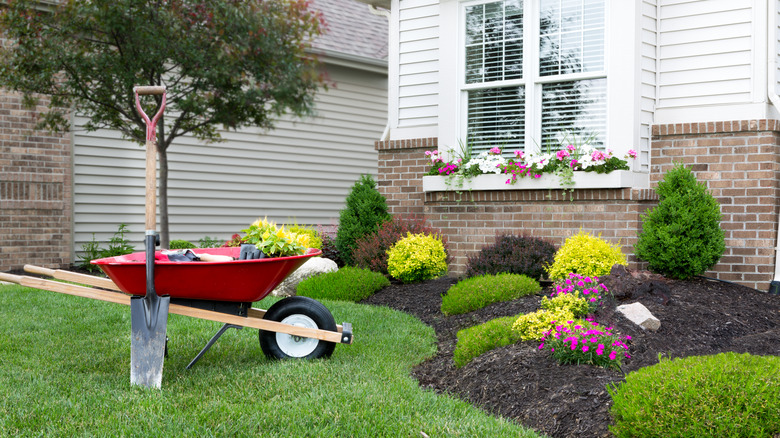
Break things down into steps

If you have a large or very overgrown yard, it can take time to whip it into shape. Mapping out the steps involved will make things less overwhelming. If you have a busy schedule, taking a step-by-step approach can help you fit your garden tasks in by spacing them out over a few weeks or months.
Creating a step-by-step action plan can also make it easier to time things like mulch orders and deliveries of other garden supplies. Once you've successfully tamed your wayward yard, you can convert your initial game plan into a maintenance schedule. A comprehensive plan should include things like lawn care, edge trimming, seasonal pruning, weeding, fertilizing, and fresh mulch applications.
This will help you stay on top of your yard chores and keep your freshly pristine garden looking shipshape. OnePoll survey findings published by the NY Post show that Americans spend an average of 32 hours per month on their yards. If time blocking is your jam, you can use this number as a guide when scheduling yard maintenance sessions into your weeks.