Unique Ways To Make Your Tiny Garden Look Much More Spacious
We may receive a commission on purchases made from links.
Don't allow space limitations to destroy your dreams of having a lovely garden. With a few tips and clever design techniques, you can make your outdoor space appear more spacious. As you enhance the perception of your garden's size, it's important to make a plan and stick to it. Avoid cluttering the small space with too many features and bulky pieces of outdoor furniture. Instead, pare down your plan to include thoughtfully placed plants, trees, pathways, and hardscape materials along with a limited number of focal points.
Include design features that make your eyes move throughout the space, making it appear that the garden extends beyond your immediate field of vision. By camouflaging the boundaries and utilizing the vertical plane, you can make it appear to open up. You can also try additional tricks like incorporating reflective materials, installing trellises, and laying out curving pathways. These features and more will create a sense of spaciousness in your tiny garden.
Adopt a less-is-more attitude
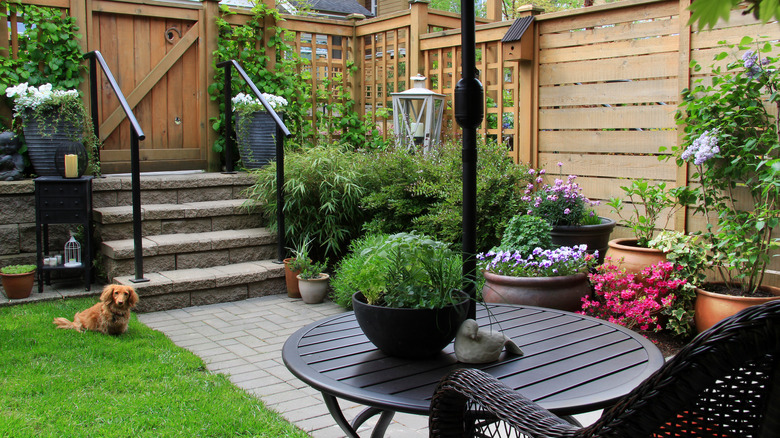
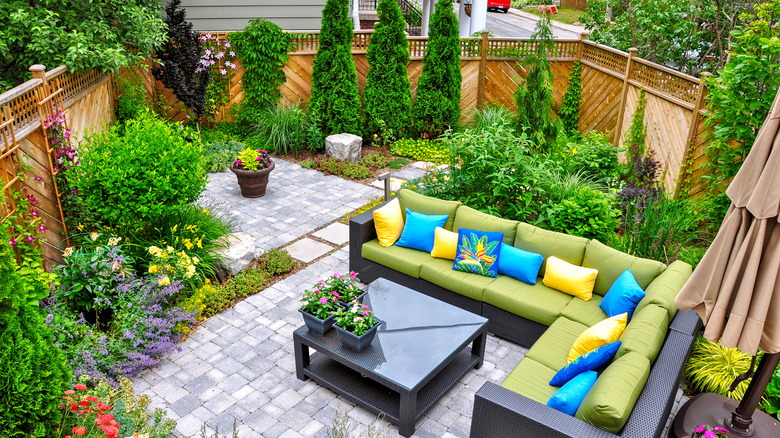
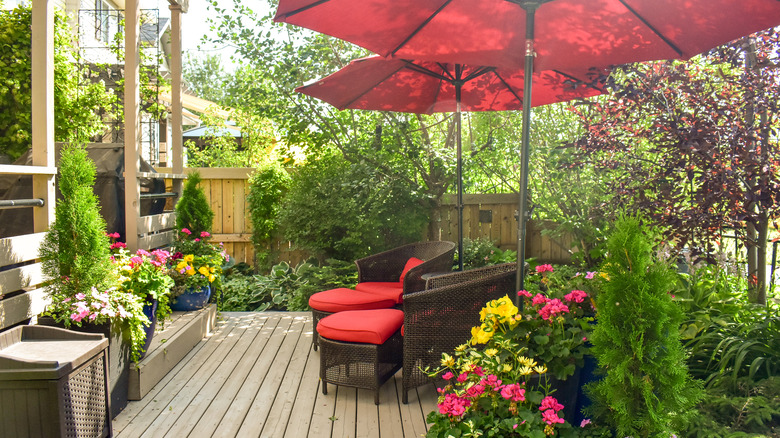
A cluttered and crowded garden can look small and congested. To create an expansive feel, you'll want to avoid filling it with too many plants and pieces of outdoor furniture. Instead, you can decide on a limited array of elements that make bold statements while leaving room for the space to breathe. It's best to keep the layout simple and provide open, grassy areas that make the tiny garden feel more spacious and easier to navigate.
In a tiny space, aim for a few well-chosen, plants that look cohesive when planted together. Uncluttered pathways flanked by a limited selection of plants in different textures and heights will create an expansive presentation. Position low-growing plants like hosta, astilbe, and dwarf mondo grass in the borders' front areas, adjacent to the pathway. Then, fill in medium-sized plants such as rhododendrons, hydrangeas, and rose bushes behind them. Small trees and tall shrubs like junipers and figs work well in the back of a border. The key is to choose a limited variety of plants with a scaled-down palette of colors.
Next, take an inventory of your outdoor furniture. Pare down the collection and keep the scale small so that the garden does not appear crowded. For example, you might select a compact bistro set for dining instead of bulky tables and big chairs. Or, go with a transparent, glass-topped table that creates an airy and open vibe.
Use plants to camouflage the boundaries
Every garden has boundaries, and a small one feels even smaller when the outer borders are a visible focus. On the other hand, your outdoor space will appear larger if you don't see the stark lines of the fencing or walls that enclose it. To trick the eye into perceiving that it continues infinitely, situate plants so they camouflage any functional hardscaped boundaries. This strategy can give the space an expansive feel like the garden goes on beyond the immediate area to a place where you can't quite see through the foliage.
Soft, full, leafy shrubbery is a good choice for this. For example, when tall evergreen shrubs like Arborvitae or juniper are planted at the edge of the small garden, they hide the fence and draw the eye upward. You could also plant a hedge row of privet or yew shrubs as a boundary that creates depth in the landscape.
Install lighting to create a sense of depth

You'll want to plan your small garden for evening enjoyment as well as daytime meandering. With strategically placed lights, the space appears bigger due to the enhanced visual perception of depth and distance. Consider using string lights, pathway lights, and ground-level up-lights to create layers of lighting.
Use ground-level uplighting to feature a few large, dramatic plants and trees. Especially when some of them are positioned at the back of the garden, the illuminated foliage will attract your attention across the space, making it appear bigger. Additionally, up-lights function well to illuminate architectural features such as fountains, walls, or statues. Use this trick to emphasize features in all areas of the space, causing you to visually appreciate the entire scope of the compact area.
Don't forget pathway lighting. When solar lights are installed along curving pathways they provide safety as well as a sense of movement across the area. To delineate zones for seating or dining, suspend sets of string lights from a pergola. Just make sure to hang them as high as possible to create vertical space. Combine these lighting strategies, and you'll create a tiny garden space that can feel bright and airy, even at night.
Use large pots and plants
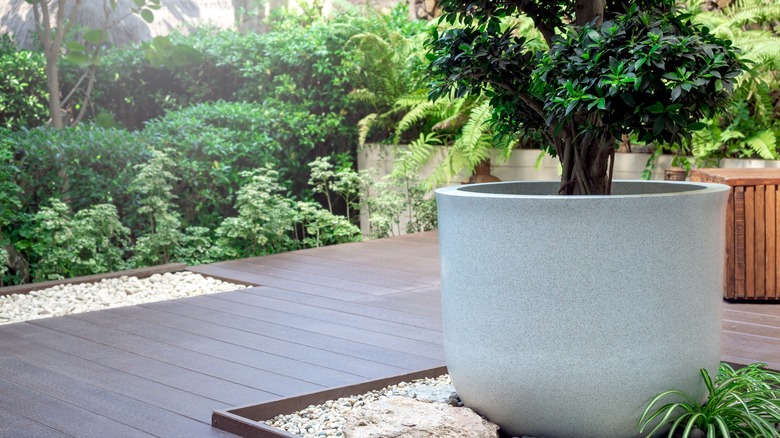
If your garden is pocket-sized, you might be inclined to acquire small pots for growing small plants that reflect the diminutive nature of the space. But you may be surprised to find that the opposite effect occurs. Filling it with lots of little plants in little pots makes it feel cluttered and small. With this approach, the garden appears overly busy and closed in. Instead, you can invest in a few large, high-quality pots to grow a limited variety of boldly sized plants, making a statement that visually enlarges the space.
Consider using a few small, potted trees and large shrubs in your tiny landscape. Look for slim profiles that also add height with a smaller footprint. For example, lemon and fig trees grow well in large pots. Then, you can position pots of shrubbery like boxwood or low-growing juniper in front of them. Layer foliage textures with the larger potted plants positioned toward the back, and you'll promote a sense of depth that makes the garden look bigger.
Place a mirror at the end of the garden
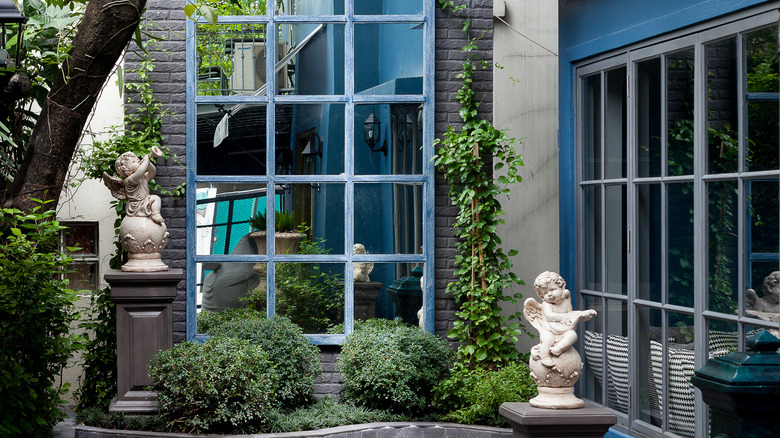
In the same way that a mirror can enhance an indoor space by bouncing light around the room, a tiny garden benefits from a thoughtfully placed mirror that creates the illusion of spaciousness. Install a large mirror on a wall or fence where it will reflect a lush and beautiful section of the space. You can fasten it to the structure, or simply lean it against a solid backdrop. This strategy works best if you can find a location where the mirror reflects an elongated stretch of the tiny garden. Suddenly, the distance looks twice as long, as the reflection visually magnifies the size of the space.
Use caution in the placement of a large mirror. You'll want to hang it in a shaded area to avoid damaging any delicate foliage with intense, reflected sunlight. In fact, reflecting, direct rays of the hot summer sun can even start a fire in dry leaves.
Additionally, you should cover or remove the mirror during the springtime breeding season for birds. The males are known to fly into mirrors as they mistake their reflections for enemies encroaching on their territory. If you attract lots of birds to your garden with feeders, you might opt for a frosted mirror or an antique one with a design on the surface so they can see it clearly.
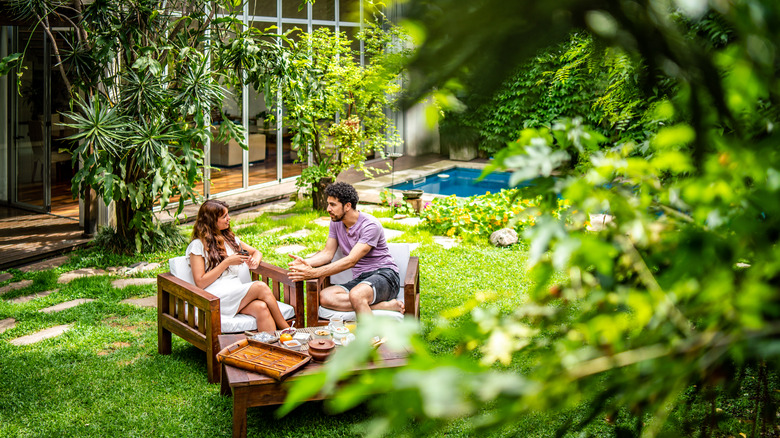
Create garden rooms
Although your garden may be mini-sized, you can envision it as a series of specific zones or rooms. Each zone may have a particular function such as seating, dining, or meditation. When the area is divided and organized, it demonstrates that there's ample space for multiple activities and that the tiny area is actually quite spacious.
If possible, plan the layout so that you don't see the entire space all at one time. Design the hardscape materials and the plantings to leave a bit of mystery regarding what lies beyond the immediate visual scene. When you wander through the designated rooms, it promotes the illusion of a larger space.
Start with a clear vision and plan for each garden room. For example, you can install paving stones to create a patio for sitting and relaxing in one area and plant a row of azalea or hydrangea bushes to separate it from an adjacent area. Vary the ground surfaces with decking, paving stones, gravel, lawn, or mulch. Then, install pathways to connect the zones.
Install a living wall

One way to make a small-scale garden appear more spacious is to draw the eye upward. When you see foliage and flowers at different heights ranging from ground level to eye level and above, it fosters a sense of spaciousness. To take advantage of this optical illusion, you can install a living wall of plants at one end of your garden. It will become a focal point that makes the most of the vertical space.
You can purchase a commercially prepared, outdoor living wall kit like this one from Amazon. It features a support system that attaches to a wall or fence and provides numerous individual pots for plants. Alternatively, some living wall systems offer multiple rows of pockets or grow bags constructed from thick fabric that attaches to a vertical structure. Many options offer convenient, drip-irrigation systems that allow you to water the entire living wall from above. Peace Lillies, Spider Plants, and Philodendron can all do well in these setups.
Grow vining plants on trellises and arches

When your garden lacks ample square footage to spread out your plantings along the horizontal plane, you can make it appear larger by establishing lush greenery and seasonal flowers growing on the vertical plane. To take advantage of the vertical perspective, position climbing plants at the bases of tall structures that draw the eye upward. Decorative, flowering climbers like wisteria, clematis, morning glory, and trumpet vine add seasonal fragrance and beauty. Additionally, you can plant upward-climbing vines that produce fruits and vegetables, providing visual interest along with an edible harvest. These include cucumbers, grapes, pole beans, peas, and strawberries.
You can also install vine-covered trellises as screens to obscure the boundaries of a small space to make it appear that it extends deeper. For dramatic impact, you can plant climbing roses or honeysuckle on either side of a tall arch positioned to span a garden path. This provides an architectural presence without sacrificing precious square footage.
Install window boxes on the house
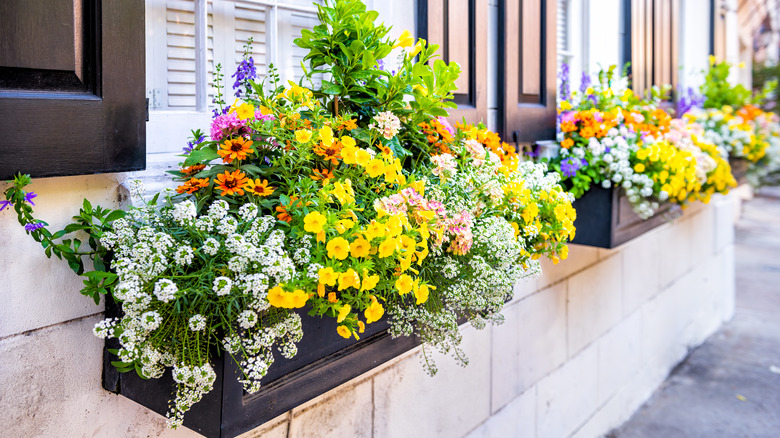
It's likely that at least one boundary of your small garden is formed by the outside wall of your house. Why not make that wall an integral part of the space by installing window boxes? Window boxes blur the distinction between the outdoors and the house, contributing an illusion of depth in the space. Plus, it allows you to enhance the feel of the garden using otherwise unused space.
With a plethora of commercially available options, you can choose from wood or plastic boxes, or metal frames lined with coco mats. Plant them with annuals in a variety of colors, shapes, heights, and textures. Many gardeners use the thriller-filler-spiller approach to planting window boxes. The formula consists of tall plants positioned in the middle, flanked by shorter plants to fill in the space, and trailing plants that spill over the side of the box. For example, you might begin by planting coleus or salvia in the middle of a window box and then fill in the space with impatiens or polka dot plants. Finish it off by planting sedum or petunias along the edges of the box so that they spill over the sides as they grow.
Draw the eye to a few focal points in the garden
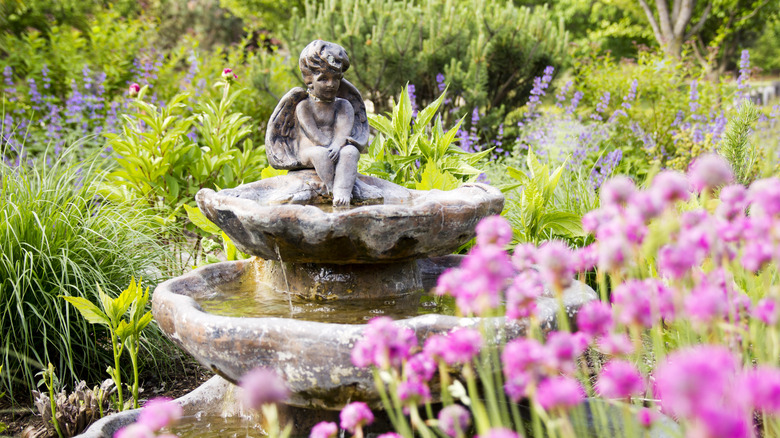
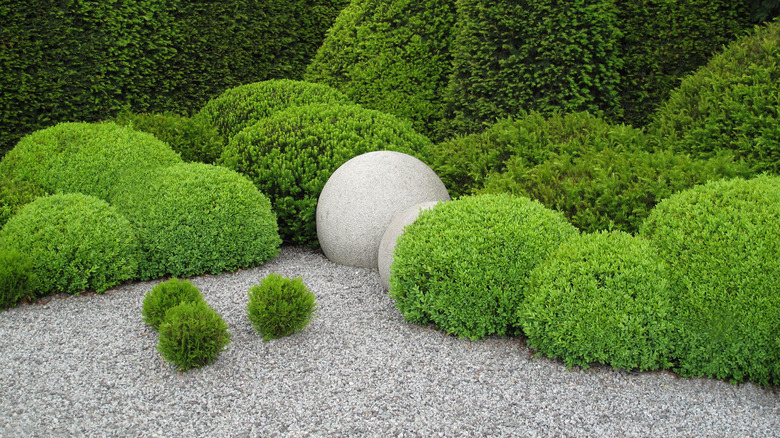
Focal points in a garden lend a sense of spatial dimension as well as add interest to the area. Place them strategically around the boundaries to draw your eye across the entire space. This could mean a fountain in one corner and a decorative sculpture in the opposite corner. Then, keep the area between the two clean and simple. When your eye is drawn across the open area to the focal points, it promotes the illusion of spaciousness.
You should keep the number of focal points to a minimum to avoid visual confusion and clutter. Try to stick to two or three carefully selected items that express your style. Examples of other focal points include inorganic objects like birdbaths, gazing balls, and benches. On the other hand, a large, shapely shrub, a lovely tree, or a collection of plants growing in containers can also serve as a focal point. For example, Japanese holly, yew, and boxwood are among the shrubbery options that can be pruned into shapes.
Install curving or angled pathways
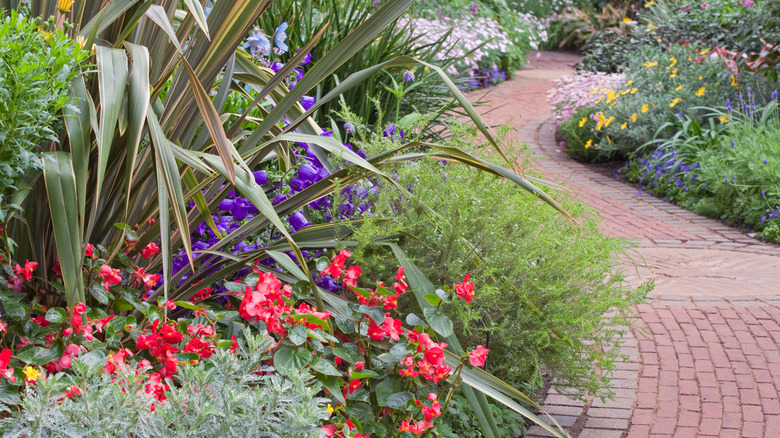
Straight-line pathways are not the best design choices for small gardens. Gazing down a straight path that dead-ends at a fence or a wall only reinforces the feeling of claustrophobia. Instead, you can utilize curving lines for the edges of your planting beds as well as the pathways that run alongside them. When you can't see the end of a path because it winds around a large shrub or a grouping of plants, it gives the impression that it extends off into the distance.
Similarly, you can amplify your small garden by designing it on the diagonal. In any space, the line from one corner to the opposite corner is longer than the line from side to side. If you can design your layout so that it's viewed from corner to corner, it will appear bigger than it actually is. Install pathways, planting borders, and patio areas at a 45-degree angle in relation to the boundaries of your plot. In addition to emphasizing the diagonal perspective, pathways that zigzag diagonally across the garden offer a sense of motion that creates the illusion of a larger expanse.
Choose hardscape materials in soft, light colors
Hard surfaces and materials like fencing, walls, paving stones, and rock borders can make a huge contribution to the beauty of a garden. For the diminutive version, it's wise to choose hardscaping in cool, low-key colors. The right shades will help to blur the boundaries for a more spacious, expansive feel. Just as using a light color scheme creates an airy interior, similar shades can create a more open feel in outdoor spaces.
Paint wooden fences in white or light, soft grays and opt for pale-colored structures like pergolas and decking. Look for hardscaping that echoes this palette such as soft gray paving stones and white pebbles to create pathways. When you use dark colors like blacks and deep browns, it can make a small area feel closed in by absorbing light. On the other hand, light-colored surfaces reflect sunlight to enhance the sense of spaciousness.
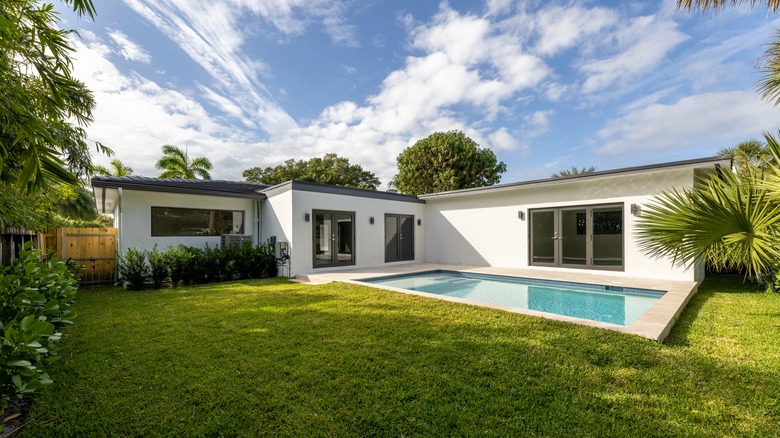
Play with different levels
One way to make a tiny garden appear larger is to vary the levels of individual zones for planting beds, seating, dining, and relaxing. You can build a raised patio or deck above the ground level and add steps that lead down to the garden path. Multi-level decks take advantage of the vertical plane to establish vantage points that expand your view. For even greater interest, you can even install a water feature that flows down from one level to the next.
If your plot features a sloping terrain, you can create a terraced garden by leveling off distinct sections and adding retaining walls or borders made from wood or stone. Alternatively, you can install landscaping beds on a sloping terrain, as they provide a natural showcase for plants. As your eye takes in the greenery and flowers on multiple levels, it can give the impression that the space is larger than it actually is.