How To Build An Indoor Plant Wall According To HGTV's Good Bones
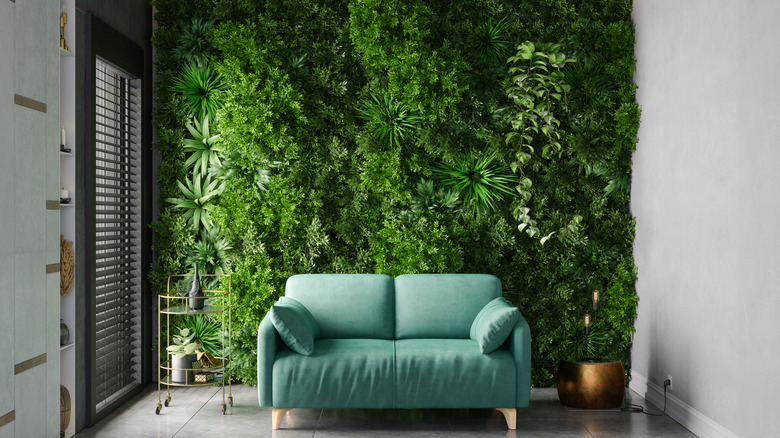
Decorating our homes with various types of plants and flowers has long been an easy way to bring a fresh and serene aura to our spaces. The design possibilities when it comes to incorporating greenery into our homes are truly endless, and HGTV's "Good Bones" stars Karen Laine and Mina Starsiak Hawk have shown us yet another unique and lively option. After purchasing a cheap duplex and renovating it for a client, the mother-and-daughter duo incorporated a DIY plant wall into the space using gridded planters filled with low-light indoor plants.
The project made for a one-of-a-kind accent wall that breathed life into the once-depleted area, with only a short list of materials and a few steps. The great part is you can do this accessible DIY right in your own home, taking design liberties that fit your décor and desired atmosphere. A plant wall won't just make for a stunning statement piece, but will also actively improve your air quality, making for an efficient way to add ample greenery to one room without overcrowding your table, counter, and shelving space.
What materials do you need?
As with any project, you'll first need to determine the materials required to complete the DIY. Laine and Starsiak Hawk used a short list of materials for their plant wall. Tool-wise, only a drill was necessary to secure the planters to the wall. When choosing which type of planters to use, the "Good Bones" stars selected a rectangular gridded planter with ten squares, but this is undoubtedly a flexible area. If you want something similar to Laine and Starsiak Hawk, Amazon has gridded planters with 12 potting pockets for $29.12. How many you'll need to purchase depends on the surface area of the wall that's being covered.
For anyone well-versed in woodworking, making your planters can take this DIY further and might be more cost-efficient. Even pallets could be used, and you may find some for free or cheap at local hardware stores. Regardless of what kind of planters you choose, they will need to fit measurements for your wall, and you will need a way to secure them. The mother and daughter team used wall brackets, similar to these from Amazon, to allow their plants to hang on the wall easily. Other than brackets, you could go for a more permanent placement option, such as drilling the planter directly into the wall if you have large enough screws like these from Ace Hardware. Lastly, you'll need to decide which plants you'd like to include on your wall, whether real or faux.
Building your plant wall
The first step to getting your plant wall together and hung is to measure your space efficiently. Before drilling into the wall, it's essential to know exactly where you'll be drilling and the necessary spacing based on the size of your planters. If you have chosen to use wall brackets, begin securing those into the desired place. Wall brackets are a practical option as they allow you to hang the planter on the wall and remove it when it comes time for watering and other care. But, it is still doable to drill the planters directly into the wall; just note that each plant will need to be removed individually for maintenance.
Once the wall brackets or the planters are in place and secure, you'll move on to arranging your plants. Laine and Starsiak Hawk used live greenery known to be resilient and do well in shaded conditions, but depending on the wall you've chosen, the possibilities on which plants to use are endless. Fake florals and plants are an excellent option for anyone who doesn't particularly pride themselves on having a green thumb or doesn't want to deal with the messier side of things that comes with live foliage. Don't be afraid to get creative with this DIY; there are infinite ways to make this project uniquely yours through tasks like painting the planters, adding lights, and selecting various voluminous and vibrant plants, which can always be switched out to fit new décor choices.