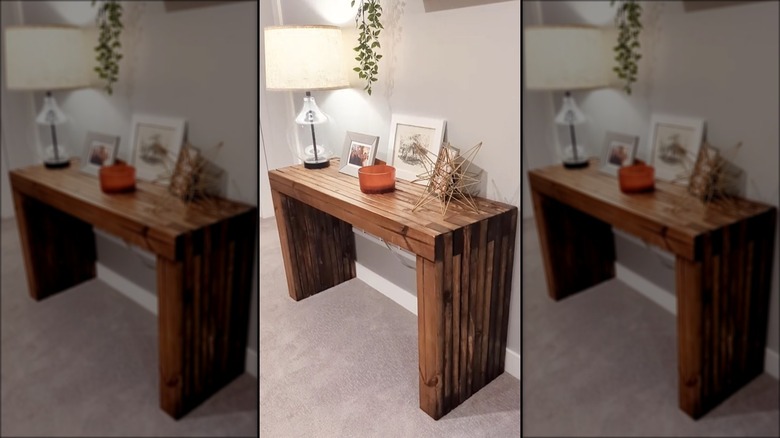
The Stunning Wooden Entryway Table You Can DIY With 2x4s
We may receive a commission on purchases made from links.
A quality entryway table can make your home's foyer stand out and help fully utilize your space, whether working with a tiny hallway or an ambiguous front room that doesn't get enough use. The entryway is the first area your guests see, and you want it to look nice, so it makes sense to aim for a quality table rather than a cheap plastic option that belongs strictly in the dorm room. But a nice store-bought table — like the Bridge Entry Console that retails at West Elm for $499 — isn't very accommodating to small budgets. If you're in the market for an attractive but inexpensive entryway piece, consider making one yourself with a few 2 x 4 boards.
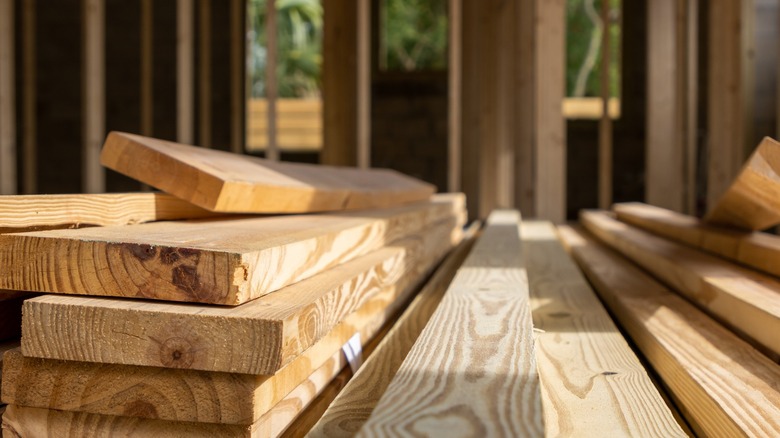
While the project might sound challenging for a woodwork novice, as demonstrated by TikTok user @therehablife, this wooden table idea is straightforward and beginner-friendly. By layering several 2 x 4 boards, you can create a sturdy, classic entryway table. All you need are the boards, which you can get from any home improvement store. Home Depot, for instance, sells 10-foot-long 2 x 4 boards for around $5 each. To attach the boards, you can use either an electric screwdriver and screws, like the BLACK+DECKER 4V MAX* Cordless Screwdriver with LED Light on Amazon, or wood glue, such as the Gorilla Ultimate Waterproof Wood Glue. Finally, get some paint or wood stain — Varathane Premium Fast Dry Wood Stain is a popular choice — to give your table an attractive finish.
How to DIY an entryway table with 2x4s
When DIYing an entryway table, your first step is to decide on the table dimensions. Remember, when you decorate a foyer, a table should be small enough to fit into the space but large enough to serve a functional purpose. Once you have settled on your desired dimensions, you can determine how much wood you need.
If you want to use the layering method demonstrated by @therehablife, you need to think in units of 2 inches rather than 4 inches when counting how many 2 x 4 boards you require for your table's width. For instance, if you want a table that's 12 inches wide, you'll need six layers of boards. In terms of the length of your boards, you need to account for both the desired height and length of your table — in the case of the 12-inch wide table, you'll want six boards that are the desired tabletop length and 12 boards that are the leg height (six boards for each table leg).
You can begin constructing the entryway table with all your boards cut to size. @therehablife uses an electric screwdriver to attach the wooden boards to each other, but if you don't own an electric screwdriver or aren't comfortable using power tools, wood glue can also work. Set the first layer, connecting one longer tabletop board piece to two leg pieces. Continue stacking these layers until you have the table size you want.
Customize your DIY entryway table
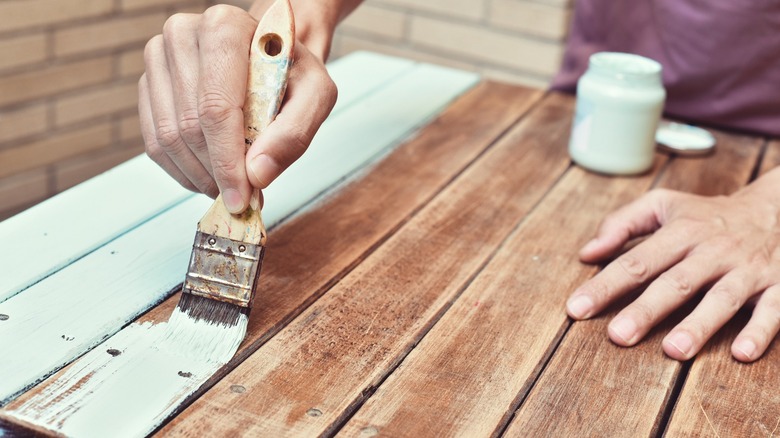
There are several ways to spruce up your DIY table. After constructing it, finish the wood with either a wood stain or paint. Lightly sand down uneven board sections, then go in with your finishing coat. A wood stain is preferable if you like the wood aesthetic and want that natural texture to shine through. On the other hand, you can mask the layered style of your table with a coat of matte paint. Whether you paint or stain the wood, treat the underside of the table, as well — unfinished wood peeking out from the bottom is a dead giveaway for a DIY piece.
Alternatively, if you don't like the look of the layered boards, you can also construct your table by making three boards (a tabletop and legs), using the 2 x 4s as planks. It takes a little more technical skill to ensure that the table balances, as the leg pieces will be quite narrow in relation to the tabletop size. Moreover, since this table style will be less thick than a layered method, you'll also need to be mindful of how much weight it can support. If you like your entryway table to regularly serve as a catch-all for keys, coats, and groceries, this might be a riskier choice. Once you've completed the project, you can begin the fun task of decorating your console table.