12 Reasons Your Houseplant Leaves Are Turning Yellow & What To Do About It
We may receive a commission on purchases made from links.
Raising indoor plants is a great way for people from all walks of life to reconnect with nature and boost their interior design. Anyone can raise a thriving indoor garden with a little knowledge and careful handiwork. Plants are self-sufficient for the most part but do rely on people in some ways. Their owners are responsible for providing the right environmental conditions and occasional water and nutrition they need to survive.
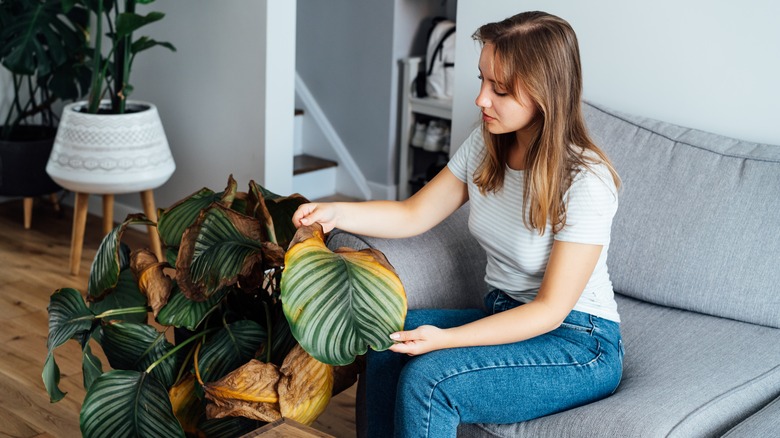
Since they are living things, plants are vulnerable to improper care-taking and poor indoor climates. It's important to keep an eye on them, watching for signs that they might not be as healthy as you think. One of the most noticeable symptoms indicating a problem is when plants start yellowing. The proper term for this condition is chlorosis. It can occur at any time of year for a number of reasons. Being able to diagnose why your plants' leaves are turning yellow will help you raise healthier, stronger plants.
There is too much water and not enough drainage
Over-caring is one of the leading causes of dying houseplants. Many new plant owners mistakenly water their plants too much and too often. Ironically, when plants are overwatered, they exhibit symptoms that look like dehydration. Their leaves turn yellow and wilt, eventually crumbling into a dull brown color.
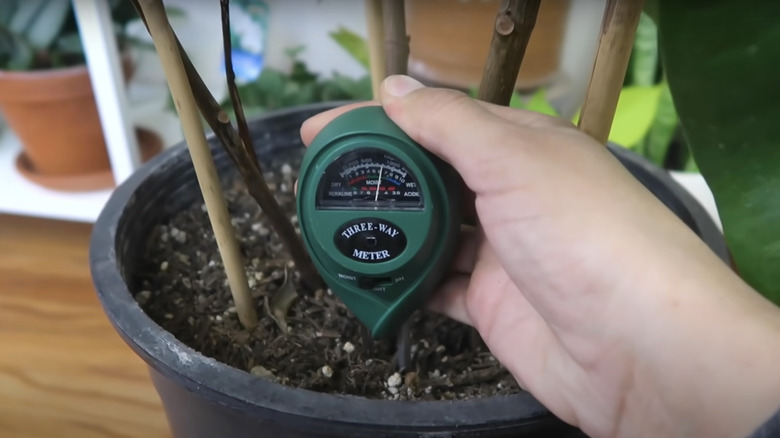
Before you rush to water seemingly thirsty plants, perform a touch test on the leaves and soil. Limp leaves and mushy soil indicate overwatering is the problem, and it's time to start emergency damage control. If your plant isn't in a pot with proper drainage, find a terracotta pot with a hole on the bottom. Terracotta naturally absorbs excess water, while the drainage hole also removes extra water.
To avoid overwatering your houseplants, don't water your plants again until the first two to three inches of soil feels dry. If you don't trust your own observations, buy a soil moisture sensor meter for only $12.99 on Amazon. Keep in mind that monitoring the first two to three inches is a general rule for most houseplants. You should look up watering instructions for the specific plant species in question because different types prefer different conditions.
Waterings are too infrequent, causing dehydration
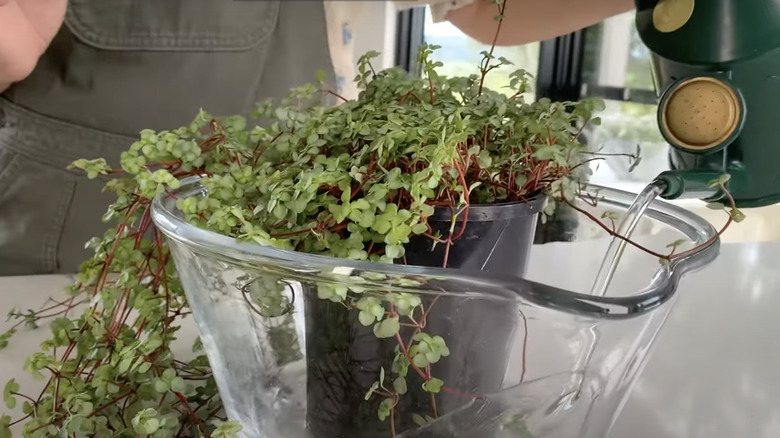
Just as over-care can lead to your plants' demise, so does neglect. Under-watering also causes plants to turn yellow, though the leaves feel dry and crumbly to the touch rather than soft. They won't be yellow for long before turning brown and withering away.
Reviving your plants is possible, though the smaller they are, the easier they are to bring back. If you can carry your plants by hand and they're in pots with drainage holes, leave them in their containers throughout this action plan. Fill a bowl with distilled, room-temperature water and submerge the bottom of your plants until bubbles stop rising. Take them out and let them drain fully in the sink or tub before returning the pots to their designated places. Check up on the plants every week and make sure you're watering as soon as the first two to three inches of soil get dry (unless your plants call for different care instructions).
Larger plants are trickier because they are more difficult to maneuver. You'll need to move their pots to a bathtub or outside and water them from the top several times. Break up the surface soil as you water to ensure the soil and roots are fully hydrated. Let the plants drain fully before moving them back to their original position and performing the same check-up process as you would with smaller plants.
There's a vital nutrient deficiency
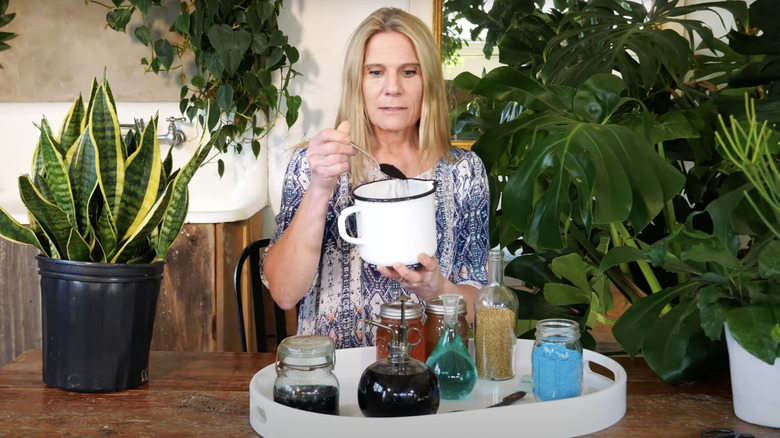
Water isn't the only thing houseplants need; they also require nutrients in the form of fertilizer. Fertilizers contain a ratio of nitrogen, phosphorous, and potassium (NPK) mixed with filler to provide sustenance for plants. When you forgo NPK or use the wrong ratio for your plant species, their leaves turn pale, and their flowers drop.
The solution is pretty straightforward: you must start fertilizing your plants. Make sure you buy the right nutrient ratio, as houseplant species have different needs. Do an online search or use Down to Earth's fertilizer guide to determine the type. Follow your liquid or granular fertilizer instructions, and apply it to plants immediately. Since liquid fertilizer needs to be diluted with water, it's recommended you use this fertilizer while watering your plants. You should also water granular fertilizer after sprinkling it in your soil to jumpstart the breakdown process.
Too much fertilizer is causing burnout from the roots to the leaves

A fertilizer dilemma can go both ways, much like over- and under-watering. Plant leaves may also turn yellow because they are getting too much fertilizer. You may notice a thin crust on the soil surface and that the lower leaves are the first to change color and wilt. Slowly, the decay will spread up the plant unless you take immediate action.
There are two ways to solve an over-fertilization crisis. You can change the soil by repotting your plants, or you can soak them in water to leach out the excess nutrients. Once you water down the fertilizer or the plant is sitting in a new home, be wary with applications in the future. Always ensure you use the recommended amount according to the back of your chosen fertilizer brand packaging.
Drafty temperatures are impeding health
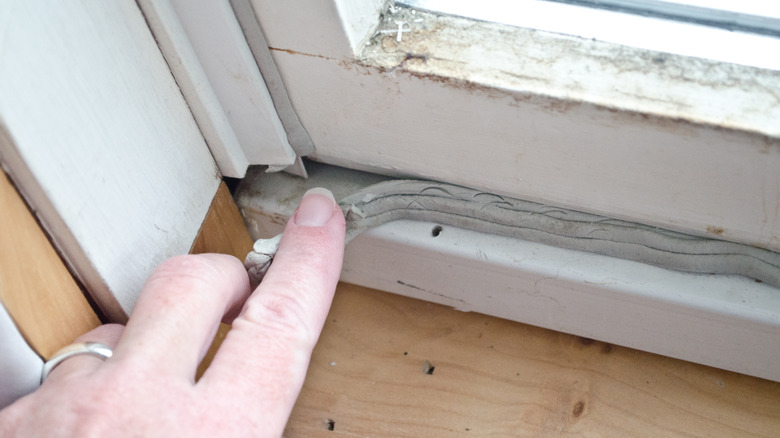
No matter how adept your watering and fertilization skills are, putting your plant in the wrong spot can put all your hard work to shame. Placing your plants near a certain window, radiator, air vent, or other spot with potential drafts may cause chlorosis. Even if you maintain your home at a moderate temperature year-round, these spots are subject to cold or hot gusts that harm plants.
It may only be during certain times of year, such as the middle of summer when your AC is on high, or in the dead of winter when your furnace works overtime, but you should move the plants away from these vents if they are visibly affected. If you suspect a window plant is experiencing drafts, you can move it to another window or make some exterior repairs.
Use rope caulking, window inserts, or innovate with bubble wrap to cover the gaps in your window. Do not invest in thermal curtains or anything opaque that could block the sunlight coming through your windows, as this can lead to a whole other problem. The three mentioned solutions should keep air from leaking and put a stop to your plants' failing health.
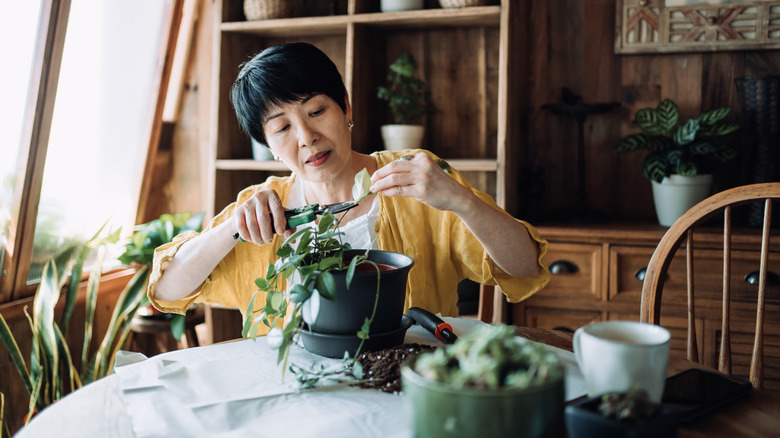
Plants are root-bound and need new pots
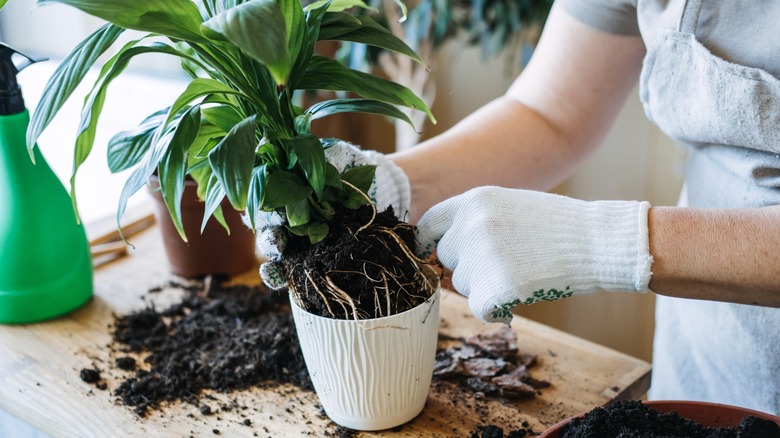
Repotting isn't only a solution for over-fertilizing or over-watering. If you've done well at raising your plants, they should grow throughout the year. Over time, they naturally outgrow their pots. If you gently turn your pot sideways and pull the plants from their pots, the roots may be compacted or grow out of the drainage holes. If they've been too large for their homes for a while, the leaves will show their unhappiness.
The good news is, rootbound plants just need to be given a larger pot and some fresh soil. Purchase larger pots, fill them with the proper potting mix for the type of plant you're growing, and place your plants in their new receptacles. Make sure to water thoroughly and fertilize if you're due for their monthly or bi-weekly fertilization. The plants may suffer minor transplant shock initially, but if you repotted them correctly, they will bounce back in the coming weeks.
Barriers are blocking proper sunlight
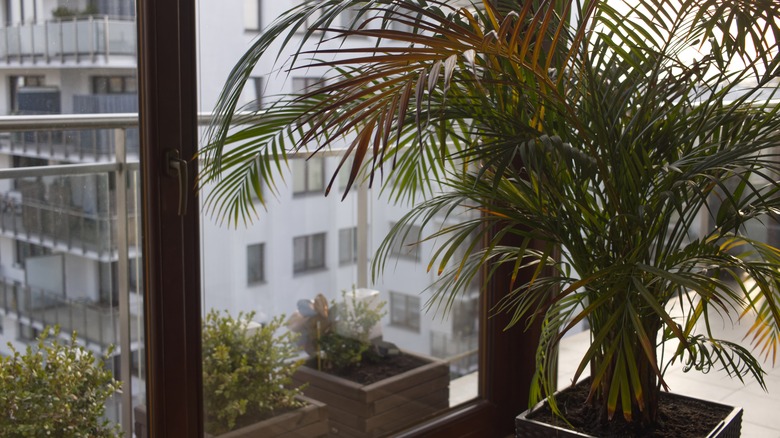
One of the most important assets to healthy plants is receiving full or partial sunlight throughout the day. No plants can thrive without sunlight to some degree. If the leaves are losing their lush green or other vibrant coloring, it may be due to a deficient amount of light.
A west- or east-facing window is best for growing plants, as these windows receive the best natural light throughout the day. South-facing windows are bright, too, but the light can be too intense for many houseplants. Aside from choosing the right location, you should also double-check that nothing outside the window is blocking daylight. Tall buildings, trees, bushes, and other outdoor obstructions may filter the natural sun, meaning plants aren't getting enough. You'll need to move your plants to a window that promises better lighting conditions. If you don't have any other options because of your location or home setup, you can purchase grow lights at Home Depot to provide this missing resource.
Intense sunlight is too much for shade-loving plants
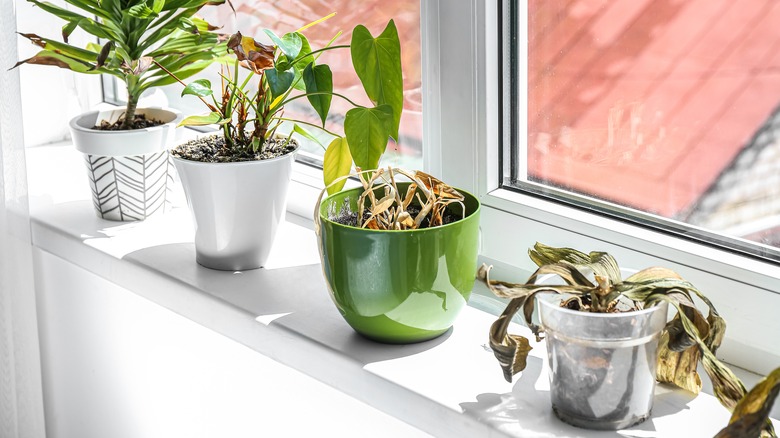
While the sun is vital, many plants prefer filtered or indirect sunlight as opposed to full brightness throughout the day. Common beginner species like snake plants, ZZ plants, peace lilies, and parlor palms are especially resilient in places that many other plants wouldn't tolerate. North-facing windows or windows that are semi-blocked by outside obstacles may be ideal for these plants.
Unlike other species that prefer the sun's full heat, these plants are more susceptible to sunburn. Excessive sunlight bleaches the leaves, turning them a light yellow and eventual white color. Remedy this by moving them slightly out of the way of the window. Don't do anything to obstruct your window unless all plants in the vicinity are suffering from excessive sun. If you put up shades or lower your blinds for part of the day at the behest of shade-loving plants, you could harm the plants that were thriving in full sun.
A viral infection has taken hold

Infections are usually a result of one of the above issues. When plants are weakened due to improper lighting, watering, nutrition, or environmental conditions, they are more susceptible to diseases. Chlorosis is one of the most visible signs that viruses have taken hold of plants, and it'll appear in lines, splotches, or rounded patterns.
Fungus, bacteria, and pests are all carriers of common diseases like root rot, powdery mildew, stem cankers, and Botrytis blight (gray mold). Treating these infections requires different courses of action, but you must begin by removing the cause of it all. Repotting, applying fungicides or pesticides, and changing your houseplants' conditions and locations are always the first steps. You should always quarantine the affected plants away from those that still seem healthy, since these viruses are contagious. Continued care and prevention techniques vary depending on the disease at hand, and you can learn more about specific courses of action at the University of Maryland's online resource.
A pest infestation is feeding on their sap and destroying their means to live
The most common cause behind an infection or disease is a pest infestation. Unfortunately, even indoor plants aren't safe from insects that slip through the cracks and gaps in your home. These bugs feed on the stems and undersides of leaves, leaving yellowing, wilted leaves and enlarged holes in their wake. The longer an infestation is left untreated, the worse it gets, and the worse physical symptoms appear.
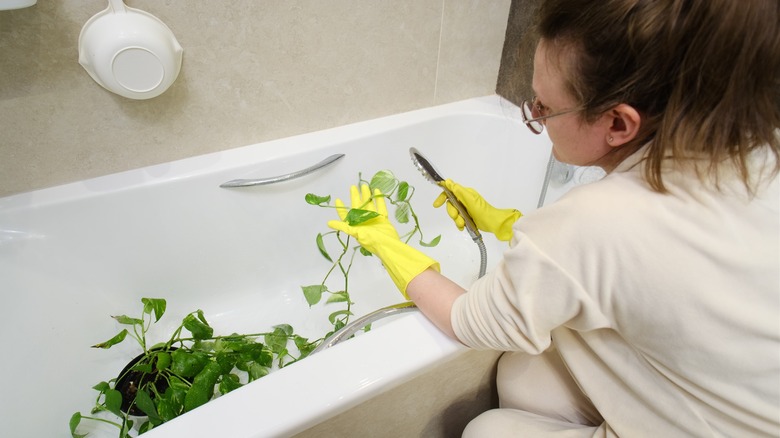
Insects like aphids, mealybugs, and scale suck nutrients out through plant sap, making them common causes behind chlorosis. Removing bugs may take one or a combination of home solutions to work. You should rinse your plants in a bath or sink to wash away most of the bugs, but you should also go over the infected leaves with a cotton swab soaked in rubbing alcohol, generic vegetable oil, or neem oil.
This eliminates bugs for now, but there's no guarantee they won't return. You'll need to keep up with preventative measures to deter them. Moderate your watering, quarantine new purchases, and rinse down plants twice per season in the bath or sink.
Leaves only live for so long and eventually fall as plants mature
Aging and dying is a natural part of life for plants and animals alike. When mature plant leaves brown, detach, and drift into the soil, it doesn't always indicate an underlying issue. If there are no other issues or symptoms afflicting your plants, consider that the leaves may have run their course.
The founder of Green Piece, Maryah Greene, told Mind Body Green, "I like to equate it [yellow leaves] to shedding hair," comparing it to how hair naturally gets split ends, and all it takes is a trim before it grows back longer than before. Remember that this potential reason is only ascribed to fully developed leaves. If smaller leaves or new growths on the ends of the plant stems are the ones succumbing to chlorosis, it's unlikely that old age is the only culprit.