Genius IKEA Pax DIYs That Will Change The Way You Design Your Space
We may receive a commission on purchases made from links.
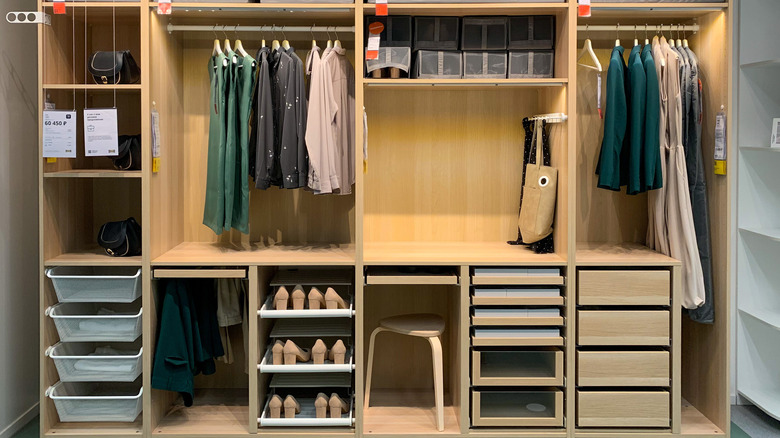
The IKEA PAX wardrobe system is one of the Swedish retailer's top sellers for a reason. All over the internet, you will see DIY creators, lifestyle influencers, and regular people alike, raving about how the PAX transformed their space. From creating a closet space that wasn't there before, to improving an already existing closet, the PAX is a customizable, organizational powerhouse. IKEA even offers the online PAX planner, which allows you to map out your interior layout to function exactly how you need it to.
When it comes to the PAX exteriors, there are several IKEA-made door styles to choose from. However, there are endless DIY ideas for designing your PAX exteriors as well. Whether you're sprucing up the PAX doors you already have, or deciding whether you need a more robust reconfiguration, we've compiled some of our favorite online tips and tricks for putting a unique spin on your PAX. Keep reading to explore ways you can make your PAX feel just as "you" on the outside as it does on the inside.
Install unique hardware flawlessly
Install new hardware on your PAX with this foolproof technique. Apply tape to the back of your hardware, and poke a hole through the tape where the screw holes are. Place the tape where you want to install the handles, drill holes directly through the marks, and repeat on the other door — using a level to ensure symmetry. IKEA has its own selection of cabinet handles and pulls to choose from, but you can use this hack to install hardware from any retailer.
Use peel and stick wallpaper for a custom look
To elevate the look of your PAX wardrobe, use peel and stick wallpaper. Starting in an upper corner of the wardrobe, apply the paper and slowly peel off the sticker backing. Use a smoothing tool (like this one from Zinsser) to eliminate bumps and create a seamless application. This DIY from The Crafted Life shows the wallpaper being applied to the back interior surface of the PAX, but you could just as easily apply it to the exterior surfaces. Try out contrasting interior and exterior patterns to make your PAX really pop!
Paint your PAX to last
To paint your PAX the perfect color for your space, lightly sand the surface, then follow with a high-quality primer and a couple coats of your desired paint. Because the PAX is made of melamine material, it's important to create a surface texture that allows paint to adhere. While sanding the PAX will help to prep the surface, an incredibly strong, adhesive primer is equally important. Many DIYers swear by the Zinsser Shellac Primer for IKEA projects because of how well it preps the pieces for painting. Try applying Polycrylic topcoat to seal the deal.
Use mirrors to open up your space
If you're looking to bounce more light around your room, consider adding a chic paneled mirror on the doors of your unit. You can either get mirrors cut to size for the BERGSBO doors' recessed panels and use mirror glue to adhere them, or, for a more budget-friendly alternative, opt for adhesive mirror film or frameless mirror tiles, like these from Ruomeng. Another tip: You don't necessarily need to have the BERGSBO doors to execute this DIY. Evenly space out mirror tiles on the flat FORSAND doors for a similar effect.
Use molding to create a timeless design
This DIY from Mallory Fletchall of @reserve_home uses decorative trim, miter shears, a nail gun, primer, and paint to create picture frame molding on the doors of the PAX unit. To save yourself the use of a nail gun, you may consider using a product like Liquid Nails to secure the molding. You can also find miter shears at any home improvement store, or Amazon, for a reasonable price. Want to simplify this project even further? Try using adhesive molding to achieve this traditional detail.
Create a finished look by hiding adjustment holes
This is a great hack, especially if you have a PAX without doors and want to clean up the look. Once you decide where all of your shelves, drawers, and other accessories go in the PAX, use the VARIERA cover plates to fill the unused drill holes. Should you ever decide to reorganize your PAX's interior, you can very simply remove the VARIERA covers by sliding a thin edge behind the plate to loosen them. The top of a flathead screwdriver bit or even a sturdy business card should do the trick.
Hang a curtain in lieu of doors
To try out this project, install a rod and curtain in front of your PAX. If you're not up to mounting a curtain rod directly to your walls, you can use a couple of variations on this hack instead. Employ a KOMPLEMENT clothes rail installed at the top of the wardrobe to act as a curtain rod for each individual PAX unit, or, for an even more simplified curtain install, just purchase a tension curtain rod.
Create a walk-in closet of your own
If you have a large, flexible space that doesn't have any closet storage, you may be able to try out this smart DIY from lifestyle blogger, Mirjam Hart. Create a custom walk-in closet by placing parallel PAX units facing one another. You can install curtain rod brackets to hang a macrame tapestry like this DIY suggests. But, you can also use a tension rod and any other kind of curtain as a substitute. If you like the macrame style, check out this textured curtain option available at Target.
Make your PAX look like a built-in – without specialty power tools
To get the coveted built-in look for your PAX, start by measuring the dimensions of your PAX base and have the wood and MDF boards cut to size. Build your platform, prop your PAX wardrobe on top (with some help), and finish by hiding gaps around the unit with more MDF boards and paint to match your surrounding walls. Retail giants Lowes or Home Depot will often have wood cutting services in-store, so you can execute this PAX project without the hassle of complicated power saws.