Propagate Spider Plants The Right Way With These Essential Tips
As most gardeners are aware, houseplants can help keep us healthy. One indoor plant that seems to have superpowers of its own is the gorgeous sprawling spider plant. Believe it or not, the leggy plant is sometimes left in hospital rooms to help patients heal faster. And it also has an incredible capability to purify air indoors by absorbing harmful chemicals like formaldehyde. Given this, it goes without saying that you can benefit from having more than one of them around. In fact, you can multiply your collection rather easily by propagating the spider plants you have at home.
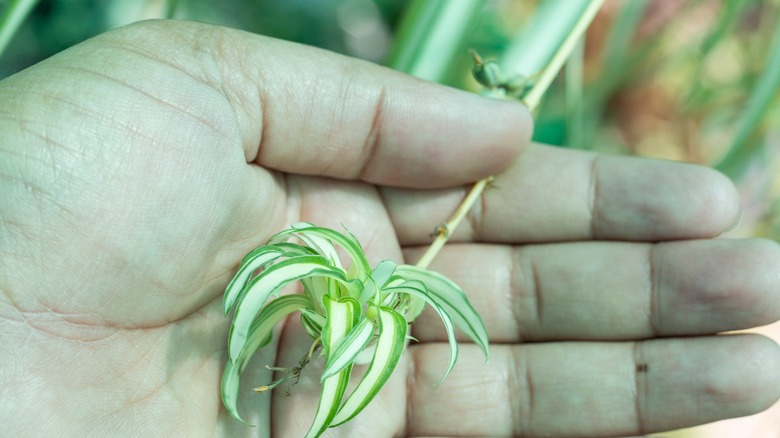
The best time to propagate a spider plant is during the active growing season which is typically spring to early summer. This is when the plants are at their strongest and have a greater chance of survival. The parts of the plant you will want cuttings from are the spiderettes, which are the offspring of the spider plant. The wiry stems can be found on the inner core and tend to hang lower than the rest of the plant. There are a few easy and effective ways to propagate them — you can directly plant the spiderettes in soil, or you can root them in water first.
Place spiderettes in a glass of water
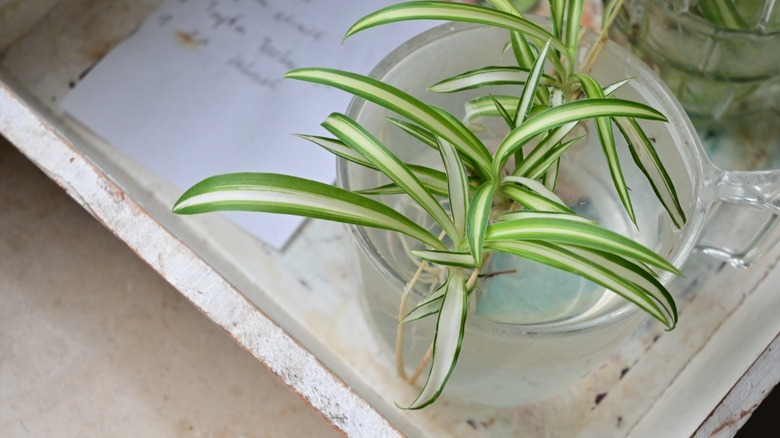
Rooting spiderettes in a glass of water can be fun and educational to watch. Although it is not a necessary step you have to take, some plant enthusiasts choose this route to watch the roots grow. To start, you will want to fill a jar with room-temperature water. Then, use clean garden sheers cut the spiderettes from the parent plant. Once cut, place the spiderettes in a jar. Make sure the water only covers the bottom of your cutting and does not touch any of the leaves on top — one helpful tip is to let the leaves naturally droop over the top of the container.
For optimal growth, place the jar near an east-facing window with indirect sunlight. You will want to leave your spiderettes in the container for about two weeks and change out the water when it starts to look dirty. When you notice the spider plant babies developing roots, that's a good indication it's time to transfer them into a small planting container. A 4-inch pot with draining holes is ideal if it's filled with well-draining potting soil. Keep the soil moist daily and enjoy watching your spiderettes grow.
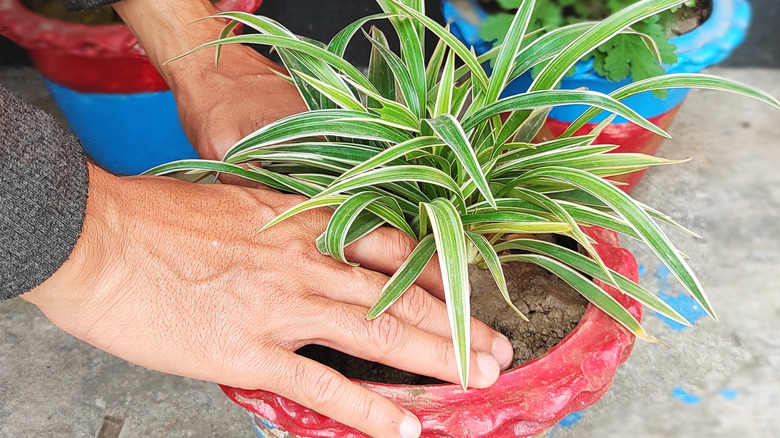
Cut spiderettes and place in soil
Another propagating method that's a lot easier is growing spiderettes directly in the soil. After cutting them at the stems, examine the base to make sure they have roots. At this point, you can dip the roots in a rooting hormone to encourage faster growth, or you can choose to do without it. After you have poked holes into the soil with either a pencil or your finger, place the spiderette roots in the holes and let them settle in. It is recommended to water your spiderettes with a spray bottle about once a day to keep the soil moist but prevent it from getting soggy. If you notice new growth, that usually means your plant has rooted, so you can transition to watering your spiderette like a young houseplant.
And lastly, you can try the division propagation method. This only works for larger spider plants that have outgrown their pots — it involves separating the plant into different sections and planting them in fresh soil. Whichever propagation method you choose, you will need to repot the plant as it grows. Keep in mind that there are fundamental steps to grow and care for a spider plant so that it thrives — for example, it cannot tolerate temperatures below 50 degrees Fahrenheit.