How To DIY A Stunning Waterfall For Your Outdoor Space

We may receive a commission on purchases made from links.
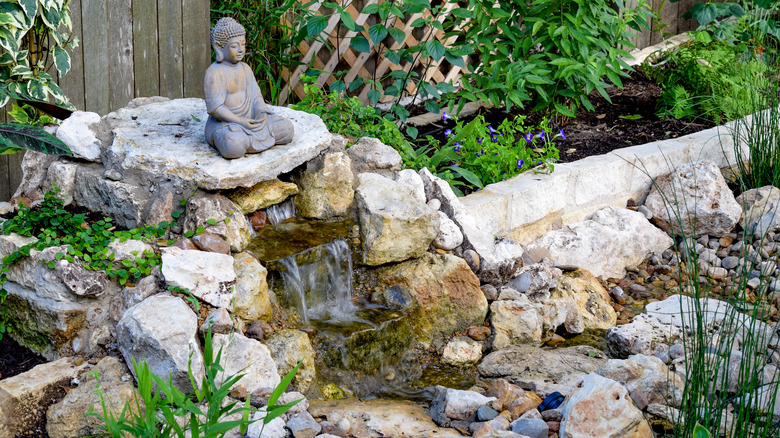
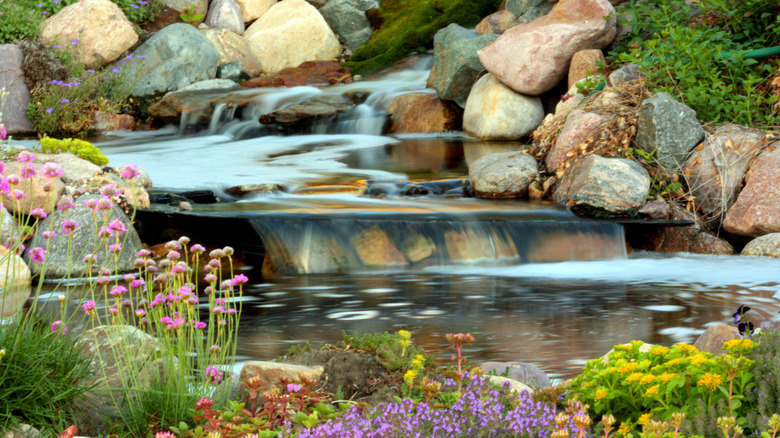
If you're looking to transform your backyard into a relaxing oasis, this waterfall DIY will create a stunning fixture for your space. Whether you already have a pond on your property or not, you'll be able to create a small waterfall that will produce relaxing sounds and provide a more natural-looking bath for birds. This project is easier to do in an area of your yard that has a slight incline, but could be possible anywhere if you're willing to move dirt or sand to make a small hill for the water to flow down.
This DIY is very customizable and versatile, allowing you to design your waterfall to fit and match your outdoor space. By stacking stones, you can make a beautiful, simple waterfall to make your outdoor space more peaceful. The natural appearance of this design will enhance any yard, and can be decorated to match your current aesthetic, whether that be an abundance of plants or some sparkly lights.
What products and tools you'll need for your waterfall

To prepare your yard for the waterfall, you'll likely need a shovel and some sand or dirt to manipulate the layout of the space. For the DIY itself, you'll need two plastic basins, a water pump and tubing, a liner, and flagstones. Depending on how much water you'd like to cycle through your waterfall, you'll need different-sized basins. This Streamlet 2.5-gallon preformed pond liner is $13 at Home Depot and would work great for the base of a small waterfall. If you want something larger, Lowe's has this MacCourt 9-gallon pond liner with a little spout for $30, which would help the water flow from the top of your waterfall.
Since flagstones can sometimes be pricey, you could also collect your own large, flat stones if you live in a rural area, or make your own from concrete. To create your own stones, you'll need a mold to make stepping stones, like these Walk Maker pathmate stone molds from Amazon, concrete or cement mix, a tarp, and possibly a trowel or something to smooth the concrete.
How much DIYing a waterfall will cost
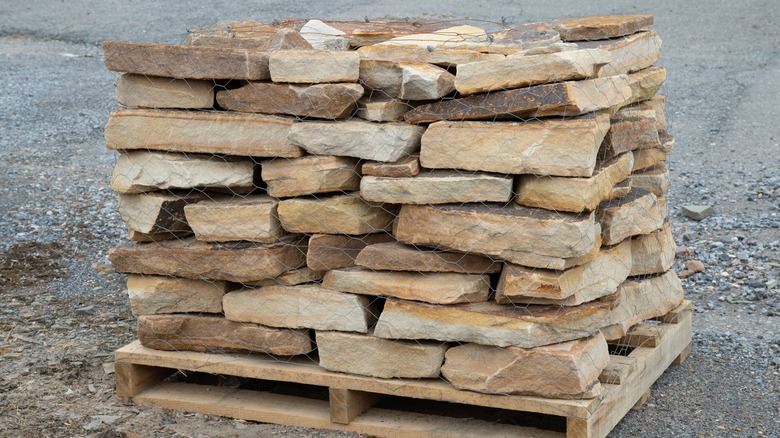
The cost for this project will vary depending on the supplies you choose, especially the stones, though it will likely be a few hundred dollars minimum. For those who want flagstones, they are sold at hardware stores but often in pallets, like this Storm Mountain natural flagstone pallet for $900 at Home Depot. You could choose to buy individual stepping stones, such as this Venetian gray natural sandstone ($17 per stone at Home Depot), though this will also get pricey if you're using a large number of rocks.
Alternatively, looking at sites like Craigslist and Facebook Marketplace could help you find stones for a better price, or you could ask local landscaping companies if they have any stones on sale. Choosing to make your own concrete stones could also drive down the price. At Home Depot, an 80-pound bag of Quikrete concrete mix is $6 and the mold mentioned previously is $20.
For those who want a larger waterfall, bigger preformed basins will run up the price. For example, this Aruba 50-gallon preformed liner is $103 at Home Depot. The rubber liner needed for your water feature could end up being over $50 or $100, depending on the size, but Amazon has this 10-by-13-foot liner for $40. Other necessities, like play sand ($7 at Lowe's) and dirt, aren't expensive but will add to the total cost of the project, especially if you need a lot to cover the area.
How difficult it is and how long it will take
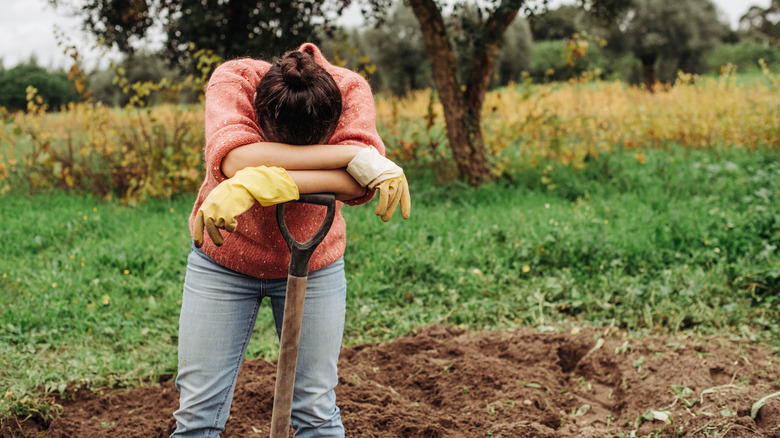
This is a fairly simple project that could be completed in as short as a day if you're already DIY savvy, but it may also take a few days for someone with less experience. Depending on where you decide to place your waterfall, you could end up spending more time excavating your yard. For those that need to create an area with an incline for the waterfall, this project will take a bit longer.
Additionally, if you try to save money by making your own rocks from cement mix, this will add another layer of difficulty to the project. It will also increase the time it takes to complete your waterfall, since you'll have to wait for the homemade stones to dry and harden. While the project itself isn't overly complicated, it will require some manual labor, such as shoveling and lifting heavy objects.
Excavating and lining a spot for your waterfall
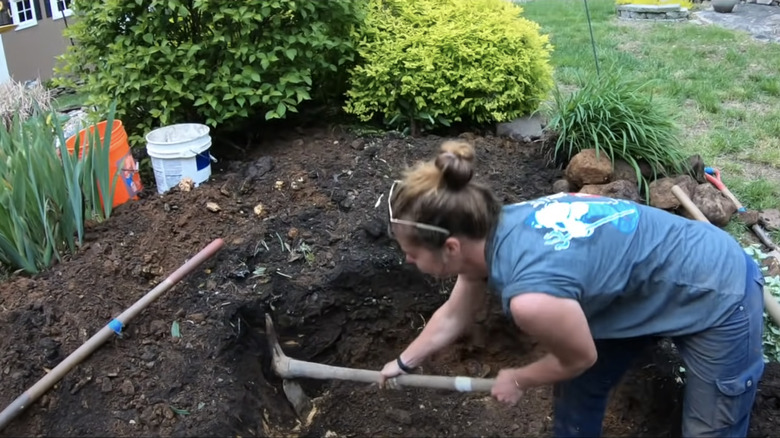
To start creating your own peaceful waterfall, you'll need to manipulate your land. This could mean digging out an area below a small incline to hold your bottom basin, or moving dirt to create a hill or change it so that your stones will fit securely. The area will need to have an indented space at the bottom for one basin, a flatter area at the top for your second basin, and then a sturdy slanted spot in between for your stones.
You can use a shovel to dig a place for your waterfall or relocate dirt from another part of your yard to fill in any gaps. Place your basins at the top and bottom of the soon-to-be waterfall to ensure they fit properly. If your basins are wobbly, try pouring sand around them so that they cannot move. Now, move your basins to the side and place a rubber liner over the ground, stretching from the top of your waterfall to the bottom. Not only will this help to keep your water free of dirt and debris, but it will also prevent the water from soaking into your lawn.
Getting stones for your DIY waterfall
Once your space has been excavated to fit your new waterfall, you're ready to put your basins back in place and start thinking about your stones. For those using flagstones or stones they've collected, you can try to visualize how to they will stack together best. Otherwise, they can be set aside until you're ready to construct your water feature.
If you're planning to make your own stones from concrete or cement mix, you'll need to do this first. Begin by mixing your cement following the directions.To make different colored stones or just a different color of concrete, hardware stores sell liquid concrete colorings that can be added to the mix. Pour your cement into the mold and then transfer it to a tarp to dry. You can run a piece of wood or a trowel over the wet concrete to level and shape it. These stones will likely need a day or two to harden, so it might be best to do this at the very beginning of your project.
Installing the water pump
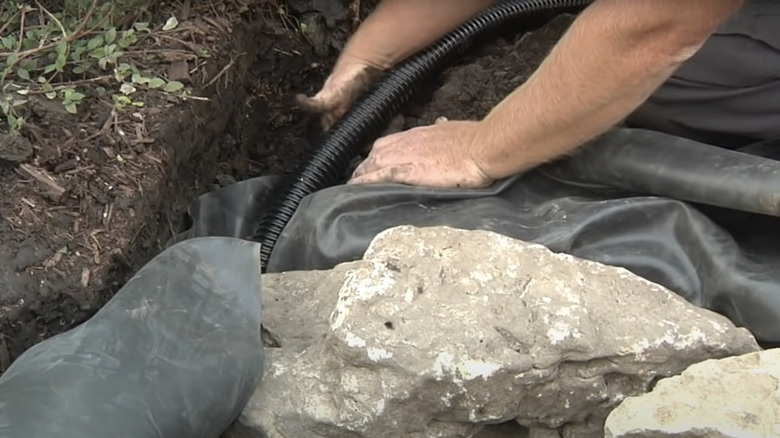
Before placing your rocks, you'll want to ensure your water pump is long enough to reach the top of your waterfall. A small pump, like this Pond Boss pump from Home Depot for $50 can be submerged in your lower basin, and clear vinyl tubing ($30 at Home Depot) can stretch from the pump to the top of your waterfall. Other types of tubing should work as well, as long as they are compatible with your pump. By setting up your pump and laying out the tubing before placing your stones, you'll be able to hide the equipment with the fixtures of your waterfall and make sure you have the proper sizing.
Building your waterfall
To start, make sure your preformed pond liners and your pumping system are properly in place. Using your stones, begin at the bottom of your slope and form a sort of staircase so that the water can flow easily from the top down to the bottom. You can wedge smaller rocks in between larger ones to provide more stability.
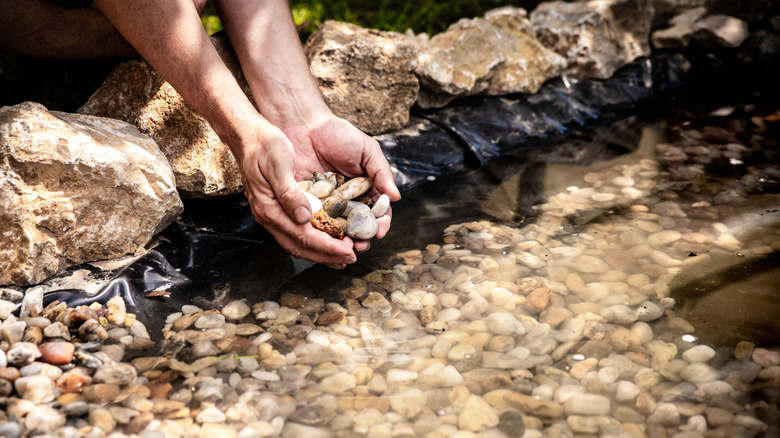
Depending on how far you want the water to drop, you could use more stones to create a gentle stream or you could try placing just a few bigger stones to have a more vigorous waterfall. As you lay your stones, try to hide the connecting tube under rocks. Placing some larger stones over your top basin and adding small rocks to the bottom pond liner will also help to make your waterfall look more natural and beautiful. If your liner sticks out from the waterfall after everything is in place, you could try to hide it with more stones or plants, or simply cut the edges so that it's less noticeable.
Testing and customizing your waterfall
After you've finished creating the structure of your waterfall, fill the bottom basin with water and turn on the pump. Allow the water to flow for a few minutes to see if it's rolling off the stones how you want. You can adjust the tubing or the stones slightly if it's not to your liking. When you're sure it's working well, you can add additional features to make your waterfall even more stunning.
To prevent the water in the small pond at the base of your waterfall from attracting mosquitoes, try adding a bird bath bubbler that will keep the water moving. Potted plants, outdoor lights, and pebbles can also be positioned around your waterfall to give it the perfect look. For those who want more elegance in their outdoor space, this DIY water feature will elevate your backyard.