DIY A Stunning Unique Wind Chime With Items From Your Junk Drawer. Here's How

We may receive a commission on purchases made from links.
Over time, drawers can become full of random objects that are no longer needed, especially if you're a crafter. Luckily, you can turn all of that junk into a beautiful DIY wind chime to decorate your outdoor space. Old keys, buttons, cans, safety pins, beads, washers, bottle caps, chains, soda can tabs, and jewelry are great options for your one-of-a-kind wind chime, but you can use almost any small objects that inspire you. Since this project is based on upcycling, search your home to find items that can make a clinking or tinkling sound, or just look pretty. Besides junk from your drawers, you'll also need craft wire to attach your knickknacks together and hang them from your base, and it might be helpful to have some jump rings.
For the base of your wind chime, you could use a can, a metal bowl, a cookie cutter with a handle, or even an old steamer or strainer. If you have any leftover paint lying around the house, this could be used to decorate your base. This project is extremely versatile, easy, and is a fun way to declutter your junk drawer.
DIYing the base of your junk drawer wind chime

Start by selecting your base. If you choose to use cans, such as empty tuna or soup cans, make sure that they are clean and that the edges aren't too sharp. Use a nail, awl, screwdriver, or a similar tool to poke a hole in the center of the bottom of the can so that you may hang it up when you're finished. You will also need to make small holes around the rim of the can, which will hold your chimes. This is a great way to make several small wind chimes. A soda can might also work, but you would need to cut off the top to be able to string your chimes through.
For those who want to repurpose an old stainless steel or aluminum mixing bowl, the process is similar. Create a hole in the bottom of the bowl for the hanger and several holes along the edge of the bowl. Since this base is bigger, you could also make more holes in the bottom of the bowl to have chimes that hang down from the center as well as the sides. For collapsible steamers or colanders, there will already be plenty of openings to hang your chimes and string on your pieces. If you want to paint your base, do this before attaching your chimes.
Making your unique DIY wind chime
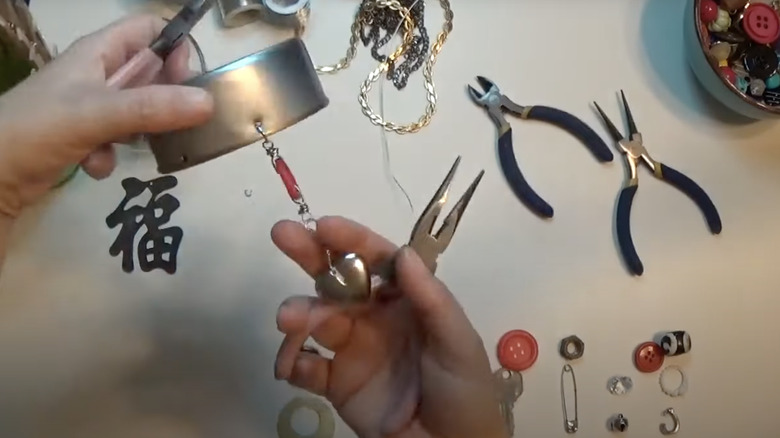
Once your base is prepped, you're ready to start constructing your chimes. Try laying out your junk to see which items you want to string together and in what order. Then, take your craft wire and begin inserting it into your pieces. If you're using objects like bottle caps, simply pierce a hole in it for the wire. You can twist the wire as you go to secure each object in its place so that they don't slide down once you hang them.
Jump rings (available in a 1,000-piece set for $10 on Amazon) can also be attached to each piece, and then thread the wire around the rings. These rings could also be used to make a cute chain for your chimes. Make sure to create a string of junk for each hole you made in your base, aside from the hole in the center to hang your chimes. Now, put the top of each wire through one hole in your base, twisting the end into a knot on the inside of your wind chime to hold it in place. You might also choose to put a jump ring into each hole and then attach each string of chimes to a ring. Finally, loop a piece of wire and put the ends through the center, twisting them together, and hang up your decoration. With this DIY, you'll create cute wind chimes to help you unwind when you listen to them clink.