Keep School Supplies Organized With These Genius Dollar Tree Storage DIYs
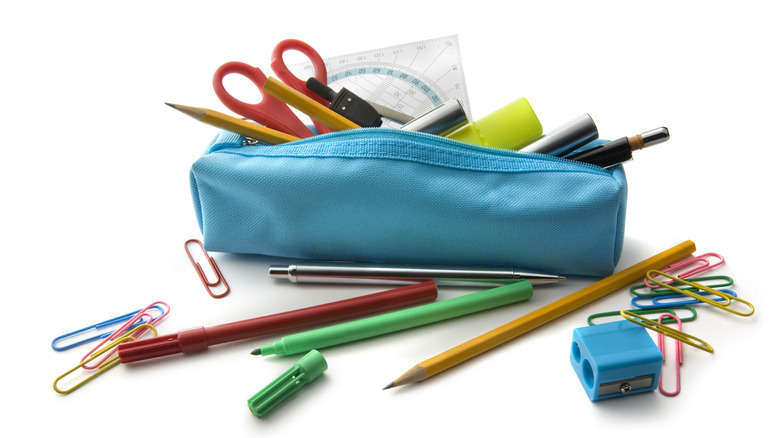
From Kindergarten through grad school, students need school supplies. Unfortunately, they sometimes end up in a jumbled mess, making it hard to find the right learning tools when you need them. To keep supplies sorted and readily accessible, you can DIY a few handy projects using inexpensive materials from the Dollar Tree.
We've collected 11 recommendations for DIY projects that enhance your school-supply organization. With a few simple items from the kitchen, office, and craft sections of Dollar Tree, you can have fun while you create practical storage solutions. Read on to learn how to make handy organizers for writing utensils, notebooks, school papers, and art supplies. With the help of hot glue, zip ties, and electrical tape, even a novice DIYer can transform simple Dollar Tree objects into genius storage options for school supplies.
Make a wall-hanging to-do list with storage for school supplies
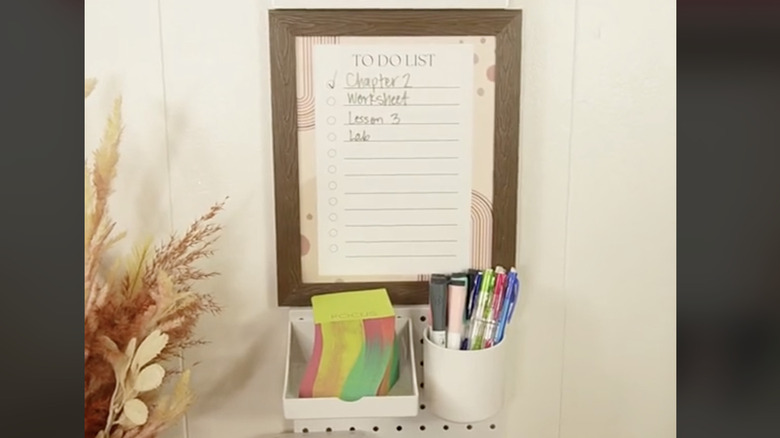
Keep track of school assignments with this wall-hanging unit made from Dollar Tree items. You'll need a 17.75-inch hanging wood plank, two square pegboards, pegboard hooks, pegboard shelves, one 8-inch by 10-inch picture frame, dry-erase markers, Krazy glue, and a "To-Do" list printed on 8-inch by 10-inch paper.
Insert the to-do list in the picture frame, and glue it to the middle of the hanging wood plank. Glue the pegboards above and below the frame, adding hooks and shelves for school supplies. Hang the unit on the wall, and use dry erase markers to check off your school tasks.
Use Dollar Tree supplies to create a DIY desktop organizer that revolves like a lazy susan
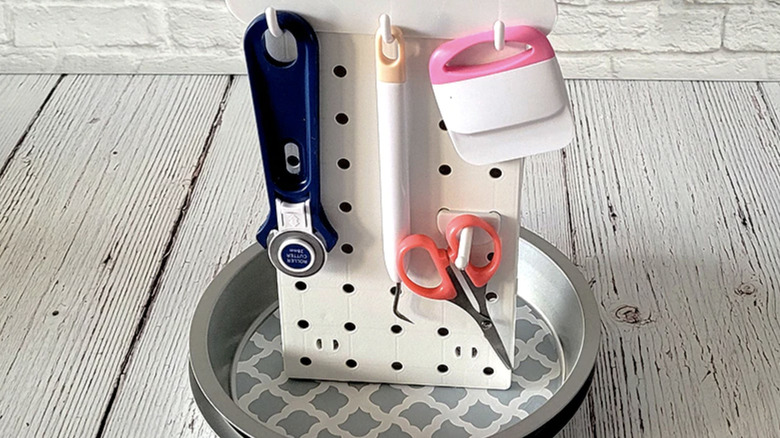
For this DIY, you'll need two tin cake pans, a roll of contact paper, a package of glass accent gems or marbles, two rectangular pegboards, packages of pegboard hooks and shelves, a hot glue gun and glue sticks.
Fill one cake pan with a layer of marbles or glass gems. Decorate the second cake pan with contact paper and place it inside the first pan. Glue the two pegboards together and then glue them (standing vertically) to the top cake pan. Attach the hooks and shelves for school supplies and then place the revolving organizer on your desk.
Create a desktop shelving unit from Dollar Tree items
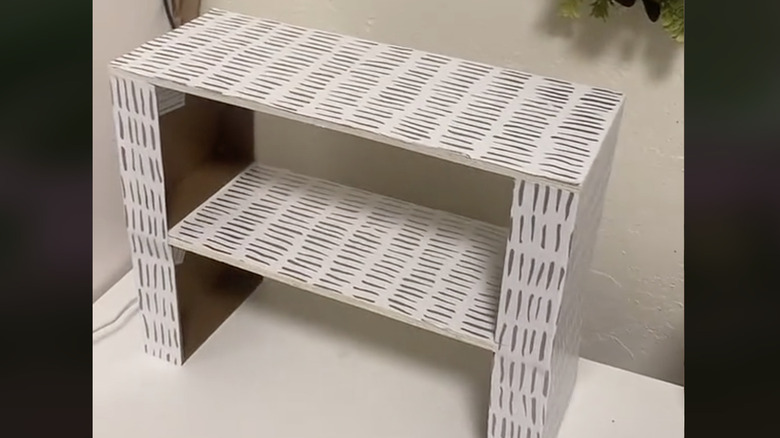
A small shelving unit that sits atop your desk provides storage space for school supplies. For this DIY project, purchase two hanging wall shelves along with four square decor signs, wood glue, a utility knife, and two packs of removable wallpaper.
Glue the decor signs, standing vertically, to the ends of the shelf boards. Cover the entire unit with the self-adhesive wallpaper, trimming the edges with a utility knife. Use the shelves to store notebooks, papers, writing utensils, and lightweight books. The unit would probably not hold heavy items.
Wooden boxes from the craft section of Dollar Tree join together to make this organizer for school supplies
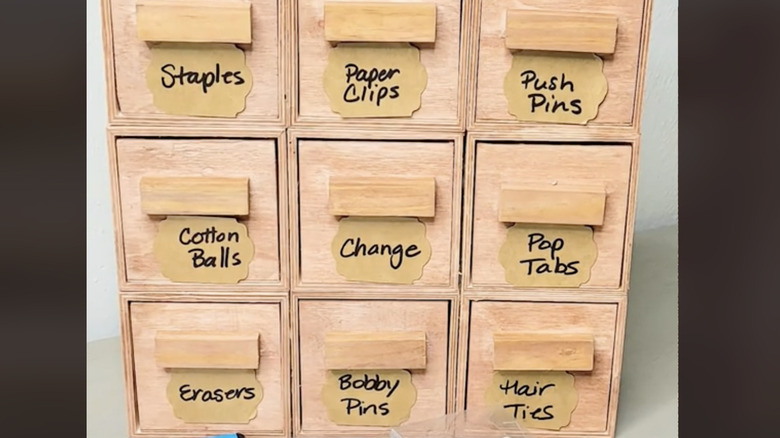
The small, wooden box-within-a-box item from Dollar Tree offers DIY possibilities to create tiny drawers for paper clips, erasers, pushpins, and other minuscule school supplies. You'll need nine boxes, a hot glue gun, hot glue sticks, craft clamps, wood stain or paint, a package of the tumbling tower game, and label stickers.
Hot-glue the outer boxes together in three rows of three each and secure them with clamps while the glue dries. Glue the wooden pieces from the tumbling tower game to create drawer pulls on the small box inserts. Stain or paint the entire unit and add drawer labels.
Use Dollar Tree items to DIY a charging station for laptops and tablets
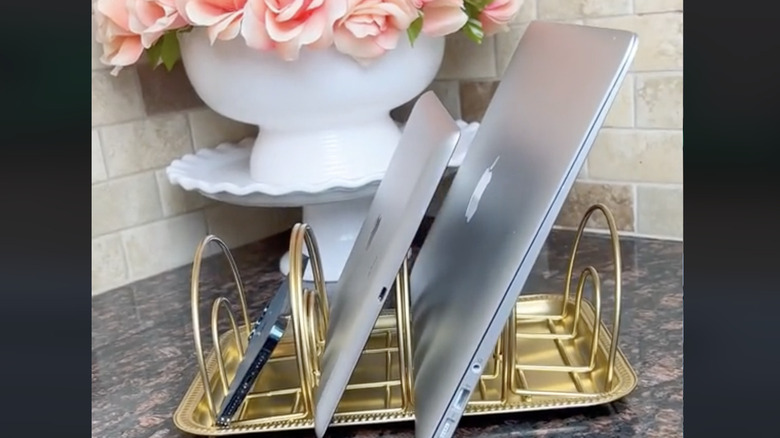
This Dollar Tree DIY will help you keep your desk neat while you're charging your electronic devices. You'll need four wire napkin holders, a metal serving tray, a tube of super glue, and a package of zip ties. Optionally, you might want to spray paint the charging station in a color that complements your decor.
Use the zip ties to join the four napkin holders, and then glue them to the surface of the serving tray. Spray paint the entire unit, if desired. Place it on your desk or a shelf to organize your electronic devices while they're charging.
Create colorful and fun pencil holders using Dollar Tree toothbrush holders
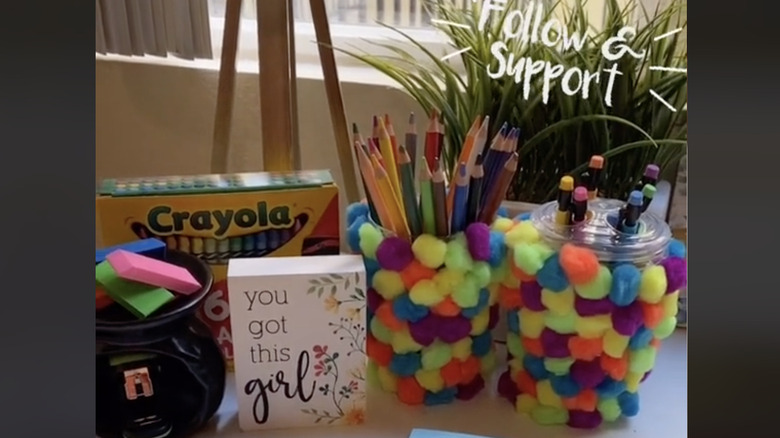
This is a fun craft activity that children would love, although an adult should wield the hot glue gun. Start with two toothbrush holders from Dollar Tree, two packages of multi-colored pom-poms, hot glue sticks, and a glue gun.
Apply the hot glue to the outside of the toothbrush holder, and attach the brightly colored pom-poms until the entire outside surface is covered. Use the holder with or without its lid as a receptacle for storing markers, pencils, pens, and paint brushes.
Hot-glue small plastic cups inside school supply caddies to organize your supplies
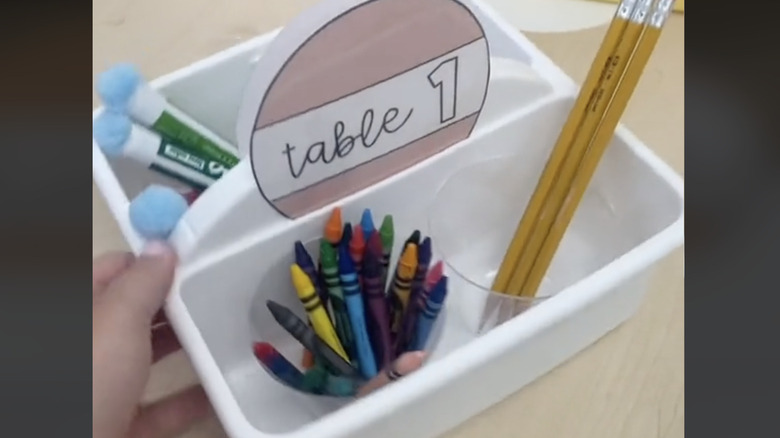
Small school supplies like crayons, pencils, erasers, and paper clips tend to fall to the bottom of storage containers and end up in a messy jumble. For this simple DIY, you'll need a small craft caddy from Dollar Tree along with a package of plastic tumblers, a hot glue gun, and glue sticks.
Simply glue two of the tumblers inside the large section of the craft caddy. Fill them with crayons and other school supplies to keep the items neatly separated. The plastic tumblers ensure that the supplies are within easy reach.
Use Dollar Tree trays and craft sticks to make a stacked tower for organizing and storing papers
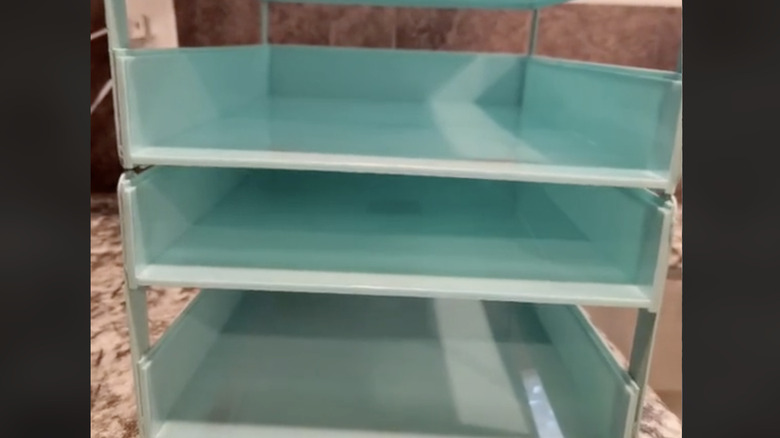
Flat letter trays from Dollar Tree make ideal organizers for school papers. But with flat tops, they don't offer much room for storing school supplies. To solve this problem, you can add craft sticks to elevate the trays. Along with the sticks, you'll need a hot glue gun and hot glue sticks.
Use hot glue to attach the craft sticks vertically at the corners of the trays. This hack will join them together in a stack while allowing enough room between the trays to store school supplies. Paint the craft sticks in a color that matches the trays.
Make a desktop organizer for notebooks, folders, and papers using simple objects from the Dollar Tree
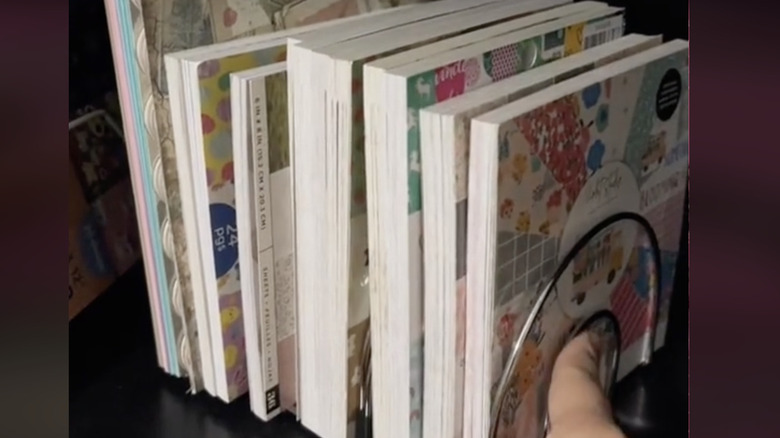
Here's a DIY project that will help you organize file folders, notebooks, and assorted papers that you might collect for schoolwork. Start with three Dollar Tree wire napkin holders and a roll of PVC electrical tape.
Place the napkin holders side-by-side, and use the electrical tape to join them securely together. This type of tape is strong and forms a tight bond when it's wrapped neatly around the wires of the napkin holders. Place the organizer on a shelf or desktop and use it to sort and separate your school papers.
With a few Dollar Tree items, you can DIY a bi-level organizer for pencils, markers, crayons, and paint brushes
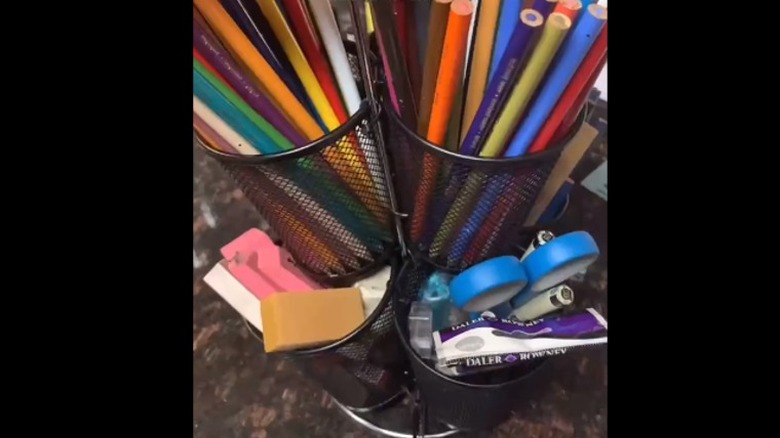
With this DIY project, you'll be able to corral your writing and drawing utensils into one neat organizer. You'll need one wire paper towel holder, six wire mesh pencil holders, and a package of zip ties.
Start by joining four of the pencil cups together with zip ties. Then, slide the connected cups down over the paper towel holder. Next, join the remaining two pencil cups to the paper towel holder with zip ties, creating an upper level for pencil-and-pen storage. If desired, you could spray paint the entire unit in a color that complements your desk accessories.
Fashion a wall-hanging bookshelf for notebooks and school books using a few Dollar Tree components

This DIY wall-hanging shelf keeps books organized and within reach for students. For little ones, you can hang it at baseboard height to make the books easily accessible. You'll need three wire napkin holders, a package of zip ties, and a package of self-adhesive hooks.
Place the napkin holders end-to-end and join them securely with the zip ties. Adhere the hooks to the wall in a desired location and hang the adjoined napkin holders on the hooks. This DIY makes a handy organizer that utilizes vertical storage space to keep lightweight materials at eye level.