TikTok Upcycles A Vintage Washboard To Add Rustic Charm To Bathroom Storage
We may receive a commission on purchases made from links.
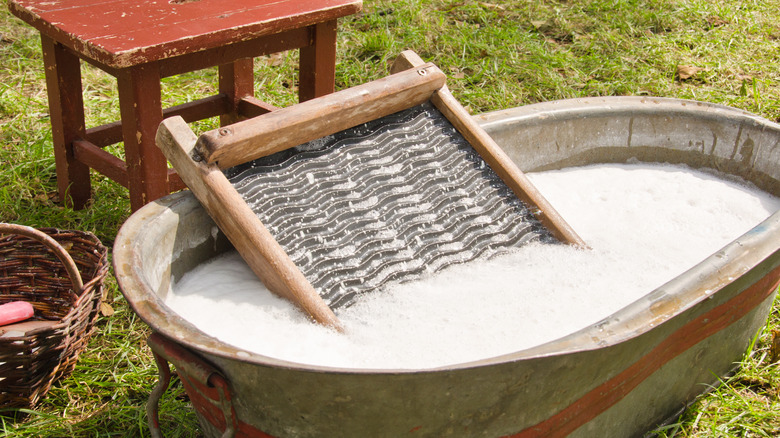
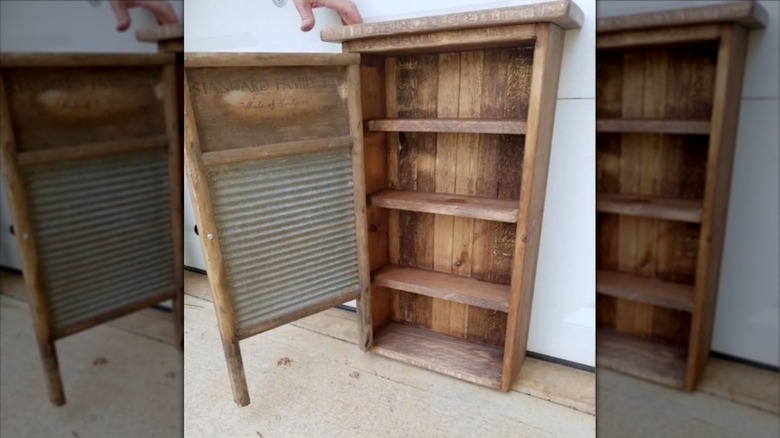
You may have spotted a vintage washboard or two while thrifting or antiquing. These items are a charming nod to the past and a definite sign that laundry today, tiresome as it may be, is much easier than it once was. As decorative pieces, these old boards — usually made out of wood, metal, and sometimes glass — contain an inherent beauty. Many are worn from years of use and even feature interesting advertisements or typography along the top. If you've ever picked one up but didn't know how to use it as a decorative element in your home, TikTok users like @josiemarieak and @lacinda_miller have the perfect DIY suggestion: Make it the door of a unique vintage medicine cabinet.
By building some simple shelves to size and mounting the washboard to the front, you create not only a perfect place for all your medicine cabinet must-haves but also a distinctive bit of vintage artwork. Glass washboards can be especially beautiful, and they allow you to partially see what's inside. Regardless of size, most washboards are open at the bottom, creating the perfect opportunity for an open bottom shelf where you can store items you want to keep visible. This is an easy, stylish way to create some additional storage while adding a dose of rustic charm to your bathroom.
How to make a vintage washboard cabinet
Start by measuring your washboard's dimensions, as this will determine the size of your cabinet's outer framework. You can either choose to keep the door recessed in the cabinet or have it overlap with the front edges. These choices will impact the cabinet's final size and determine whether you'll place your hinges on the front or side of the washboard. For a cabinet with a front-fitted door, build it using lengths of 1x4 timber that are equal in width to those of your washboard. For a recessed cabinet door, build the frame slightly larger to accommodate the washboard inside.
To build a basic, no-frills medicine cabinet, create a rectangular box for the sides and attach the corners with simple pocket holes. For the backing, you can either use individual boards nailed to the frame or add a sheet of plywood. Add your shelves inside using a ladder format and more pocket screws; if you plan to only store lighter items, you can simply use wood glue and finishing nails. Attach the washboard to the front of the cabinet using hinges, like this brass set from Amazon. Mount your cabinet to the wall by inserting screws through the back and directly into a wall stud. You can either stain your cabinet as desired to match your bathroom decor or leave it natural.
Customizing your DIY cabinet
This upcycled cabinet is perfect for small storage either over your bathroom sink or on a nearby wall, where it can serve as a discreet spot to stash small toiletries. You can also customize the cabinet's size by using larger cuts of wood, such as 1x6 boards; these will create a deeper storage area where you can keep larger essentials like shampoo bottles or extra toilet paper. If your washboard is glass, you can also install some tiny LED strip lights so you can easily find specific contents. This can also turn the cabinet into a charming nightlight.
While this DIY works well as a medicine cabinet, you can also use it in other spots throughout your home, like in the kitchen as a spice rack or in the laundry room as a space to keep safety pins, buttons, and other small items. Instead of shelves, try adding hooks inside to make a perfectly vintage mudroom key cabinet or mounted jewelry organizer. If you're still looking for ways to give your medicine cabinet new life, try this genius tile renovation.