13 Common Mistakes That Are Sure To Kill Your Hostas
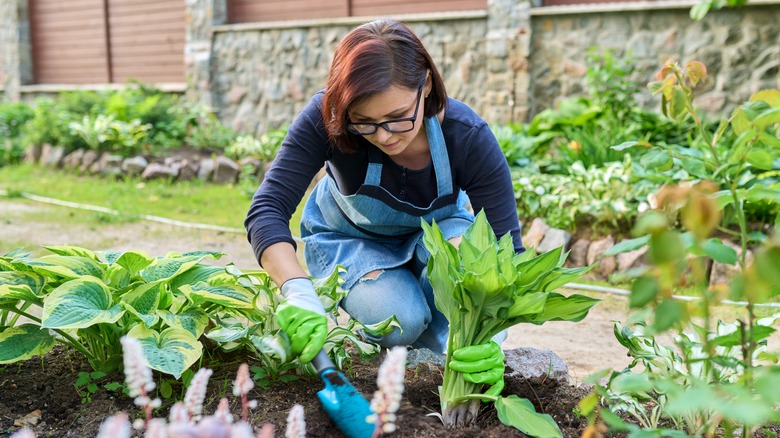
We'd all love to have plants that grow without much trouble, require little attention, and look pretty all the time. But the reality is that many indoor and outdoor plants can wear you out with their high maintenance and specific growing conditions. Not hostas, though. You can successfully care for hosta plants whether they grow in a container or in the garden. Their leaves are eye-catching, and the flowers become the focal point of the landscape. That doesn't mean that growing hostas is always error-free. Even experienced gardeners could make mistakes that cost hosta plants not just their glamor and beauty but their life as well.
For a plant that is hardy to drought and shade and has a high tolerance to different temperatures, hostas are not immune to animals, pests, and pathogens. The meaty and glossy leaves are on the menu for deer and rabbits. Rodents, too, are not above digging under the hostas and devouring their roots. But it's viral, fungal, and bacterial diseases that are the biggest threat to your hosta plants. Not detecting the first symptoms of an infection, or worse, delaying taking action, can put the life of the plant at risk. Let's take a look at the biggest mistakes you could be making with your hostas.
Giving deer access to the hostas
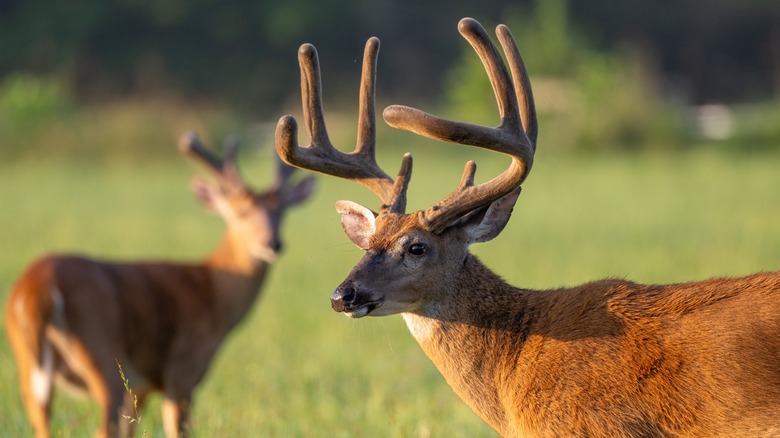
Deer snack on hosta plants whenever they have the opportunity. They don't just nibble on the leaves; they munch their way through the whole foliage, leaving nothing but half-chewed stems behind. But deer are messy eaters, and since they lack upper incisors, they pull at the leaves rather than bite them off. So, if you see parts of the leaves with ragged edges on the stems, that's another telltale sign that you're dealing with deer and not any other wildlife. You would also find deer droppings and hoofprints around the hosta beds. This rampage can slow the growth of the hostas. They will take time and proper care to grow back.
To protect hostas, you'll need to keep the deer away or make the plants inaccessible or unappetizing for the mammals. Placing a netting over the plants or chicken wire around the hosta beds will make it harder for the deer to gain access to their favorite meal. Another option is to surround the garden with a fence, at least 10 feet tall, that will stop the agile animals from getting into the property. A chemical solution such as a commercial deer repellent could also come in handy. Apply the repellent once a week or every other week and after rainfall.
Allowing rodents to eat the hosta roots
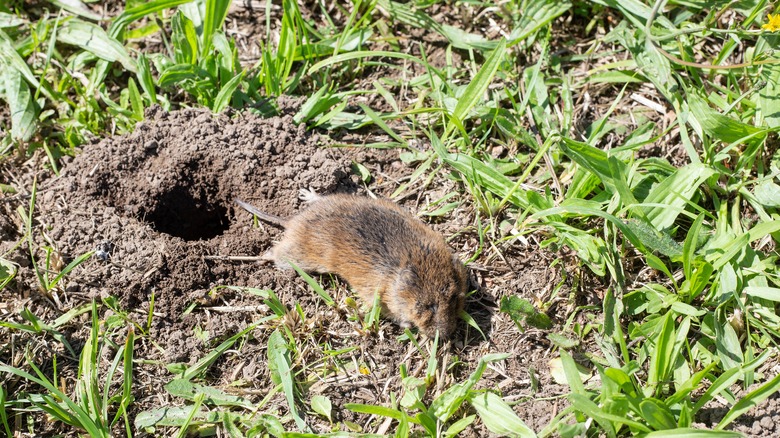
Rodents, such as voles and mice, are another threat to hosta plants. But this threat is more insidious and can have serious consequences for the hostas. Rather than feeding on the foliage, the rodents can dig under the hostas and devour the roots. That means that you won't notice the damage until the plants turn yellow and wilt because of the lack of moisture and nutrition. Other symptoms of root damage include stunted growth and the absence of new leaves. A closer look around the bed might reveal small holes in the ground where the voles dig tunnels to reach the hosta roots. If you don't intervene before the whole root ball is gone, the hostas will die.
Since rodents seek shelter under the cover of tall plants and clutter, keeping the garden clean is a good line of defense against them. Trimming the lower parts of bushes and moving wood piles away from the hosta bed will make it harder for voles and mice to go near the plants. You can also cover the area around the beds with gravel to make digging tunnels much harder. If all else fails, bury wire baskets in the soil and plant each hosta in its own basket. This will safeguard the root ball and keep the plant protected from rodent danger.
Not protecting hostas against rabbits
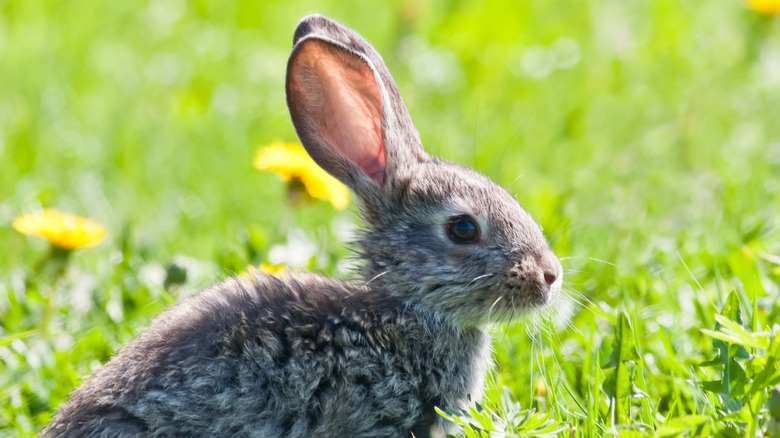
Rabbits, too, have a taste for both the leaves and roots of hostas. But unlike other wildlife, the damage they cause is easier to detect and stop in time. Telltale signs that rabbits are making a meal out of your hostas include missing leaf tips and signs of nibbling on the edges. Rabbit droppings on the ground are a dead giveaway. And if you check around the area, you might find holes with rabbit hair around them where the animals have built a home. But they won't stop at the leaf tips. Rabbits will eat every part of the hosta and eventually kill it. When the animals feed on the roots of young hostas, the plants might not survive the attack, either.
Rabbit repellents are a good way to protect hostas from the animals. But sliced onions, crushed garlic, and chili flakes also do a good job keeping rabbits away from hosta beds. To make your own rabbit repellent, crush a few cloves in a bowl, add a couple of teaspoons of chili flakes, and fill the bowl with water. Stir well and sprinkle the concoction around the perimeter of the plants once or twice a week. Keep in mind that fences are not an effective protection. Rabbits can dig under the fences and get to the plants.
Not getting rid of slugs and snails
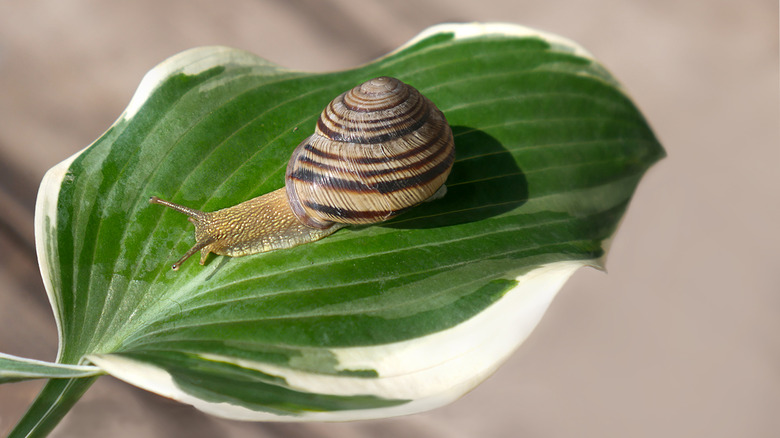
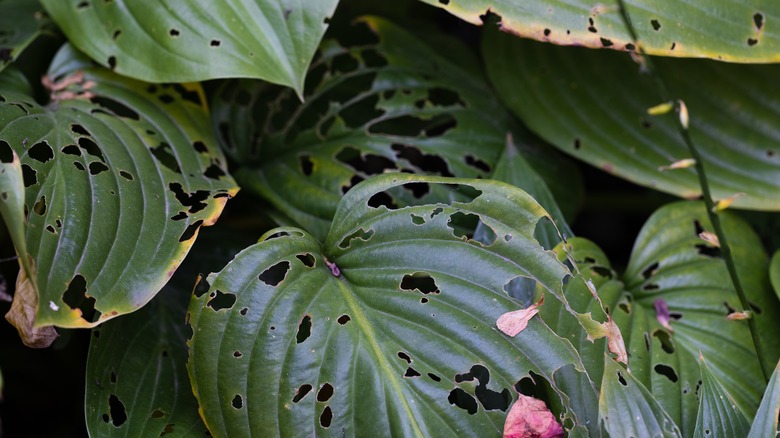
When it comes to dealing with pests on hostas, slugs and snails will be at the top of the list of your pest-fighting priorities. They are attracted to hostas because the plants grow in shady and moist conditions, which the pests prefer. When it's sunny, slugs and snails will hide inside the plant or under its large leaves. In the evening, they start their feeding frenzy. You can tell that you have a slug or snail problem when you see holes in the hosta leaves. However, the damage that a small handful of slugs can cause to established plants is limited. The real danger for the hostas is with large infestations or when the pests feed on young hostas.
If you only have a few slugs to deal with, then it's easy to pick them up by hand and dispose of them. Keeping the garden clean and tidy and following best watering practices are some of the many non-toxic ways to keep slugs from damaging your hostas. The pests like to hide in debris and clutter, so regular cleaning will limit their numbers. Always water the hostas in the morning to allow the sun to dry out the excess moisture and keep the topsoil dry. And if slugs are a problem in your area, consider growing slug-resistant hostas.
Not dealing with cutworms and black vine weevils
Both cutworms and black vine weevils are a menace to hostas. Cutworms are 2 inches long with a few hairs on their smooth body. They feed on different parts of the hosta plant. Variegated cutworms climb up to the top of the leaves to feed, while other types remain in the soil and eat the roots. Signs of climbing cutworm damage include elongated holes along the edges and near the veins of the hosta leaves. Black vine weevils are brown-black insects, less than an inch long, with short snouts. Their larvae feed on the roots of the hostas and, in large numbers, could kill the plants.
To banish destructive cutworms from your hostas, search near the base of the plants and manually pick out the pests hiding in the soil or mulch. Since they are nocturnal, use a flashlight to detect and dispose of them when they come out at night to feed. To control adult black vine weevils, spray the hostas and the surrounding soil with pesticides. Start applying the insecticide in the late spring when they're active and ready to lay eggs. The best time for pesticide application is before dusk.
Allowing blister beetles and grasshoppers to fester
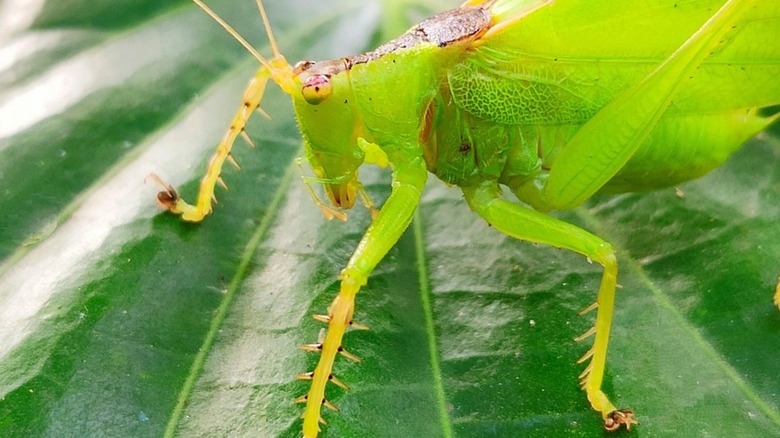
The problem with grasshoppers and blister beetles is that one pest will attract the other, and they both feed on hosta leaves. Grasshoppers are around a little over an inch long, green, and thrive in the hot and dry months. They eat the edges of the hosta leaves, giving them a ragged outline. Meanwhile, blister beetles have many reasons to look for hosta plants. The adult beetles feed on the edges of the meaty leaves of the hostas while their larvae devour the eggs of grasshoppers. The beetles get up to 1 inch long and vary in color between gray, black, or striped. Both pests can cause defoliation in hostas.
Blister beetles are easy to spot and control manually. Fill a bucket with water and dish soap, pick the insects, and drown them in the bucket. Always wear gloves when handling the beetles since they release a chemical that causes blisters on the skin. And since blister beetles need grasshopper eggs for their larvae, managing grasshopper populations can help make the garden less inviting for the beetles. Insecticidal soap and neem oil can control large infestations of both grasshoppers and blister beetles. Also, grasshoppers lay their eggs in weedy areas, so avoid planting hostas near vacant spaces where weeds grow.
Not taking care of nematodes in time
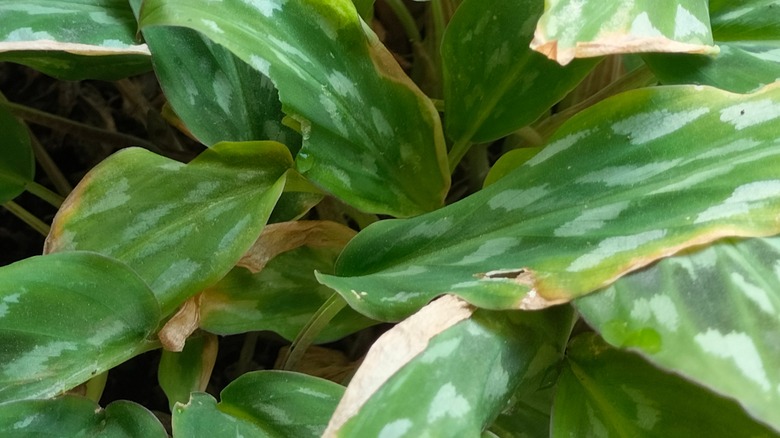
Nematodes are some of the sneakiest, most destructive, and hardest to eradicate pests. Unfortunately, hostas get two types of nematodes: foliar and root-knot nematodes. Foliar nematodes are small worms that penetrate the surface of the hosta leaf and feed on the tissue. This creates yellowing stripes on the leaf which turn brown. The nematode will also lay eggs there and when they hatch, the young nematodes move to other leaves and start feeding and breeding. Foliar nematodes cause tattered leaves and defoliation.
Root-knot nematodes live in the soil and enter the root system of hostas through the root tips. Once inside, the nematode feeds on the moisture and nutrients the root absorbs. It lays eggs there, and the young nematodes could either stay inside the same root or move out to infect other roots. The symptoms include knots on the roots, branched root tips, stunted growth, and wilting because of nutrient deficiency.
To combat foliar nematodes, avoid overhead watering or misting the hostas to limit infections. Removing and disposing of the infected leaves as soon as you see the symptoms can save the rest of the plants. Heat treatment also works for both foliar and root-knot nematodes. After removing all infected leaves and roots with galls, place the hosta in a container full of hot water at around 123 degrees Fahrenheit. After 5 minutes, take out the plant and expose it to cold water, then replant it in fresh soil.
Not treating anthracnose
Anthracnose is a common hosta disease caused by the Colletotrichum fungus. It affects the leaves and spreads during hot and humid conditions. The symptoms start with irregular spots with dark edges and gray or white centers. As the disease progresses, the spots die back and fall out of the leaf, giving it a tattered look. In severe cases, the spots will join to cover large necrotic areas of the leaf, eventually causing it to fall. The fungus favors wet conditions, and overhead watering can help spread it.
Keeping the hostas dry and well-ventilated are two important steps in preventing the fungal disease. Space the plants to improve airflow around them and refrain from splashing water over the leaves. When removing infected leaves, get rid of them safely, and don't use them in composting or mulching. Fungicides on the market are ineffective against infected plants, but they could prevent the disease. Spray the plants with fungicides labeled for hostas that contain sulfur, azoxystrobin, copper sulfate, tebuconazole, or triticonazole in the early spring. Make sure the plant is getting enough light since poor light makes the hosta more susceptible to infection.
Not watching out for Fusarium root and crown rot
This is another fungal disease that affects both the crown and root of hostas. The cause of the infection is Fusarium hostae, a fungus that can survive in the soil for years. It becomes active in dry conditions and under cool weather temperatures between 60 and 80 degrees Fahrenheit. To infect the hosta, the fungus spores need to enter the plant through a cut when pruning or transplanting it. On the root level, symptoms include a reduced number of roots per plant, and black and decaying roots. When the fungus affects the crown, the leaves turn yellow, wither, and die. The hosta becomes stunted and is slow to grow back in the spring.
Since the disease is untreatable, it's always best to prevent it from happening. Avoid nicking any part of the plant when dividing or repotting it. Treat any plant wounds with a fungicide that contains thiophanate-methyl or thiabendazole to prevent infections. Always sanitize the tools with disinfectants before and after using them on the hosta. Fungicides containing azoxystrobin or fludioxonil can protect the vulnerable hosta during transplanting and dividing. Immerse the plant in the fungicide before transplanting, then spray it after you're done.
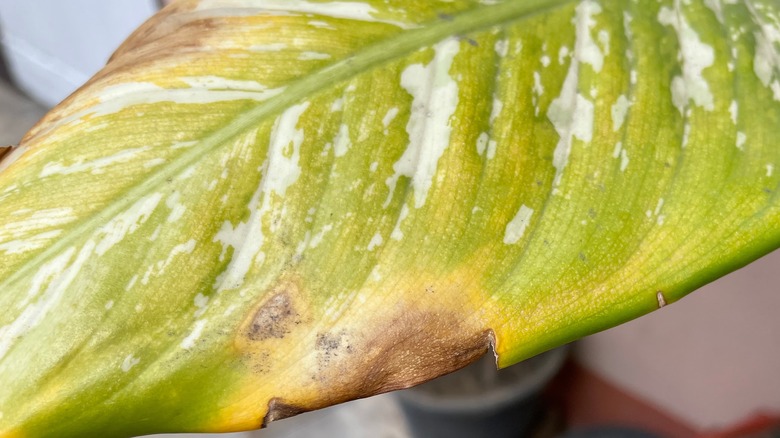
Not paying attention to signs of Hosta Virus X
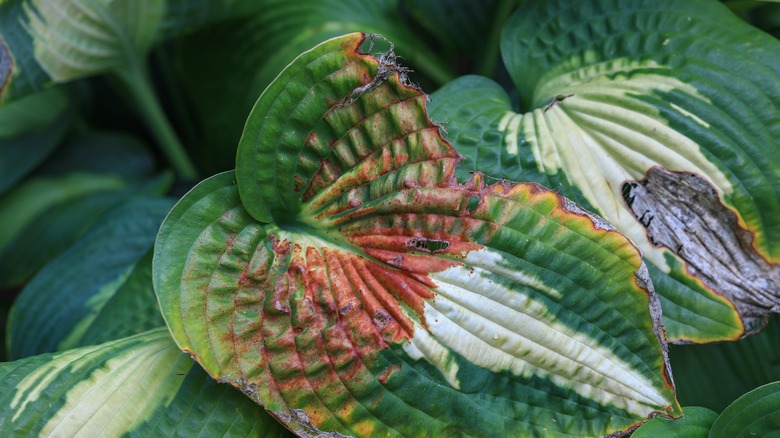
Hosta Virus X (HVX) is a newly discovered virus that affects only hosta varieties and cultivars. First identified in 1996, its symptoms vary among the different cultivars and are hard to detect in hostas with green leaves. Some hosta cultivars carrying the virus are asymptomatic but could still infect other plants. The main symptoms of HVX include green discoloration of the leaf along the veins and yellow blotches along the edges. More symptoms, such as brown circles, twisted leaves, wilting, and tissue death, might appear. Even though the infected leaves will die, the hosta plant can survive the disease.
HVX has no cure and infected plants should be uprooted and destroyed to protect healthy hostas. Removing just the infected parts of the plant is counterproductive and can backfire by contaminating the gardening tools and spreading the virus. Burning the whole plant is the safest way to contain the disease. When you buy new hosta plants, keep them isolated in a corner of the garden for a few weeks. If the plants don't show symptoms of HVX infection, you can transplant them in the garden.
Not taking action against petiole blight
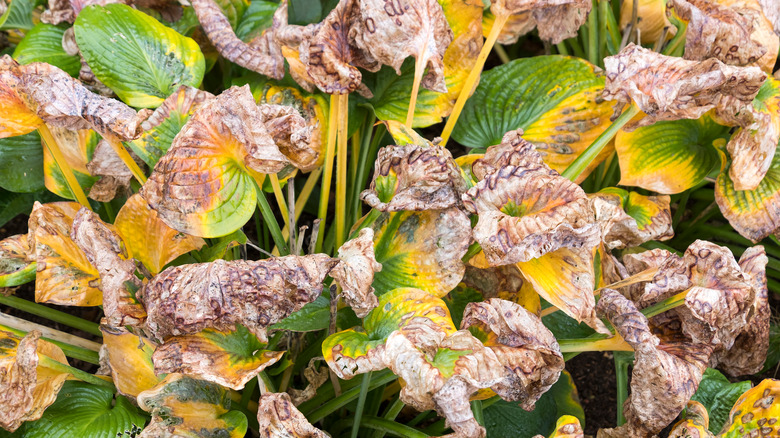
Petiole blight is a fungal infection caused by Sclerotium rolfsii, and it goes by many names, including petiole rot, white mold, and southern blight. Besides being lethal to hostas, the fungus can survive for many years in the soil and on plant debris, living inside tiny spheres called sclerotia. The sclerotia are usually white when they first emerge, then turn reddish-brown as they mature. When the fungus becomes active, it attacks the petiole of the hosta with oxalic acid, which destroys it. The attached leaf then turns yellow, wilts, and finally dies. Although infections often start around the base of the hosta, the top leaves will eventually wilt and fall as well. The fungus prefers hot and humid conditions, especially after rainy days.
There's no saving the hosta after the onset of petiole blight. Most often, removing the infected hostas isn't enough to get rid of the pathogen. You'll also need to get rid of all the plants and debris in the infected area and either replace or treat the soil. Soil solarization can be effective in eliminating the sclerotia in the soil. To solarize the soil, cover the infected area with plastic sheets for six to eight weeks during the sunny months. When buying hosta plants, inspect them closely for signs of the disease, such as yellowing lower leaves or wilting petioles.
Ignoring Phytophthora foliage blight
This is another blight that might kill your hostas. It's caused by a pathogen called Phytophthora nicotianae which lives in the soil and potting mixes. The pathogen thrives in wet soil and affects many parts of the hosta, including the foliage, the crown, and the roots. It becomes active when water drops cover the leaves of the plant. The first sign of an infection is a soggy lesion on the leaf. As the lesions grow and expand, they take over most of the surface of the leaf as the center of the wet lesion dries up, turns brown, and then falls. The hosta becomes stunted, wilts, and dies.
Since moisture is the triggering factor for the pathogen, planting the hostas in well-draining soil and keeping them dry are important ways to stave off Phytophthora foliage blight. Avoid introducing infected plants to the garden since the disease is hard to manage when it takes root in the soil. You can save hostas suffering from foliage blight by disposing of the infected leaves and spraying the plants with a fungicide that contains copper, phosphorous acid, or phosphonate. But if the pathogen infects the crown or the roots, then the whole plant has to be removed.
Not dealing with bacterial soft rot
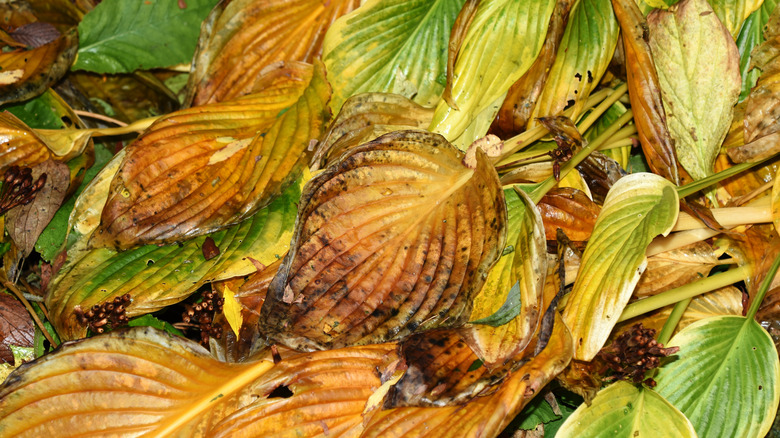
The bacteria behind this disease is called Erwinia carotovora. A wound in the hosta, either when dividing the plant or during the cold storage process, makes it more susceptible to the disease. The bacteria are active in humid conditions and when the temperatures are between 70 and 80 degrees Fahrenheit. Hostas need cold temperatures during dormancy and storing them above 32-degree Fahrenheit temperatures increases the chance of infection. The symptoms of bacterial soft rot start as watery spots, with the tissue under them becoming mushy and soft. The leaves become yellow, leak an odorous liquid, and collapse under their own weight. In the last stages of the disease, the hosta lies flat on the ground and dies.
Improving ventilation around the hosta plants can reduce the spread of the bacteria that cause the disease. Keeping humidity levels low while cold storing the hostas helps protect them against infections. Also, raising the temperatures in the cold storage facilities above the freezing point will prevent the bacteria from infecting the dormant hostas. Always use sterilized tools when dividing hosta plants and dispose of any infected plants immediately.