Reuse Old Wooden Fencing To DIY Planter Boxes On A Budget
When old wooden fencing starts to weather and wear, most folks see it as nothing more than a heap of discardable debris. But hold on a second! Before you dismiss those dilapidated pickets, consider this: You can give them a new lease on life by transforming them into charming DIY planter boxes. Not only does this extend their functional lifespan, but it also adds rustic charm to your garden while minimizing waste. It's a win-win! By repurposing old wooden fencing to make planter boxes, you're not only saving money but also reducing your environmental footprint. Plus, there's a certain satisfaction in breathing new life into something that would otherwise end up in a landfill or on your firewood pile. Best of all, you don't need to be a seasoned carpenter to pull off this project. With a few basic tools and some elbow grease, you can do it.
Before getting into the nitty gritty of fashioning your own planter boxes, make sure you have all the necessary materials handy and take the required measurements. You'll need pieces of your old wooden fences as well as a measuring tape, pencil, handsaw or circular saw, wood glue, drill with a screwdriver bit, and some screws (preferably exterior-grade) and waterproof sealant. Using the measuring tape and pencil, decide how big you want your planter boxes to be. Mark the measurements directly onto the wooden fencing pieces.
Crafting your planter boxes
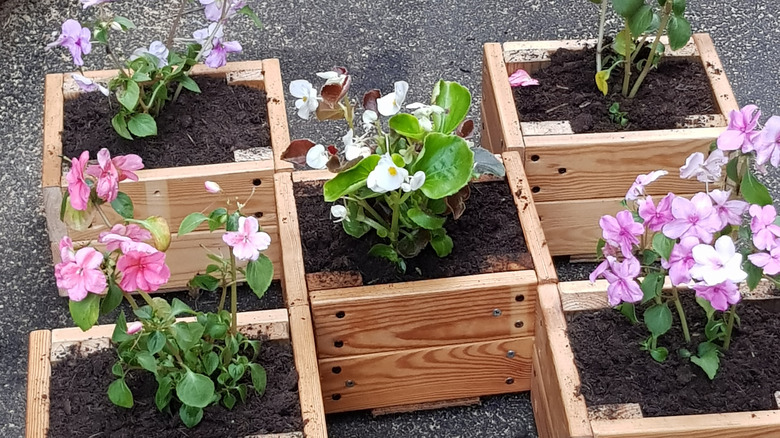
Using your handsaw or circular saw, cut along the marked lines carefully. If you're using a circular saw, follow proper safety precautions, like wearing goggles and gloves, and securing the wood. Take two of the cut pieces of fencing; these will be the longer sides of your planter box (including the leg portion). Place them parallel to each other on a flat surface. Take two shorter pieces and position them perpendicularly between the longer pieces, forming a rectangular frame. Make sure the corners are flush. Secure them with the wood glue and then with screws using your drill. Attach the shorter pieces to the longer ones at each corner. Pre-drill the holes to prevent the wood from splitting. Place the screws evenly along the joints to ensure stability.
Measure the inside dimensions of your assembled frame. Cut other pieces of fencing to fit snugly inside as slats for the bottom section of the planter. Secure them in place by gluing and screwing or nailing them into the bottom edges of the frame. To protect your planter box from the elements and prolong its lifespan, clean and sand the wood, vacuum or brush off the sawdust, and then apply a waterproof sealant to all exposed surfaces. Pay attention to the joints and bottom where moisture can seep in.
You can include mitered corners and other decorative touches if you want to get creative. Just make sure all parts are attached securely and won't interfere with the functionality of your planter box.
Exploring alternative materials
Old wooden fencing can be repurposed in various creative ways beyond just making planter boxes. You can remake or repurpose them into other useful items like DIY coffee tables, garden edging, shelves, headboards, raised garden beds, wooden clocks, birdhouse trellises, signs, and so much more. And while old wooden fencing is a fantastic option for DIY planter boxes, it's not the only material you can repurpose either. Consider salvaging wood from pallets, crates, or even fallen tree branches. Wine barrels, tin cans, and even old bathtubs, toilets, chairs, and boots can also be transformed into unique planters with a bit of creativity. The possibilities are endless for designing your garden on a budget with found materials.
By following the step-by-step instructions above, even a novice can create beautiful and functional planter boxes from old wooden fencing. By embracing the art of upcycling and thinking outside the box (pun intended), you can create stunning planters that not only showcase your green thumb but also your eco-conscious mindset. So before you toss out that old wooden fence, think about the potential it holds to become a beautiful addition to your garden.