Helpful Tips For Framing Out Your Basement DIY-Style
As damp, subterranean things go, it's pretty exciting when you get inspired to finish your basement. It's like found space in your house, allowing your home to grow with you without all of the expense of an addition. And while it might be wise to offload the HVAC, electrical, and plumbing work to a pro, there's no reason you can't do a lot of the framing and finishing work yourself. TikTok builder @benderhomes has a great tip for wall framing that simplifies and fool-proofs the framing process for DIYers: Use a homemade jig to get your stud spacing just right.
There's nothing particularly revolutionary about the idea of using a spacer template like @benderhomes' jig. There are commercial products for pro builders that essentially do the same thing. But it's a change to the widely used practice of laying out your stud locations on the bottom plate in advance. What @benderhomes does is, basically, use two lengths of 2x4 as spacers to determine where the next stud falls. A 13 ¾-inch spacer is used for the first stud bay, and a 14 ½-inch spacer is used for subsequent stud locations (for a typical 16-inches-on-center wall). Just butt the spacer against your last stud, butt the next stud against its other end, and nail it into place. It's simple and helps avoid problems like remembering that the first bay is spaced differently, that you have to back off ¾ inch when laying out with a tape measure, etc.
The big question: Assemble and lift or build in place?
There are two ways to frame a basement wall, and both have adherents. (We're assuming wood framing here, though using metal studs is increasingly accessible for DIY projects.) You can construct the wall on the floor and raise it into position, or frame it in place (often called stick framing). @benderhomes advocates for the assemble-and-lift approach, so long as you have room in your basement to do it. It is definitely faster to build your wall on the floor and stand it up. But some, like YouTuber @theweekendbuilder, conclude that it's better to build basement walls in place because things can get tight when you're trying to lift a wall or add a second top plate if any of the floor joists are sagging.
Better yet, stick with assemble-and-lift but carefully measure from the floor to each joist along your wall, and use the smallest measurement, minus ¼ inch you can shim on a non-bearing wall. Building in place comes with pitfalls like the need for lots of toe-nailing, that can cause a DIYer's wall to get out of whack pretty quickly. Be sure to build walls small enough to lift on your own if you're working alone. Make sure the wall is plumb front-to-back and side-to-side, then simply secure it to the floor with construction adhesive and (unless you have in-floor heating) anchor fasteners rated for damp concrete. Note that the bottom plate should be pressure-treated when used on concrete.
Other basement-framing tips
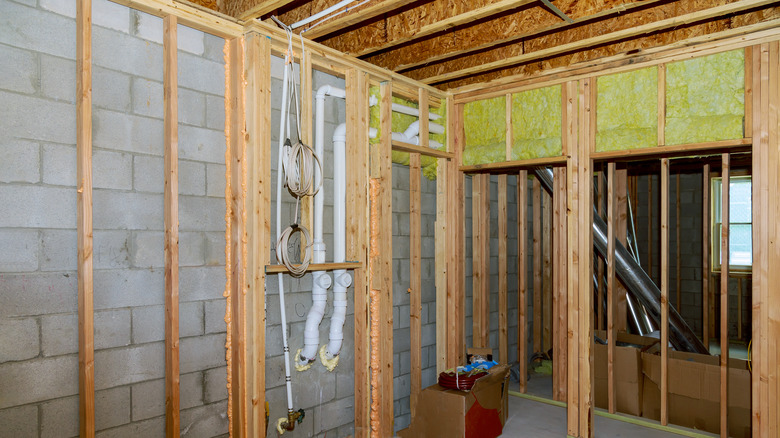
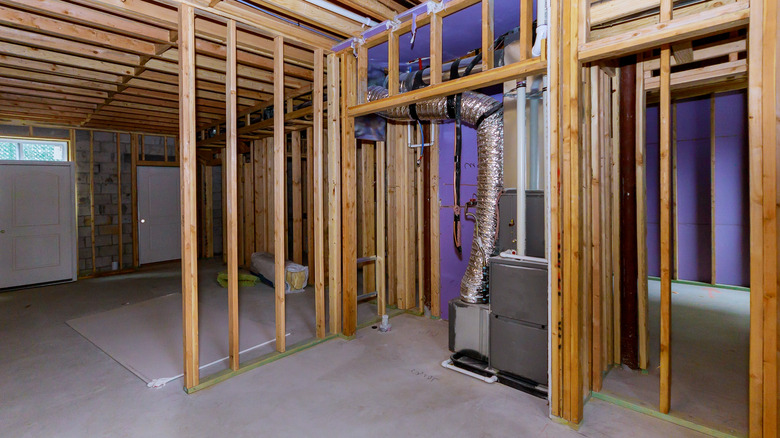
Basement framing doesn't exist in a vacuum. There are exterior frost walls you'll have to deal with, and often existing walls, mechanical elements like pipes and ductwork, etc. Check all existing walls and surfaces for plumb and level, and isolate the interior basement space by waterproofing frost walls, insulating properly, and using a vapor barrier to keep humid, heated basement air from condensing on cold walls. Note that waterproofing a basement can be costly in some situations. Use bulkheads to cover exposed pipes and ducts. Future-proof your basement as much as possible. Updated furnace venting and more robust wiring will be a lot easier and cheaper now than once all the walls and bulkheads are finished and closed up.
You'll also be working within confines created by the floor joists overhead. A double top plate is often unnecessary when you have good overhead nailers like floor joists, so if headroom is at a premium in your basement, you might be able to pick up 1 ½ inches by using a single top plate. You don't normally need to worry about door and window headers when building basement partition walls. If you're building a load-bearing wall, on the other hand, you're entering territory that can overstretch the capabilities and knowledge of many DIYers. If you're adding a wall that is somehow load-bearing, be sure to consult with your permits and inspections office and, in all likelihood, an engineer.