How To Remove Drawers From A Craftsman Tool Box To Customize Your Storage
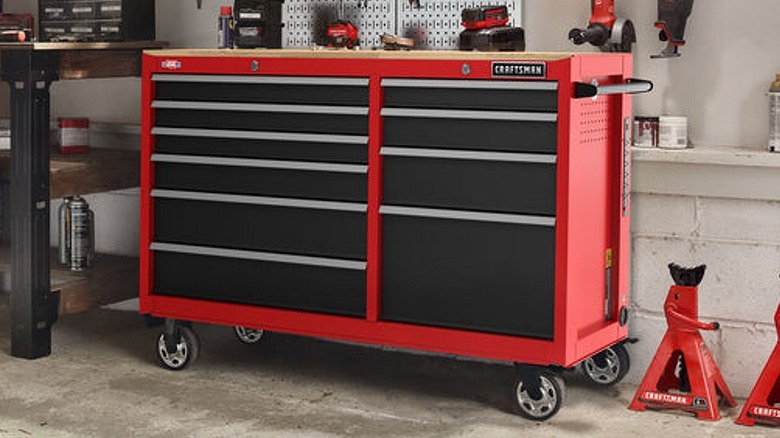
Craftsman tool boxes come with pre-installed drawers of varying heights so you can properly organize the home workshop you have worked so hard to build. However, the drawers may not be in your ideal order for maximum efficiency based on what you are storing and how you use the unit itself. The good news is that the tool box drawers can be easily rearranged to better suit your storage needs. Removing the drawers and glides is a simple process, which generally involves removing the drawer unit and two rivet screws, taking out and then securing the drawer slide brackets in their new locations, and then replacing the drawers in the new order.
This type of tool box is built with a series of pre-cut holes along both sides of the interior front and back rails, which allows the drawers to be installed at different heights along the rail to optimize storage space based on your personal utilization. In addition to rearranging the order in which you store items in your tool chest to customize the experience, you can also outfit the interior of the drawers with some custom organizers, such as this must-have drawer insert that'll keep your power tools organized in the deeper drawers or this DIY socket organizer to keep small tool parts neat and tidy. Personalizing by rearranging the drawer order will allow you to prioritize the items that need to be closest at hand and how you organize them for easy access.
Removing and reinstalling your Craftsman tool box drawers
As the above video from Off Road Endeavor details, to switch up the order of your Craftsman tool box drawers, begin by removing the open drawer unit itself from the slide bracket. Do this by pushing the little black levers located on the outer side of the brackets, lifting one side up and pushing the other down to release the drawer from the glide. To move the drawer slide to a different rung on the front and back rails, remove the rivet screw that secures it to the front rail, lift the glide upwards out of the front rail, and push the glide toward the back of the cabinet to disengage it from the rear rail. It's worth noting that you will never need to remove the top set of brackets, as the upper drawer will always start at the top rung of the rail, regardless of size.
Once the drawer glides have been fully removed, determine the new placement of the slide brackets based on the height of the drawer. When you identify which set of holes you'll be using, start by lining the glide up with the correct hole in the back rail and then pull it forward from behind the rail to hook it in. To attach the bracket to the front rail, slide the drawer glide down from above while applying pressure to hook the bracket into the hole in the rail, securing it in place with the rivet and reinstalling the drawer units. And your tool box is personalized.