Strategies For Building A Home Workshop
For many of us, a home workshop represents an important secret truth about ourselves: Left to our own devices, even when it's not necessary, there is work we will do anyway. In our workshops, we elevate pastimes with a dedication we might hold back from our day-to-day professional and personal lives. We are sequestered away in garages, sheds, and under shade trees to practice the perfect dovetail joint, the replacement door panel for a 1953 Ford Victoria, or perhaps a stratum 1-time server that uses satellites to tell your computers what time it really is.
These are our hobbies and avocations. They structure our free time, and make us who we are. And all this has to happen somewhere — often in a personal workshop. So customizing a workshop for yourself isn't a burden, but a great opportunity to set up something important to you in a way that makes you comfortable, efficient, and/or effective, according to what's important to you. Here's how to do just that.
Some assumptions about you

As the saying goes, nothing is more permanent than a temporary solution. It is, therefore, important to plan ahead and stick with the process. If you stick to a carefully considered plan, you'll have more success from the outset and better results in the end. If there ever is an end.
Since that plan is all about you, let's define some common characteristics shared by most workshop owners. You have limited time, space, and resources, which demands efficiency. You have some experience and are interested in doing a good job. Keep all these obvious facts in mind. You must work at least somewhat efficiently, or you'll eventually discourage yourself. Don't reflexively solve problems with money that are better solved with thinking. And don't waste space ... unless, for you, an open, spacious environment is a key part of thinking and working well.
Bobby Hagstrom of The Art of Woodshop Design says you should maximize the space you're in while planning for a bigger and better room in the future. This is a simple genius that all makers of jigs and toolers of tools know instinctively: Make it yourself and for yourself, and be yourself while making it.
Your workshop is not a business, but treat it like one

Naturally, you have some space and financial limitations; even a very large workshop is defined by its walls, and it's probably not full of $15,000 Grizzly production table saws and $35,000 CNC lathes. Your hobby shop isn't a functioning business ... at least not yet. But sound business practices are important to keep in mind. Empire Machinery & Tools says there isn't any logic in creating quick, small-order jobs inefficiently. This can extend to how you organize your workshop. If your parts bins are on the opposite wall from your soldering station, you're going to waste time doing the smallest of jobs, and not have time (or the will) for the larger ones.
Whether you approach your workshop in microeconomic or home economics terms, much of the thought process is the same: You're working through tradeoffs. Nineteenth-century logician and theologian Richard Whately described economics as the "science of exchanges." Making good tradeoffs, good exchanges, is important because it gives you a structured way to avoid frustration, and frustration is the enemy of doing anything well, and often of doing anything at all.
Building your type of shop

As we begin to untangle what your shop can and will become, the first and most salient bit of information is what type of shop it (mostly) is. Are you an auto mechanic, and, if so, are you building hot rods, restoring classic cars, or swapping out water pumps for friends and family? Are you a woodworker turning out 15 birdhouses a day or one mid-century sideboard every 15 weeks? Are you fabricating things from metal or fabric? Would it be more accurate to call your shop a "lab" than a shop, as is the custom with electronics workshops and computer/networking playrooms?
There's a difference between woodshops, mechanics' shops, and garden sheds. According to Dakota Storage Buildings, woodworkers need power, dust collection, and materials storage, while mechanics need some specialized power tools and lots of open space. Gardeners cultivate tools of strange dimensions that need to be stored, and do most of their "workshop" work standing at a potting bench. The rest, and majority, of their work, is done outdoors.
What is the primary business of your shop? How many projects are going at once, and where does all the related material get stored during work? What about after the work is completed? And where on earth do all the clamps go? These are all things you need to consider before planning.
But your workshop will probably be a combination of these things

Because every style and purpose of the workshop has different requirements, combining many types into one seems like a certain path to frustration. But, congratulations: This is most likely the path that you're on. A fabrication shop might make only gutters or ductwork, but the average home workshop will likely involve fixing lawnmower engines, repairing toys, building shelves, starting seeds, and acting as a hiding spot when you need some me time. You will probably end up with a multi-purpose workshop with one over-arching "type" and a dozen unrelated purposes. If you don't plan on putting the me-time recliner in there now, you'll just have to make room for it later.
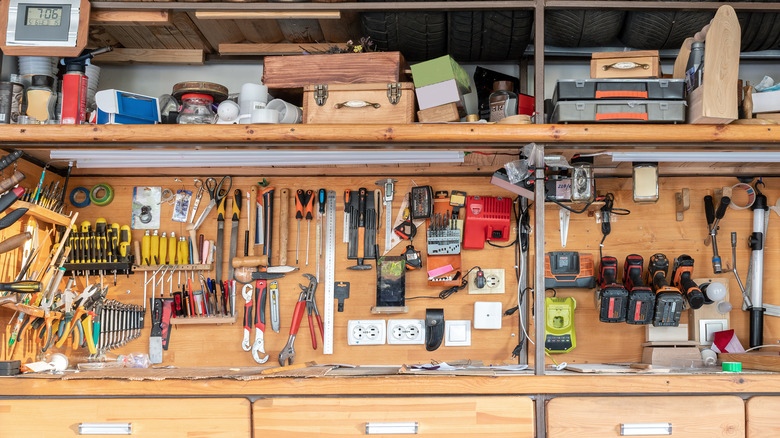
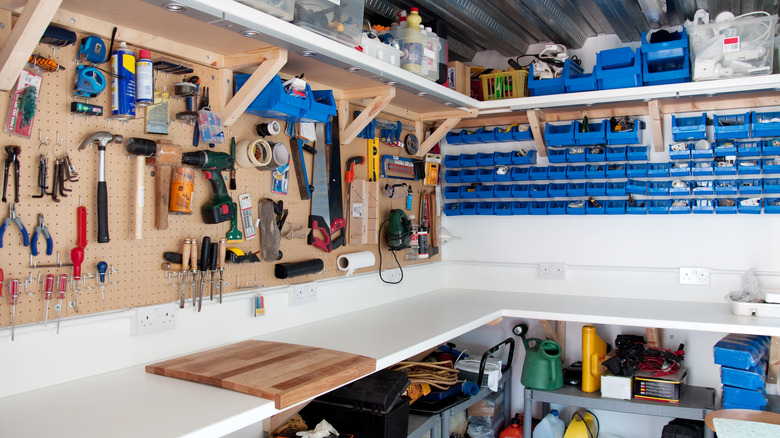
Flow Wall has a good list of fundamental tools you'll need in a shop for home repair, gardening, woodworking, and car repair, and you might not be thinking about some of these. Does anyone adequately plan for ladder storage? Or extension cords? You're not planning to leave that wheelbarrow out in the rain, are you? Don't you own about 1,400 feet of garden hose? Where will all those long-handled gardening tools fit? Should dust collection and compressed air move around to where they're needed, or would it make more sense to leave them stationary and run permanent vacuum lines all over the shop? Oh, and, hey: Once you get that bench vise screwed down, you won't want to move it, so give its location some careful thought.
The bones of your workshop
Workshops have bones. This is the underlying structure, the skeleton, of the shop. To say that a workshop has "good bones" is to say that the structure is sound, reasonably complete, and appropriate to its purposes. Doors, windows, A.C. units, and heaters are standard and uncomplicated components. Electricity is another biggie, although it can get pretty involved. Your shop might also need some dust collection infrastructure (for woodworkers), multiple workstations that can be used at the same time (if you have a partner or employees), or perhaps a divider or equipment to maintain a clean space (if you use a lot of electronics or other dust-sensitive equipment, or if you have a client area). You might think your shop doesn't need plumbing, but will eventually discover that it's nice to be able to wash your hands or clean parts.
Install enough lights, and install them high enough to be out of the way, says Today's Homeowner. Put storage and countertops everywhere and, where you can't fit a work surface, put one that folds out of the way. We tend to plan for stationary elements, but Decked suggests leaving room for a rolling mechanic's toolbox that can be moved to where it's needed.
The storage and handling of your stuff

You know you're going to need storage, and probably have some idea how that will be shaped. You'll likely have bins for electronic components or fasteners, racks for lumber or metal stock, and shelves of salvaged and spare small-engine parts. What you might not consider is the space you'll need for un-storing those materials — moving them around and using them. Do some larger wood offcuts get re-stored as raw materials? Where do the small bits go? What happens to the used motor oil, the sawdust, the replaced parts? This isn't much of a problem for an electronics lab, but for a woodshop or a metal fabrication shop this is a major structural consideration.
You see table saws in the middle of woodworking shops because, yes, they're central to the operation, but they also take up enormous amounts of space. You'll need at least the depth of the saw plus the length of the longest material you'll handle on both the infeed and outfeed sides, plus a little to spare. Bob Vila calls this the stationary tool's "operating space." When mapping out where everything goes, ensure you add this negative space into your design.
Designing based on your workflow

Organizational schemes are mostly about where your tools and infrastructure are, and how you interact with them (and how they interact with each other). Your interactions describe your workflow — the steps you go through in the shop and the locations of those steps. By taking a closer look at your workflow, you can manage interruptions, delays, and bottlenecks, making the job more streamlined. But how can you design a shed or room based on this?
Rather than designing a room, imagine workflow as a linear flowchart, with the occasional decision branch. There are many software packages for mapping workflows, but Smartsheet provides an Excel worksheet and instructions for a basic linear workflow. Think it through thoroughly, and include details such as where workpieces are stored along the way, the quantity and size of pieces being transported from one station to the next, etc. You can match this up to a floor plan in the next phase.
Designing based on your material flow
Taking a hard look at material flow — the way raw materials work their way through your workshop –emphasizes optimization and efficiency. Moving materials the shortest distance possible is a key principle of examining material flow, as per Snips Magazine. Mestek Machinery describes the best commercial shops as having an uninterrupted flow of materials that moves in a continuous line without much overlap or crossing. Here they're describing workflow through the lens of material flow.
A manufacturer might be concerned about the cost of time spent on manual material handling, but maybe your currency is the annoyance of walking around in circles carrying 4x8 sheet goods in a fairly tight shop space. If this is you, then your material flow needs some retooling. Research shows that storing materials closer will help with flow. While that sounds obvious, our temptation in workshops is often to store materials out of the way, which often means far away. Ensure you're not making that mistake in your design.
Designing in workstations
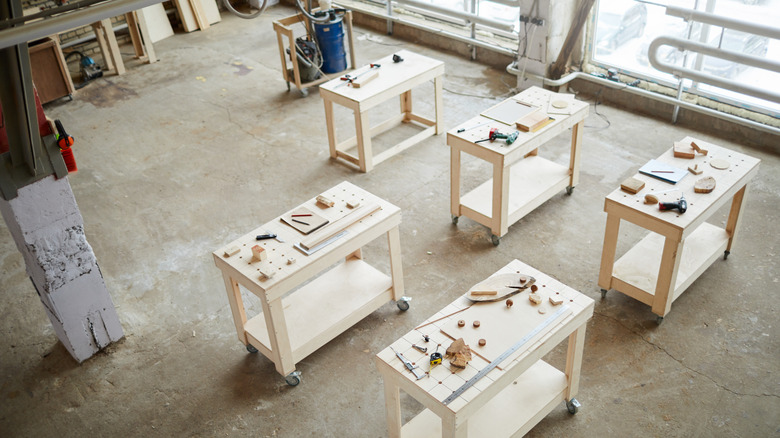
Centering your workshop layout around your tools is the usual way of doing things. It's what you'd do if you put absolutely no thought or effort into planning your design. You know some basic things about your tools, such as which are stationary and which are mounted on rolling stands. You also probably know which handheld tools require a work surface of a particular type, and which don't. Now take this a step further and consider which tools are commonly used together and need to be near to each other. This underpins the common approach of using tool clusters to minimize unnecessary motion in the shop, as per The Art of Woodshop Design.
When trying to figure out your tool clusters, first focus on the obvious: Which tools need to be grouped together to make everyday tasks easier? First nail that down, and branch out from there. Act out some of your tasks, and see which tools, machines, or tables you use. Arrange (and angle) them so the workflow moves easily and uninterrupted.
Modeling your space on paper

When all of this starts to gel and you need to start brainstorming, you will want to start fooling around with actual concrete ideas. You could design with toothpicks or modeling clay or bricks, but chances are you'll either start your design possibilities on paper or a computer. On paper, you can either sketch or make cut-outs to scale and move them around a grid. (The Art of Woodshop Design emphasizes the importance of correct scale, and tells you how to accomplish it using graph paper.) Wood Magazine offers cut-out paper templates for making these models; some have even cut shapes out of flexible magnetic dry erase board material. In any event, you're probably going to either start or finish by sketching — maybe both.
The advantage of paper over computers is that it's more amenable to a truly creative, open process. Perdue University analyzed this phenomenon, observing that paper sketches help designers order their thoughts, recognize patterns and budding ideas, and implement more problem-solving. Whatever the reason, working with pencil and paper is a more free-flowing, creative, and open process.
Modeling your space on a computer

On the other hand, Popular Woodworking says you could start with CAD, but computer modeling can stunt brainstorming and retooling. Polly Brown of Stanford University writes in "CAD: Do Computers Aid the Design Process After All?" that computer programs nix the sketching and redesigning stage, and force you to commit to putting all of your energy into creating a virtual model, which you later won't want to tweak. This might lock you into a design that isn't exactly perfect. It discourages major changes or refinements.
However, suppose you think you will use CAD often (for woodworking plans, mechanical modeling, electrical and electronics diagramming, etc.). In that case, Popular Woodworking has a list of a few CAD offerings that work particularly well for woodworkers. Designing Idea has a list of software you can use specifically to design your workshop, both free and subscription-based.
Revisiting our assumptions, and planning to evolve

Evolving and improving your workshop layout will happen naturally. Some things won't work properly, and you'll be keenly aware of what those are. Keep in mind these key questions from Snips Magazine: Can you avoid wasted movement? Can you improve safety? Is there unused space that can be used? Is there anything you can get rid of?
Prepare for the next few evolutions by looking at what you're changing, and trying to anticipate future changes. Do you ever need to change things back to the old way? How much flexibility does your shop demand? How often will you need to reconfigure the space to accommodate a new or different type of project? Make notes about your pain points and any workarounds you are adopting; those are likely areas for revision in future plans. Maybe you can avoid the reconfiguration altogether by installing some electrical outlets or buying duplicate tools. Indeed, Today's Homeowner says the perfect workshop is constructed with screws rather than nails to make changes easier. One valuable and fun tip: Read and watch shop tours for ideas, such as this thoughtful one from MWA Woodworks.