Toilet Flapper Not Sealing? Steps To Take Before Replacing
Have your recent water bills been higher than anticipated? Is your toilet's constant trickling keeping you up at night? Chances are your flapper is not sealing adequately around the flush valve, allowing water to trickle into the bowl and sending your utility bills down the drain. Besides slowly driving you mad, an unsealed flapper can waste up to 4,000 gallons of water daily (per the NYC Environmental Protection). Since this rubber (or vinyl) mechanism is responsible for monitoring the flow of water between the tank and the bowl, a flapper not sealing is one of the most common reasons why your toilet won't stop leaking. While your knee-jerk reaction may be to replace the flapper, there are a few steps you can take, like cleaning the mechanism and adjusting the chain, before you buy a new one.
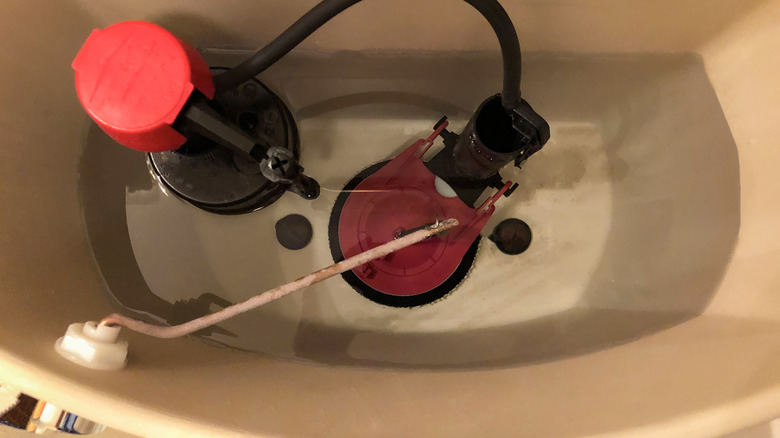
However, before you do anything, lift the lid off your toilet tank to critically examine the flapper. If it looks past its prime, is more than five years old, or is warped at all, the best thing to do is replace your worn-out toilet flapper. But if that's not the case, you might want to hold off on the replacement. Further, to be 100% sure your flapper is the culprit behind the leaks, place a few drops of food coloring into the tank, leave the water undisturbed for 10 to 15 minutes, and see if the colored water makes its way inside the bowl. If it does, your flapper isn't sealing properly.
How to clean a dirty toilet flapper
The flapper is an essential part of your toilet you probably aren't cleaning enough. Cleaning the rubber mechanism is especially necessary if you live in an area with hard water, as mineral deposits, algae, and other sediments might hinder your flapper's sealing. So, your first step towards fixing a leaky toilet is to clean the flapper and see if that fixes the issue. When doing this, wear rubber (or disposable) gloves to avoid dirtying your hands. Next, turn off the water supply valve. Be gentle, or you risk breaking it off.
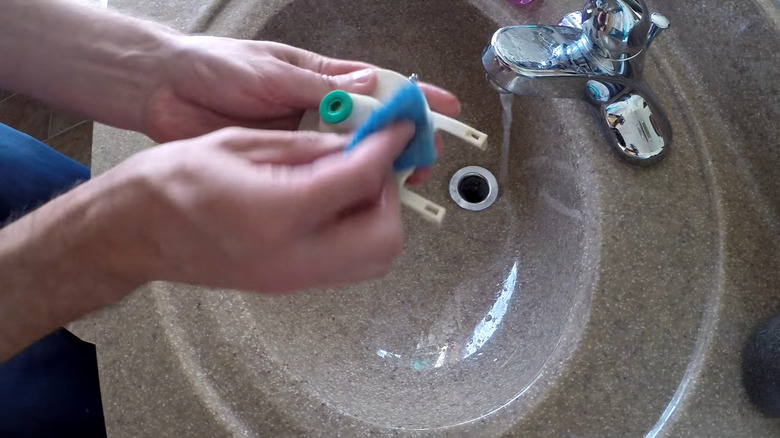
Now, flush the toilet and wait for the tank to empty out. While it's emptying, grab a sponge (a washcloth or old toothbrush work, too, but steer clear of anything that's abrasive) and mild detergent (or dish soap or vinegar). Once the tank is empty, raise the flapper and gently rub it with the sponge to clean it. However, if the flapper is incredibly dirty, it's best to remove it from the chain (or rod) it's attached to and give it a thorough cleaning. Scrub both sides of the rubber and use dish soap to remove stubborn deposits. After it's clean, rinse it with water to remove the deposits and soap. While at it, clean the areas surrounding the flapper before attaching it back. Turn the water supply valve on, wait for the tank to fill up, and flush the toilet to see if the issue is resolved.
How to adjust your toilet flapper's chain
If the problem isn't resolved, you might have to adjust the flapper's chain to ensure it seals correctly. Turn off the water supply valve, then look inside the tank to check if the chain is tangle-free. Its length is another consideration. If it's too long, it'll sandwich itself between the flapper and flush valve, hindering the former's sealing. Or, if it's too short, it'll be difficult for the flapper to adequately resume its seated position. The good news is that you can adjust the chain's length to fix either issue.
In case the chain is longer than needed, secure the clip to a lower link. Always ensure there's ½ to ¼ inches of slack. Now, flush the toilet to test your handiwork. If the leakage stops, your work is done. If not, move the clip lower. Flush the toilet again. Once you're satisfied, grab your cutting pliers to shorten its length. Do the opposite if the issue is a shorter chain length.
Additionally, check that the flapper is positioned over the flush valve to act as the doorkeeper between the tank and the toilet. In case it's not, adjust the mounting rings or loosen the guide arm adjustment screw with slip joint pliers to right its position (don't forget to tighten this once you have the flapper where you want it). Refill the tank and flush the toilet to see if the issue is resolved. Otherwise, replace the flapper as a last resort.