Easy Aluminum Foil Hacks That Make Painting So Much Easier
Aluminum foil has many uses, both conventional and unconventional. Of course, foil has its role in the kitchen, oven, and on the grill; however, foil can also be used for cleaning purposes, home DIYs, and more. One of the unconventional places where foil's extraordinary utility can shine is a household painting project.
Painting a room is one of the most approachable projects for any DIYer to undertake. Still, painting takes time. It's not only the act of painting that requires effort, but the cleanup process as well. Attention should also be paid to storing leftover paint with care so that it can be used in the future. Whether you're painting walls, furniture, or even a canvas, a roll of aluminum foil can play a supporting role in your project. Use foil to keep your paint fresh. Or, you can rely on it to help you keep a clean workspace. In short, foil is there to help you throughout the painting process, from prep to finish. To learn how foil can do all these useful things and more, read on for our list of helpful hacks.
Wrap hardware
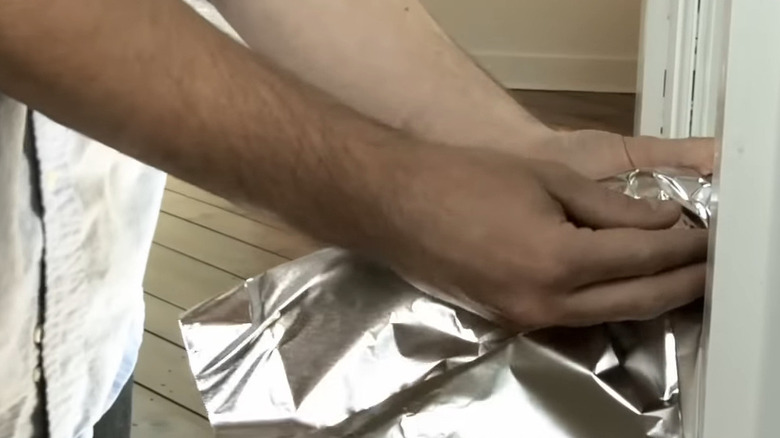
You already know aluminum foil protects your food, but foil can also protect your hardware. When tackling a DIY painting project, messes are almost inevitable. Paint can drip onto floors or fixtures, necessitating extra cleanup. Stray brushstrokes can leave paint in unwanted places, requiring either removal or coverups. While drop cloths shield floors and painter's tape creates a barrier for trim, other surfaces pose practical challenges. Take doorknobs, for instance. Due to their shape and placement, they are an easy target for drips while you're painting a door. But these same dimensions can also make it difficult to adequately cover doorknobs with painter's tape in order to protect them.
Where painter's tape fails, aluminum foil prevails. To cover a doorknob before a paint job, simply wrap it in foil. Start with a clean sheet of foil. Position it around the doorknob, being sure to cover the place where the doorknob meets the door. Then wrap the foil around the area. Extra foil can be easily bent around the hardware to ensure the door is free for painting, but the doorknob is covered. This trick can also be used on furniture. To paint your furniture like a pro, it's best to remove hardware before painting. So, it's best to opt for removal when possible. But imagine you only want to paint part of a furniture piece — say, a tabletop. In a case like that, foil can be wrapped around table legs to prevent paint splashes from damaging your piece.
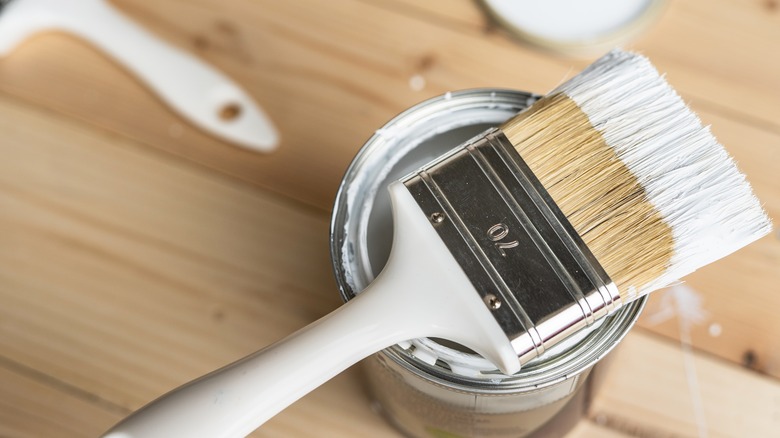
Line a paint tray
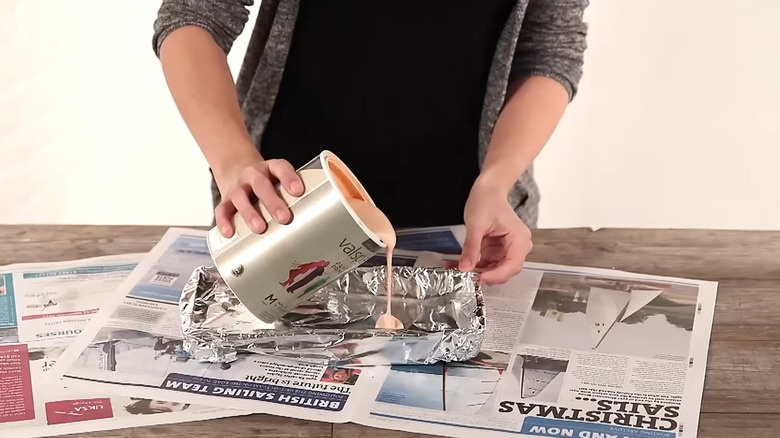
Household painting projects are easy enough for a DIYer of average skill to complete, but cleanup is where some struggle. One of the complaints against paint project cleanup is simply that it takes time. After painting a large room, initiating a lengthy cleanup process may be the last thing someone wants to do. However, there's also a more particular issue with cleaning paint. It revolves around the question of how to responsibly wash wet paint from paint trays. After all, paint should not be washed down the drain. That paint can clog and damage your pipes. Plus, it's a pollutant and contains hazardous chemicals. Translation: Paint doesn't belong in our water processing facilities or waterways.
To make it easier to clean your paint tray, and to reduce the amount of paint you wash down the sink, rely on aluminum foil. Foil can be deployed as a simple disposable paint tray liner. Tear a sheet of aluminum foil from the roll. Then place it over your paint tray. Fold the ends over the edge of the tray to secure it. Then pour in the paint. When you're done painting, pour the excess back into the can. Let the remnants of the rest of the paint on the foil dry while you complete your other cleanup tasks. Then remove the foil from the tray, ball it up, and toss it in the trash.
Make a palette

Just as you can line a paint tray with foil to expedite the cleanup process, you can also line a paint palette with foil to achieve the same end. And if you don't own a paint palette, use foil to create your own. Simply line a plate or other hard surface with aluminum foil. Fold the extra over the sides and secure the ends with tape to keep it in place. The benefits of lining a palette with aluminum foil extend beyond facilitating easier cleanup — it can also help you save money.
The money-saving power of aluminum foil lies in the fact that half of a palette can be covered with one sheet of foil, and the other half with another. Use one side of the palette to hold your colors, and the other for mixing paint colors, etc. When your mixing surface get muddied and messy, the sheet covering that side of the palette can be removed and replaced. This leaves the other side of the palette, and its contents, untouched. Taking this approach prepares the palette for a fresh mixing surface. However, it also cuts down on unnecessary waste. Fine art paint is pricy, as any artist knows. So while this act may seem small, it can help you save quite a bit of money over time.
Seal leftovers
Of course, aluminum foil can be used to cover your leftover food, thereby keeping it fresh — and the same can be applied to paint. Chances are your DIY painting project will leave you with leftover paint. That's a good thing. It's helpful to have leftover paint in case you need to touch up paint afterwards. Also, paint cans indicate the pigment used to create your preferred color. That's a time saver if you decide you ever want to use the same paint color in a different room. The downside to storing leftover paint is that it can dry up over time. When paint is properly stored, it takes a long time for paint to dry inside the can. The first sign of the drying process, though, is a skin that develops on top of the paint.
Prevent skin from forming on the surface of your leftover paint by placing a round cut of aluminum foil on top. Cut the foil to size by tearing off a sheet, laying it on a table and placing a paint can on top of the foil. Trace around the foil, remove the can, and cut along the circle you've drawn. After that, the round of foil can be placed gently on top of the paint opening before sealing the can with the lid. Now you're ready to store your leftover paint. When you're ready to use the paint again, crack the lid and remove the foil. Then simply stir and use.
Keep a paintbrush wet
Here's a bit of conventional wisdom when it comes to painting a room: It's best to paint an entire wall at once. This prevents visible paint lines from forming as new paint overlaps with dried paint. The same goes for trim. That said, sometimes it's necessary to take breaks in between painting jobs. When this happens, you're left with a conundrum. What are you to do with your wet brushes and rollers? When not in use, these painting utensils can dry up rather quickly. Add to that, if you need to duck out in a hurry, washing them out may require more time than you have to spare. Luckily, aluminum foil comes to the rescue once again.
If you're taking a break in your painting project, but you can't take the time to wash your brushes and rollers, you can wrap them in aluminum foil. The foil keeps air out, which prevents the paint from drying quickly. This gives you time to take a coffee break, chauffeur the kids to an after-school engagement, or any other quick task. In fact, this trick should even keep paint brushes wet overnight. When you're ready to resume your painting project, simply remove the foil. Discard the used foil and get to painting. Wash the brush as normal once you're done with the project (or use an expert tip to clean a paint brush).
Funnel paint
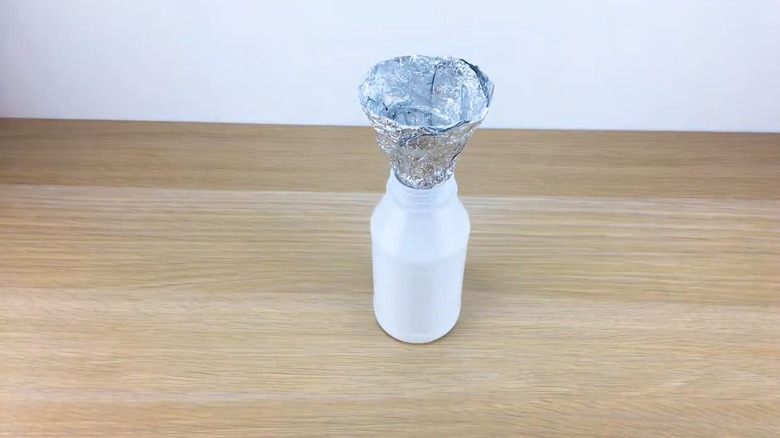
So, imagine you've finished your painting project and you're left with unused paint in your paint tray or painting cup. Now you need to return any leftover paint to the can and store it in case you need to use it later. If your paint was sold in a wide-mouth can, pouring leftover paint back into the can should be easy enough, but if your paint can in a smaller vessel, it's a more delicate (and challenging) process. To pour paint into a smaller receptacle without spilling is a task that's made easier with the use of a funnel. If you don't have a funnel, you can make one with aluminum foil.
Take a sheet of aluminum foil and roll it in into a cone, ensuring it is at least a few layers thick. Leave a large hole on one end, and a smaller hole at the other. The small end will be the bottom of your funnel. Ensure this is small enough to fit into your paint container, but large enough so it doesn't fall in. The funnel should rest in the opening of the paint container to allow you to pour your leftover paint in without holding the funnel steady. Pour the paint into the container for a mess-free process, then remove the funnel and discard it.