Prevent Standing Water Around Your Patio With A Simple Draining Technique
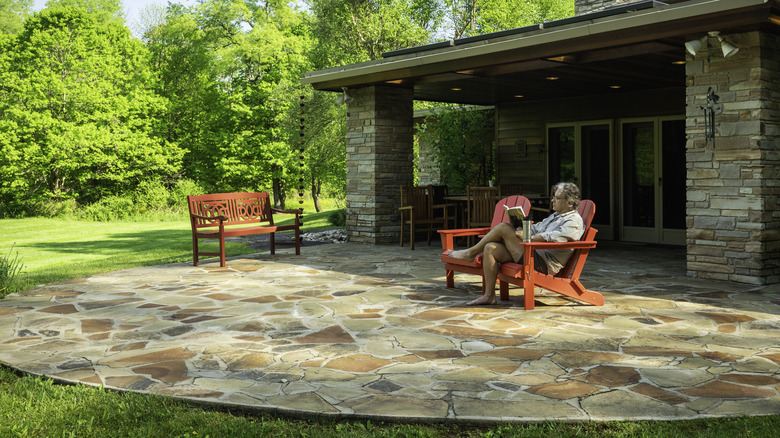
Imagine sitting on your moonlit patio, enjoying a summer meal with your partner as crickets sing and fireflies blink around you. Then you feel the first bite on your ankle, followed quickly by many more. You and your partner swat hopelessly at the swarm of feasting mosquitos that have made a home in the puddle of water collected on your patio. Many homeowners may think that eliminating standing water on your patio is better left to professionals. However, armed with a drill and a powerful bit, you can tackle this issue yourself in a matter of hours. By drilling several 1-inch diameter holes where the water pools, you'll have low-cost drainage in no time.
Standing water on a patio is a breeding ground for fun-ruining mosquitoes, but that's not all. It's terrifyingly slippery when wet, it can encourage mold and mildew growth, and if the pooling is near your foundation, it can allow water into your basement. Depending on the size of the area where water is pooling, you can knock out this problem yourself without too much trouble. Yet, not every kind of drill bit is ready to pierce tough patio flooring. Concrete slab, brick, cement pavers, and stone are common patio floor materials, and you'll need a drill bit to match the stuff it's going to pierce.
How to drill into concrete or brick
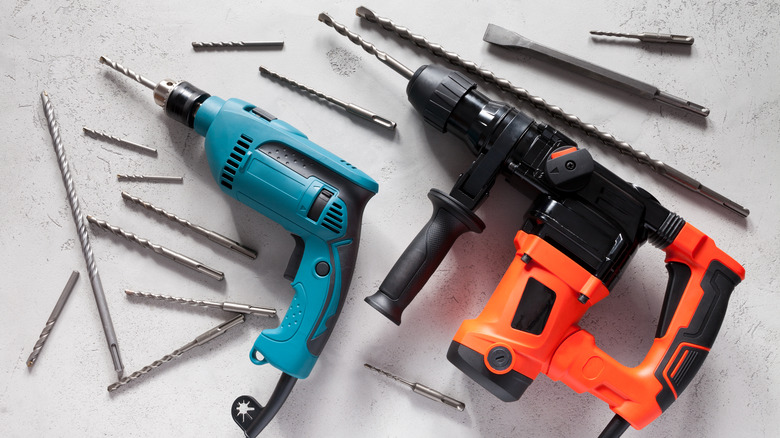
If your patio is made of anything other than stone, a standard drill and a 1-inch masonry bit should do the trick. Masonry drill bits are made from tungsten and steel, a combo that stands up well to hard surfaces. You can purchase a 1-inch masonry bit for around $30, though it could cost up to $60 depending on the brand.
Scope out where you'll be making your holes, don some protective gloves and goggles, and get ready to drill. But, first there are some guidelines to help you and your gear do the job safely and more easily. Getting your bit to make the initial hole can be challenging. You can speed the process along by making a nick on the surface where you'll be placing the tip of the drill bit. This divot will give the bit more surface area to grip onto as it creates the hole. Go slowly, letting the drill do the work rather than pushing too hard on the tool. Take breaks to allow the bit to cool; bits are more likely to break when they are overheated. Once you've drilled your holes deep enough to expose the ground beneath, you can fill them with gravel to make the holes less visible. Now you're ready to maximize your outdoor living space!
How to drill into stone pavers
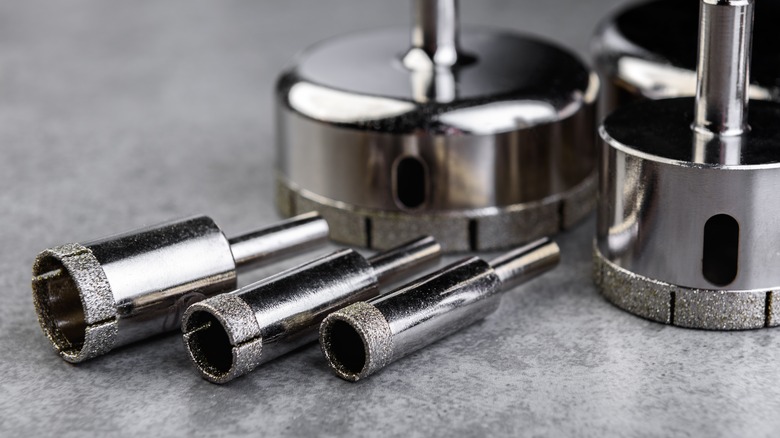
Did a chic paving stone patio lure you in when you were buying your home? For stone, experts suggest using a diamond bit with a regular drill. This type of bit is designed to cut into very hard material, and they are priced similarly to masonry bits. Diamond bits are often cylindrical and grind into stone surfaces with the help of diamond particles. The cylinder cuts out a "plug" of stone rather than carving out a hole like most other drill bits.
Using a diamond bit involves different steps than when using a standard drill bit. Like other bits, diamond bits need to stay cool to perform best, and water is a simple solution. An easy trick to hold water around your bit as you drill is to create a small barrier out of plumbers' putty around where you'll be drilling and add small amounts of water as you work.
Starting the hole can be challenging, so professionals recommend beginning the hole with the bit at an angle, and then straightening it as you deepen the cut. Like with drainage holes in man-made patio flooring, you can conceal holes in stone patios by filling them with gravel.