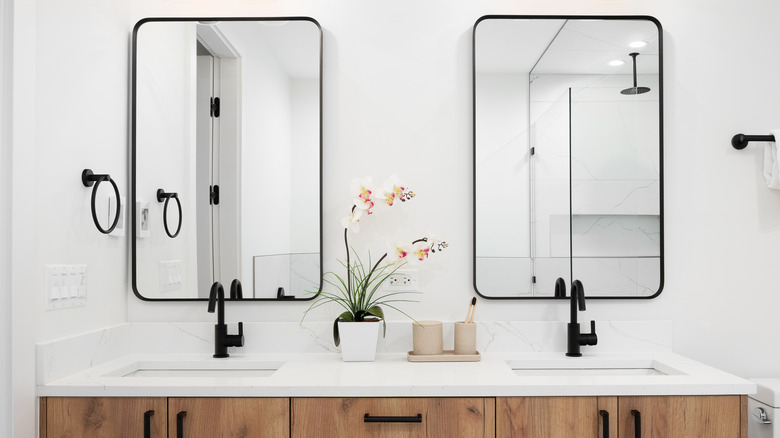
Protect Your Bathroom Vanity From Unwanted Moisture With A DIY Backsplash
Water goes where it wants to go, and that's usually everywhere, but it has a knack for taking up long-term residence anywhere you really don't want it to be. Nowhere is this more true than around kitchen and bathroom sinks. And if you've ever seen a child under 7 years old wash their hands at a bathroom vanity, you've probably marveled at the fact that the floor hasn't caved in from all the splashed water. Yet. But water working its way between a vanity and wall absolutely is an issue, and in a moist environment like a bath, this invites mold growth and its cousin: wood rot. A backsplash and judicious use for caulk are necessary, but even the least expensive vanity backsplashes can be absurdly expensive. A 4-inch-wide, 21 ¼-inch-long bit of white marble runs you at least $29.00 at Lowe's. But we have a cheaper and equally effective idea: PVC.
Purists might quibble about it, but PVC trim boards have a lot going for them. They're light, easy to work with, inexpensive, durable, and impervious to water. A 1-by-4-inch PVC trim board costs $19.98 at Lowe's ... but it's 96 inches feet long. On a per-foot basis, you're paying about $16.38 per foot for the marble, and $2.50 per foot for the PVC. It's a good idea to add an effective backsplash to a bathroom vanity, and from a distance (or at a glance), it's unlikely anyone will notice the difference between the PVC and the marble.
A quick, easy, cheap, effective backsplash
Westlake Royal's S4S PVC trim boards, for example, are engineered for exterior use, and they are guaranteed to have perfectly square edges. This precision is common in PVC trim — your seams can practically disappear when you butt them against each other. And the backsplash construction project is itself is simple, even compared with peel-and-stick backsplash tiles, which can actually be troublesome. The only tools you need are a caulking gun and a miter saw (though you could get away with a handsaw with a bit of care).
Cut the boards to length, and when possible try to use factory edges whenever two pieces meet. To more closely match the exact look of a marble or quartz backsplash, you can slightly chamfer the visible top corner on a table saw. Apply construction adhesive to the boards and press them into place firmly. Caulk around all the new backsplash's edges, and you're done. YouTube home reno DIYers LightsCameraYorks used the same basic process (but with a wider PVC board) to finish and protect a chipped bathroom vanity, and the results speak for themselves — take a look above. To give your backsplash a bit of a more refined look, consider using the wider, slightly more expensive boards.
When you start looking around, you'll find more and more uses for PVC trim. Sometimes the use is simply as trim, like this backsplash (you can also use this paint trick to make your baseboards look taller). But the stuff is so uniform — so flat, smooth, and straight — that we've used it for everything from DIY table saw fences to homemade video equipment.
Working with PVC boards
If you've ever studied plumbing at the University of YouTube, you might have seen a video of a guy cutting through a PVC pipe with a bit of string pulled from his toolbox or perhaps his walrus mustache. It really drives home how easy it is to work with this material. But if you haven't seen a demonstration like this, you might be thinking that using PVC will require a whole new set of tools and skills. Not so. For the most part, you can use the same instruments and methods that you would for a wood board. Cut the stuff with a sharp saw blade made for cutting lumber. Just remember that PVC is typically very smooth, but cuts can have rough edges, and saw blade marks stand out against the smooth uncut surfaces. You might need to do a little light sanding at the cuts with 220- to 330-grit sandpaper, just as you would when finishing wood trim.
If you decide you need to use fasteners (for example, to pull two boards together), you can use wood designs unless the manufacturer suggests otherwise. Don't worry too much about leaving gaps for your PVC to expand into. Because this is an interior application with fairly stable temperatures, and because you're gluing the entire length of the backsplash anyway, it won't make much difference. Just use flexible caulk at any corners and you should be all set. The only difference from working with wood is that you might want to use a respirator when cutting or sanding PVC because it's been shown to off-gas chemicals like plasticizers.

