Grow Thriving Microgreens Without An Outdoor Space By Using Empty Food Tins
Once a garnish and now a common produce item, microgreens are popular for all of the right reasons. Packed with nutrients and flavor, these baby vegetable plants are a great way to get your vitamins without waiting for them to mature. As the Head Gardener for Local Matters, a nonprofit working to tackle food insecurity, I've fully taken advantage of the magic of microgreens. They are flavorful, add a nice crunchy texture to almost any dish, and even a novice can grow them. It's very easy to start your own little salad bar in just a couple of weeks, indoors, and in the most interesting containers. There's no need for bags of potting mix or heavy ceramic pots. You can even use something as common as empty food tins.
While the name seems self-explanatory, some specific characteristics set this food item apart. Unlike sprouts, which are young vegetable plants eaten seed and all, microgreens are young veggies with their first or second set of leaves and are cut above the growing medium. From broccoli and peas to radishes and sunflowers, there are so many plants that make excellent microgreens. The young greens tend to taste like their future selves (though a bit milder), but they have a much higher nutrient density than mature vegetables — as much as 30-40 times more! So the payoff is worth learning how to grow and care for microgreens.
Choose the right container for microgreens
As the Head Gardener of Local Matters, it's my responsibility not only to grow healthy food, but to teach people about growing at home. I utilize microgreens because it takes so little specialized equipment to grow them. All you need is a growing medium and a container, but both things are very flexible. You can use potting soil, but you only need a depth of about 2 inches. Coco coir and jute are also popular.
Picking a shallow, clean container is where you get to have the real fun. The greens will stretch up toward the light, so a regular pot will either waste soil or house the seeds too low for strong stems. Instead, using small fish tins is a great way to repurpose something that would end up in a landfill, and you also know that the metal is food-grade safe. Adding drainage holes to the bottom is a personal preference. To prevent one of the biggest mistakes you can make with container gardening, drainage is a must to prevent root rot. However, microgreens are ready to harvest in as little as 7-21 days after germinating, depending on the variety, so root rot isn't a concern here. I use pie tins or glass Tupperware containers for mine, but even teacups, plates, and bowls can work. I've also experimented with using jute growing mats, but soil has had the best results in my experience.
Growing healthy microgreens at home

To get started, dampen the growing medium. If you're using soil, add enough water to it that you can feel it is moist, but if you squeeze it, no water drips from it. Then, sprinkle the seeds on top. Some seeds, such as speckled peas, benefit from being soaked in water for a couple of hours first. I have tried soaking them for 4 hours and not soaking them at all, and both work. For all seeds, gently pat them onto the soil.
The next step is to germinate them in the dark. Adding a lid to keep humidity high is helpful, but otherwise, you can spritz them with water occasionally. At Local Matters, I place the plastic lid of the pie tin on top to keep the humidity high, and then I place the entire setup in my desk drawer for a couple of days. This encourages germination. Plus, it's fun to open my drawer to show off my "desk peas." Once you see that the majority of the seeds have germinated, you can take them to a nice sunny window or grow light.
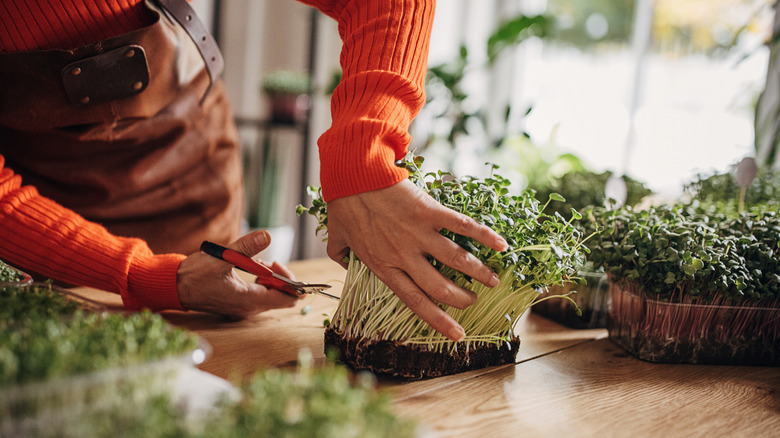
Be sure to keep an eye out for watering. Microgreens are thirsty. A totally flattened tray of greens has greeted me more than once at work. Thankfully, they do perk back up if you water them right away. The last step is to harvest by cutting an inch or two above the soil line. Try to use them as soon as you cut them. Sprinkle them on ramen or your pasta for a healthy garnish.