Can You Cover Up Your Outdated Kitchen Backsplash With Plaster? What To Know
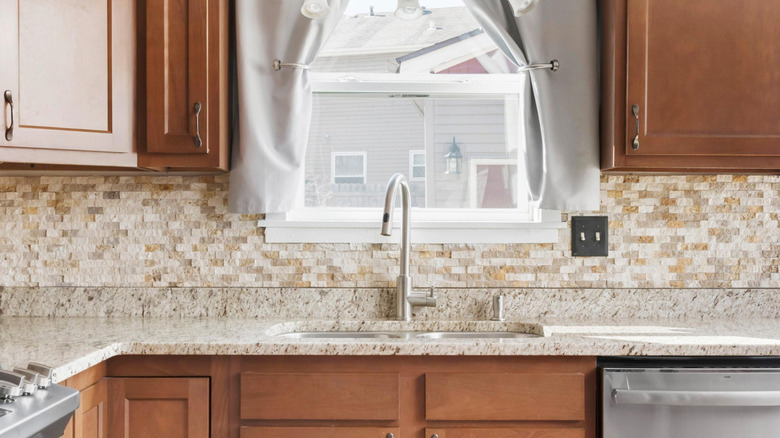
Tile has long been king of the backsplash. Sure, it's easy to clean and durable, but it can also become outdated, chipped, or just not your current style. Rather than replacing it, which can be expensive with plenty of tiling mistakes to avoid, DIYers are drawing inspiration from the unique wall plaster Joanna Gaines adores and used in her renovation of Hotel 1928 in Waco, Texas: Venetian plaster. However, Venetian plaster can be finicky and should only be applied to certain surfaces, tile not being one of them. Luckily, there's another kinds of plaster that tends to be more DIY friendly and still lest you achieve the same look: microcement.
Microcement plaster is a great material for backsplashes since it's easy to clean and, unlike tile, doesn't have grout lines that can be easily stained or turn dingy over time. Microcement is also fire resistant and eco-friendly. It's even waterproof with the correct application, which makes it ideal for kitchens prone to spills and splatters.
Using microcement as a kitchen backsplash
Microcement differs from other plaster because it contains cement, which is very adhesive. This key ingredient means microcement plaster can easily stick directly onto most surfaces, including tile. Just be careful to read the instructions carefully before choosing a brand. Many microcements are sold in kits that are very DIY friendly and can be applied directly to tile, but there are a few brands that require you to level the surface and apply a primer first.
Start by cleaning the existing tile backsplash so it's free of any grease or dust. The tiles should be in good condition without any cracks or loose areas. Once the surface is prepared, it's time to start mixing the product. Follow the instructions on the package carefully, and be aware that microcement tends to dry rather quickly. Typically, you'll have about 45 minutes to 1 ½ hours to work before the product becomes challenging to spread. Once the mixture has a pancake-batter-like consistency, use a trowel to apply it over the backsplash in thin coats, letting each coat dry thoroughly before starting the next one.
You may opt to use a sealant at this point to help the product last longer, but ensure the microcement is fully dry before applying the sealant; some products take up to three days to fully dry. Once complete, be sure to add a line of caulk where the backsplash and countertop meet to keep spills from seeping between the two surfaces.
Potential pitfalls of using microcement
Like any DIY, covering your outdated tile kitchen backsplash with microcement isn't without potential pitfalls. For one, microcement tends to dry at different rates on top of tile versus on top of grout. If you aren't absolutely sure every last inch of the surface is dry before applying the next layer, play it safe and wait a bit longer. If you don't, there's a chance a hint of that original tile-and-grout grid will show through in the finished product.
Improper product mixing can also lead to poor results. You want to be very sure the color is evenly distributed throughout the mixture before applying, or the backsplash could dry splotchy and uneven. There are also temperature considerations. The ideal temperature for applying microcement is about 60 to 77 degrees Fahrenheit. Extreme temperatures can affect the hardening time of the product.
If you aren't quite sure your DIY skillset is up for this project, hiring a professional is always an option. To find one, reach out to the brand that makes your microcement. It may have a list of preferred contractors trusted to apply its product correctly and well. No matter if you tackle it yourself or hire a professional, a microcement plaster backsplash beautifully updates an outdated kitchen. Now that your kitchen backsplash has its glow up, consider ditching your shower tiles and using plaster for a trendy bathroom, too.