12 Mistakes To Avoid When Tiling
We may receive a commission on purchases made from links.
We've been using tiles for aesthetic and practical purposes since the time of the ancient Egyptians. Tiles are functional, fashionable, and durable. However, tiling can be a nightmare if you don't take the time to avoid some common and simple mistakes. Whether it's wall or floor tiles, if they're not installed properly, they can lead to a range of problems, from bad to worse. Water damage, mold growth, and structural problems can all occur in the wake of a bad tile job, but that's just the tip of a particularly nasty iceberg.
When tiles are not fitted according to the universal rules laid down, they'll look haphazard instead of seamless and act as more of an eye sore than a focal point in your home. Tiles laid improperly can look cheap instead of dynamic. Although there's a tile for every taste and theme, if you don't plan the layout, measure properly, apply the correct amount of adhesive, grout with care, and pick the right tile for the right place, it'll look like a DIY job gone wrong. Worse still, you'll have to shell out extra money for a professional to fix your botched job. All this can be easily avoided if you familiarize yourself fully with these 12 costly mistakes. Memorize these before you pick up your trowel and prepare your grout.
Forgetting to test a sample tile before you begin
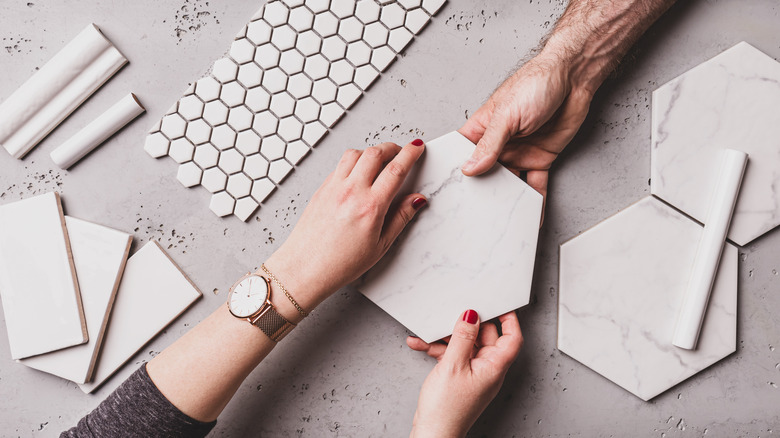
With an abundance of eye-catching and diverse tiles to choose from, it's difficult to know which one will work best with your decor. However, don't make the cardinal mistake of forgetting to test a tile sample before you begin because you'll live to regret it. Samples are the only surefire way to visualize the effect your laid tiles will have. Their color, texture, and finish must be seen in the flesh before you begin any tiling project. Screens or brochures don't capture the feel and flavor of a tile or give you a true idea of how it will look in your home. So do yourself a favor and get busy sampling.
If it's a floor tile, place it on the floor, and if it's a wall tile, hold it at eye level to see if it clashes or enhances your existing space. Another factor to bear in mind is how much natural light the room receives. The tile that looks bright and cheerful online might look different in a room that receives little natural light. Alternately if you are tiling in a room that gets a lot of natural light, ensure there's no surface glare that might diminish its aesthetic integrity. Likewise, it's always wise to see how tiles look under artificial light.
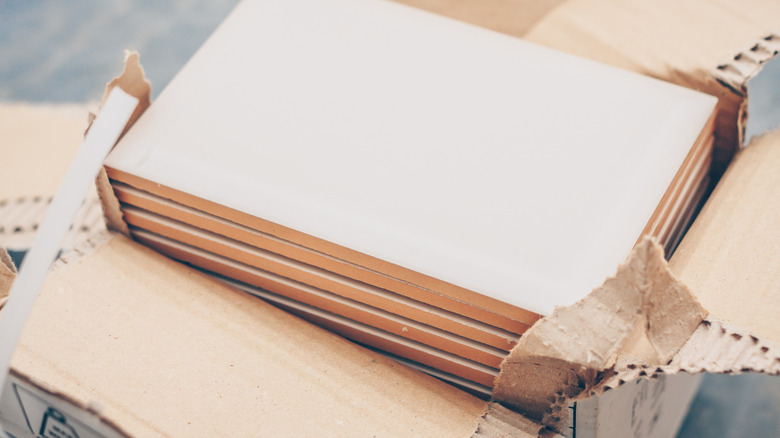
Not having enough tiles for your layout
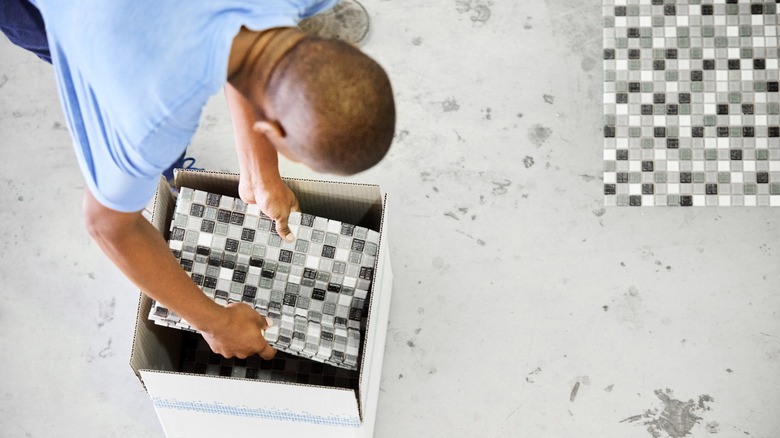
Picture the scene. The tiles are flying onto the walls or floors with effortless ease. The tiled area is beginning to take shape and looks even better than you imagined it ever would or could. The trowel feels like an extension of your own body, and as the project approaches its last mile and you reach for another tile, you come up empty! It dawns on you that you've made the cardinal error of underestimating just how many tiles you needed to complete the layout, and now you feel like a prize plum. Don't make the common mistake of not having enough tiles for your layout because it'll ruin your momentum as well as your equilibrium.
To avoid this annoying predicament, ensure you get your calculations right before you begin, and add a few extra tiles to account for measuring mistakes and breakages. It's usually advised to order about 10% more tiles than you'll need. Remember, it's better to have too much than too little. This is especially important if you accidentally crack a tile or two a few years down the line. Rather than redoing the whole layout, you can just replace the one tile from your surplus supply.
Neglecting to pick the right size tiles for the job
Just like people, tiles come in all shapes and sizes. You've got your large format showstoppers and your cute and understated subway tiles. In theory, you've got a world of form and scale to play with. However, just as you can't force a square into a circle-shaped hole, you've got to pay special attention to what size tile fits where. Many people fall into the trap that small tiles are tailor-made for small places. Big mistake! The more grout lines you have, the more claustrophobic that space will become. The bigger the tile, the fewer the grout lines — you create the illusion of a bigger space with a more modern and streamlined look.
Small tiles usually work better if you're looking for a more dynamic pattern, and they make for a more suitable fit and finish on uneven surfaces. If you want to mix and match sizes, a common rule of thumb is to have larger tiles on the floor with smaller ones on the walls. It makes the space feel more proportional than if you were to do the opposite. However, if you want to push the boat out and get a little playful with the size and scale of your tiles, it's entirely up to you.
Failing to prepare the surface properly
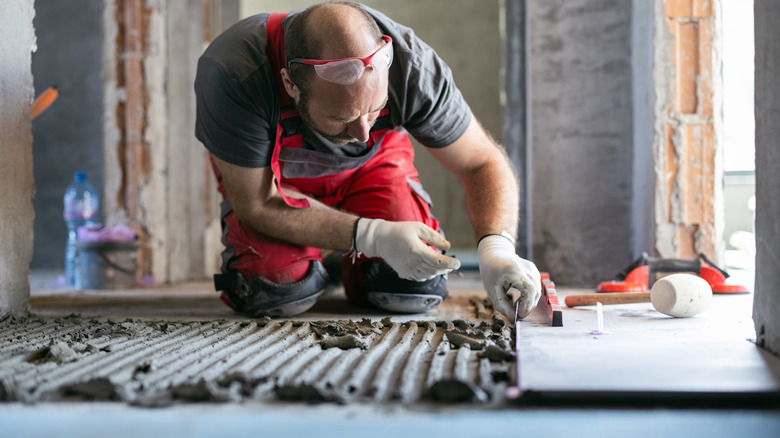
Just as the longest journey begins with the smallest step, laying your first tile on a wall or floor can be a bit of a moment. It's the foundation stone for something pretty special. Yet before you even contemplate getting to this stage, you've got to make sure you've prepared your surface properly. When tiling a floor, the surface must be flat, dry, and dust-free. It also needs to be sufficiently rigid and hard to support the weight and structure of the tiles. New concrete floors can be tiled easily after being fully set and cured. Old concrete floors may need to be treated with diluted hydrochloric acid before tiling to remove contaminants and rough edges. You cannot tile directly over wooden floorboards because their flexibility and movement can cause the tiles to crack and break. However, if you cover a timber floor with a cement fiber board before tiling, you'll have no such problems.
In addition to prepping the floor, you also have to prep the walls. It's a common mistake to forget to waterproof shower and wet room walls before you tile them. Tiles, tile adhesive, and tile grout are not 100 % moistureproof, and timber floors in particular can swell and force the tiles to rise if not treated beforehand. Waterproofing membranes are easily available and can be easily applied in one coat with a brush or a trowel.
Using the wrong type of drill and cracking the tiles
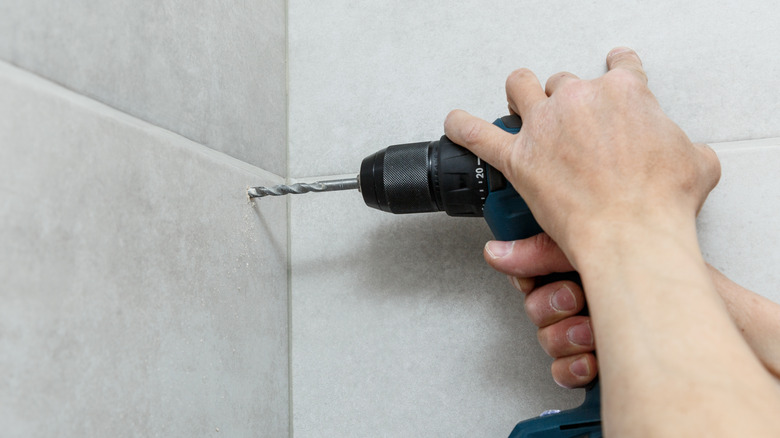
Cracking tiles is a nightmare scenario, but it happens, particularly when using a drill. Although you don't need a drill to lay tiles, you'll sometimes need one directly after tiling to finish off the job. It could be attaching a shelf or mirror to the tiled wall or installing a shower enclosure or screen, but knowing how to safely drill into tiles without cracking them is essential. A cordless drill is your best bet, and dependent on your choice of tile, you'll need a specialist drill bit.
Spear-shaped carbide-tipped drill bits are cheap and work well with softer ceramic tiles. For natural stone and porcelain tiles, you'll need the more expensive and circular-shaped diamond-tipped drill bits. Drill bits that have been around the block a few times won't be up for the job, so make sure yours is in tip-top condition.
Be prepared to use a bit of elbow grease when drilling; you need to press down with some force. You also want to use the standard drill mode as opposed to the hammer function, because it's less likely to cause cracks. Measure and mark where the holes will be on the tiles you are drilling. It's a good idea to cover the area with a bit of masking tape so the drill can get a better grip and catch, and avoid damaging the tile's surface. Once the drill has penetrated the tile, you'll need to change the drill bit to match the wall's surface.
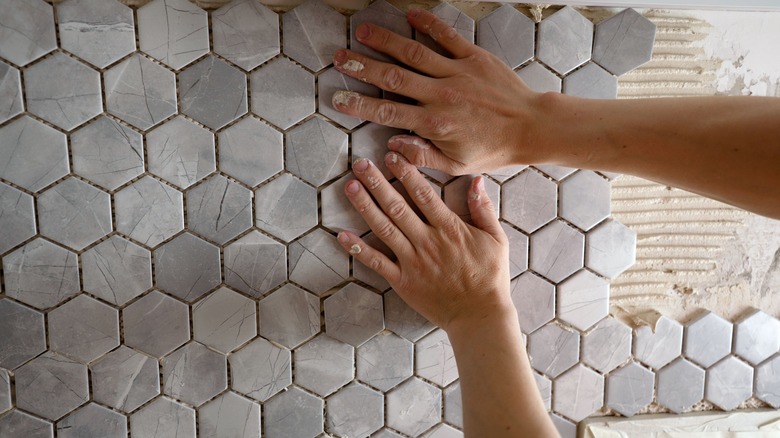
Using the floor or skirting board as a guide to laying your tiles
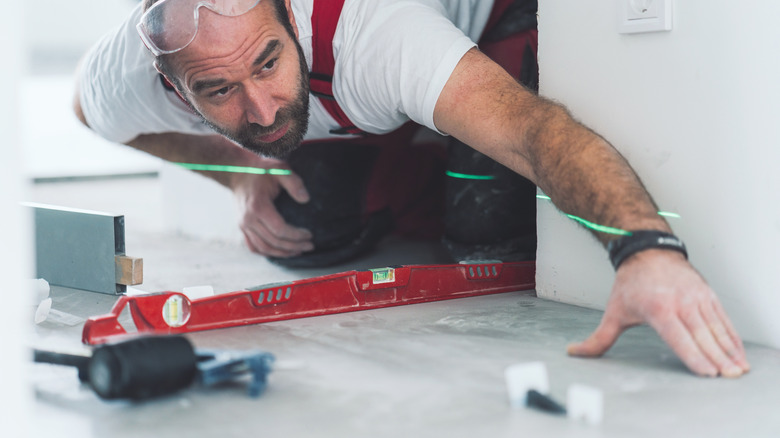
It's a common mistake when tiling to fall into the trap of using existing features such as floors or skirting boards as a guide to laying your tiles. Rarely are either perfectly symmetrical and using them as a guide can cause your tiles to look wonky and unprofessional. To avoid this rookie and textbook error, invest in a spirit level to ensure your tiles remain straight and true as you lay them.
Before tiling walls, a thin piece of wood attached to the center will be a good starting point. Tile in rows from the middle to the edges and use the spirit level to ensure the tiles are aligned vertically and horizontally. When tiling floors, the process is similar. Start from the center and tile towards the corners in straight and even rows. Always leave the doorway area until last so you can safely come and go without walking on tiles before they have set properly.
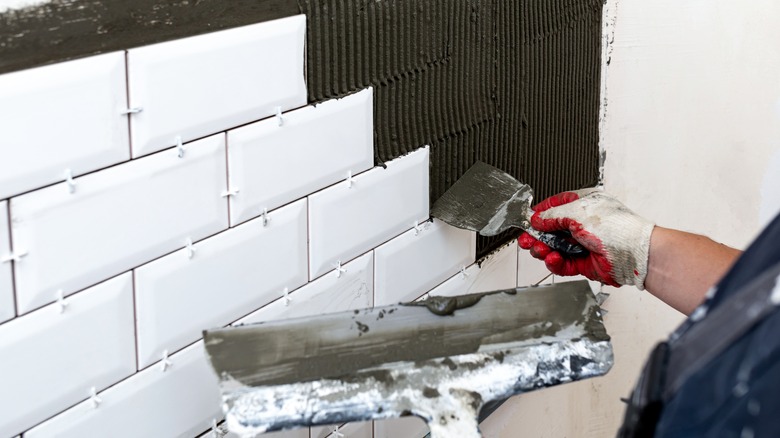
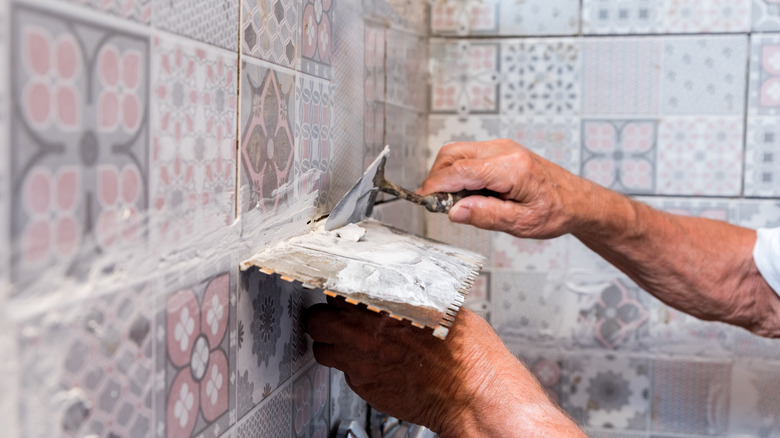
Not using the right tile adhesive or the correct amount
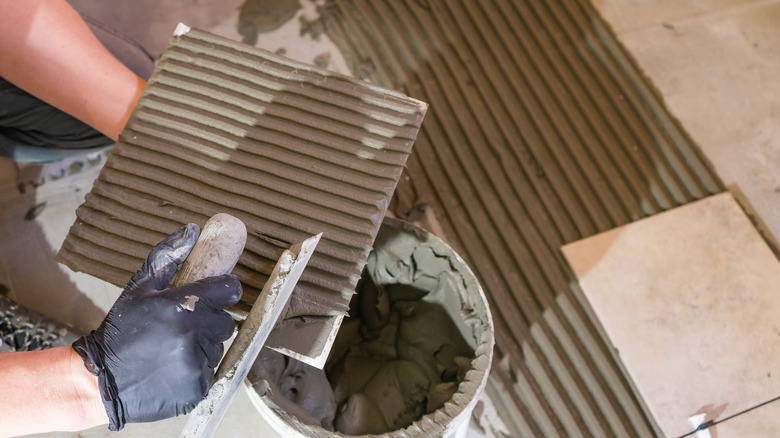
Tile adhesive is an integral part of the tiling process. Get it wrong, and you'll find yourself in a sticky situation where the tiles fail to set and stay in place for the long term. When it comes to tiles, there's no one-size fits all type of adhesive. It depends on the location where you're tiling and the material of the tile. For example, make sure you pick a waterproof adhesive for areas where the tiles will be exposed to a lot of water, such as bathrooms and kitchens. You'll need a flexible adhesive when tiling onto a backboard so it doesn't crack if there's any movement. Heat-resistant adhesives are perfect for tiling fireplaces, and rapid-set adhesives are tailored specifically to hold natural stone and large tiles in place.
As a simple rule of thumb, you will need more adhesive for floor tiles than wall tiles. It's recommended you use a 1-3mm layer of adhesive for wall tiles and around 3-5mm for floors. Applying adhesive directly to the wall provides a solid and even layer for tiling. If you prefer to apply it directly to the tile, ensure you apply the adhesive evenly to the backside of the tile as opposed to the dotting and dabbing technique. Applying little dots and dabs to the center and corner of the tiles is a recipe for disaster. The areas not covered by the adhesive can provide inroads for moisture, resulting in the tiles becoming loose and falling off over time.
Using the incorrect trowel
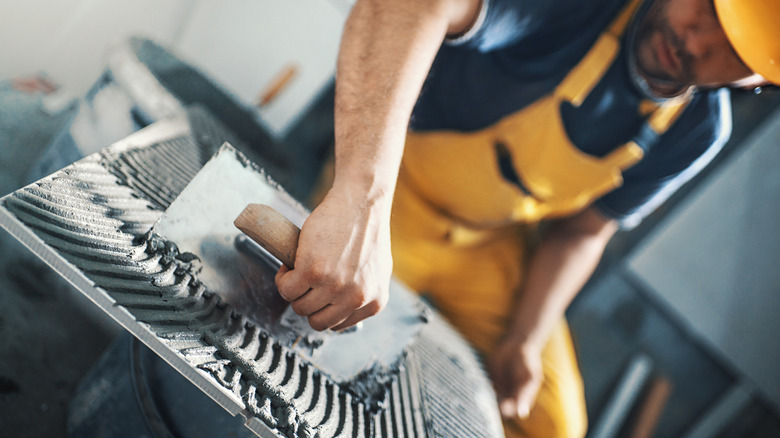
It's a poor workperson who blames their tools, but when it comes to laying tiles, it's easy to get it wrong if you don't get the tool right. And nowhere does that ring truer than using the incorrect trowel. A tile trowel's primary purpose is to apply the adhesive evenly to the tile. Too little coverage leaves you with weakened and compromised tiles that can undermine your entire project. Apply too much, and you're making a job far messier, more complicated, and more expensive than it needs to be.
To save yourself a lot of aggravation, find out what type and size of trowel the manufacturers of your specific tile and adhesive recommend. U-notched and square-notched trowels are the most popular choice for regular tiles installations. U-notches are preferred for larger tiles, while square notches work better with smaller tiles. V-notched trowels allow for a more controlled appliance of adhesive because of their v-shaped notches. They're often the preferred choice for smaller mosaic tiles. When choosing a trowel, pick a durable one that has a comfortable grip, is nicely weighted and balanced, is compatible with your chosen adhesive, and feels it will make your overall tiling experience much more enjoyable.
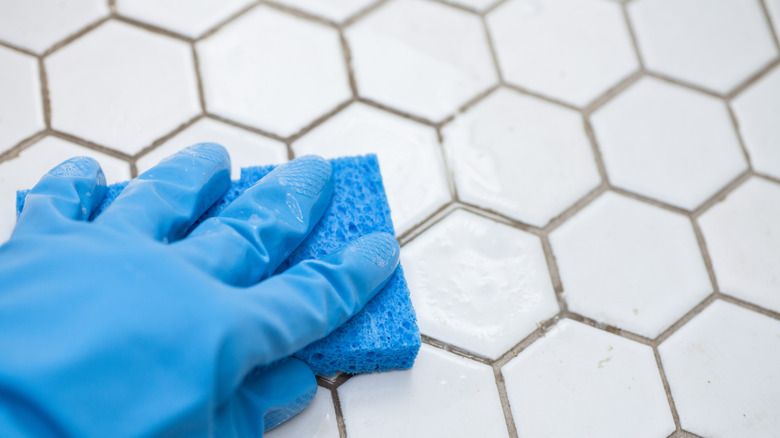
Rushing the grouting process
Once the tiles are laid and in place, it's time to fill the narrow gaps and channels with a little grout. It's tempting to think at this stage that the hard work is over, and the grouting is the easy part. But remember, without the icing, the baked cake is just a dour sponge! Apart from providing cohesion and a perfect finish to any tiling project, grouting also strengthens the surface and helps keeps dirt and moisture out. It's important not to rush this process because you'll soon regret it.
Before grouting, you should let the tiles cure for at least a 24 to 48-hour period. Take a putty knife and ensure the gaps are clean of dirt and debris. Mix the grout powder with water and wait 10 minutes for it to strengthen. Spread the grout over the tiles in an upward direction, and use the side of the float to help it penetrate the gaps. Remove all excess grout with the float, then clean the tile surface with a damp sponge. You can finish shaping the grout lines with your fingers, but don't apply too much pressure as you don't want to force the grout out before it's set. Wait 30 minutes, and then buff the tiles to a shine.
Getting the grout color wrong
It's understandable that when we're visualizing how divine the pattern, color, shape, and layout of our tiles will look in our homes that we forget to pay attention to the color of the grout. Depending on its particular shade and hue, your grout can upstage the understated intricacy of your tiles. This is a big no, no! The job of grout, apart from keeping things from falling apart at the seams, is to emphasize the unique aesthetic of your tiles.
A grout color that contrasts with your tile can create a dramatic and eye-catching look — think white grout, black tile — but that can be overwhelming in large spaces. The safer option is usually to match the grout color to that of the tile. It looks minimalist and seamless and can add both depth and space to small and large areas alike. Grout works best when it fades into the background, like a distant relative at a wedding. A neutral-colored grout allows a more flamboyant and patterned tile the chance to shine and be the true focus. If you're using multicolored tiles, as long as your grout matches at least one of the colors, you're usually on safe ground.
Undoing all your hard work by failing to seal the tiles properly
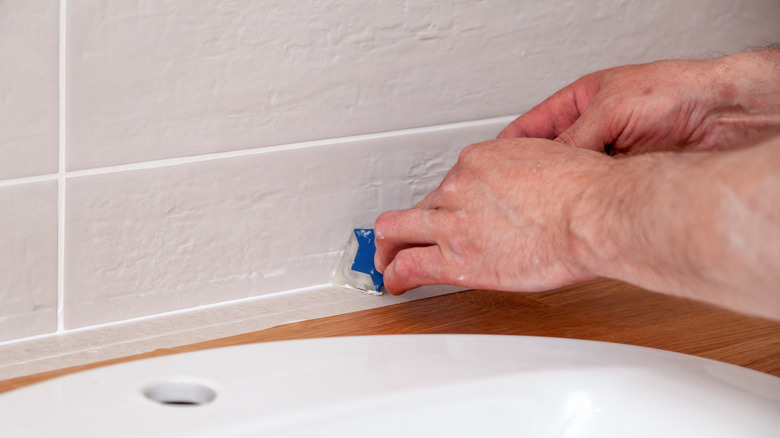
Once the tiles are in place and the grouting is finished, it's time to kick back and marvel at your masterpiece. But wait! There's something you've forgotten, and it's a biggie! Failing to seal the tiles and grout properly at the end of the job is a surefire way of undoing all your hard work. If you're tiling in a bathroom or anywhere where the tiles will be exposed to a lot of water, you must choose a high-quality sealant capable of fighting mold. A good sealant is also a good combative measure against everyday spills and stains. Porcelain or ceramic tiles do not have to be sealed, but the grout does. Because of the porous nature of natural stone tiles, they require a sealant. Take our word for it; something like a spilled glass of red wine can do a lot of damage to a limestone tile floor.
Sealants also keep everyday dirt and grime from penetrating the tiles, keeping them looking box-fresh for much longer. You can get tile sealers, grout sealers, and sealers that do both. Once the tile surface has been cleaned and is dry, apply the sealer with a rag or sponge and allow five minutes for it to penetrate the surface. Always follow the instructional label on the bottle, but it's usually advised to reapply the sealer every one to five years for maximum protection.
Throwing away any tiles you haven't used
When the sun finally sets on a job well done, throwing away any surplus tiles you didn't use may be tempting. But don't! Not only is this a headache for the environment, but it's also impractical. If one of those carefully laid tiles on your wall or floor gets chipped over time, or a hyperactive toddler with a permanent marker mistakes it for a canvas, you'll need a replacement. Tiles and their supply lines go in and out of fashion, so make sure you have a few on standby when the need arises.
Additionally, if you've got more tiles than anyone could need after the job is done, don't consign them to a landfill. Get a little creative instead. Those old tiles can be used to create a DIY masterpiece, such as a coffee table with patterned tile, a serving tray, a mosaic mirror, or tile planters. The choice is yours, but tiles don't just have to be for floors and walls. They can also help liven up other parts of your home in endless ways.