The Simplest Way To Banish Hollow Spots From Your Flooring

Beautiful flooring can instantly elevate the look and feel of your home. When certain spots start to sag, however, it not only detracts from the appearance, but it can also create a tripping hazard and lessen the value of your home. The costs to repair sagging floors by a professional can be steep, but luckily there's an alternative. Injecting an adhesive or sealant underneath the drooping floorboards is an easy, affordable way to stabilize your floor and eliminate any soft spots underfoot.
If you have vinyl plank, laminate, or engineered hardwood flooring, various factors can cause the floorboards to sink over time. Often it's a result of mistakes when installing vinyl plank or laminate, though changes in temperature or humidity, an uneven subfloor, or water damage could also be to blame. If one of these problems has caused your floor to sag or feel bouncy when you walk on it, a quick repair to level out the boards may be all that's needed to make your floor look level and feel firm again.
The simple saggy floor fix
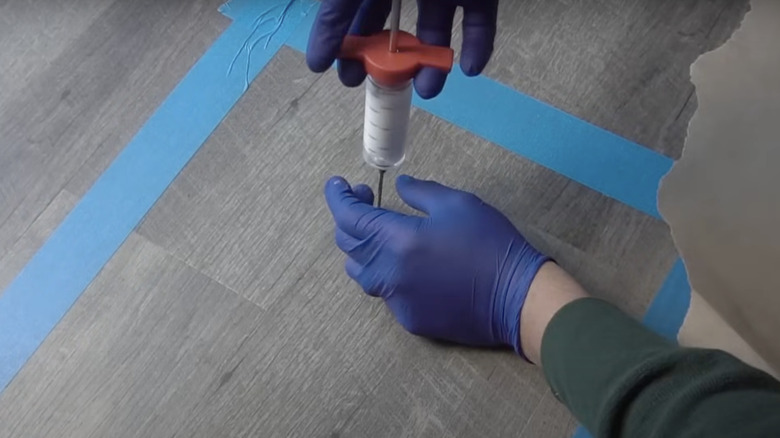
To tackle this project, first you will need access to the space between the subfloor and the floor planks. If your floor was installed with a click-lock system (as opposed to being glued or nailed down) you may be able to do this by using a suction tool to shift the boards apart, creating space to get underneath. If this isn't an option, you will have to drill holes in the planks. The size of the holes depends on what you use to insert your filler. For smaller areas, use a small drill bit and a syringe. For larger areas, match the drill bit size to the tip of the caulk tube.
The next step is to inject a sealant, caulk, or adhesive into the drilled holes (or between the planks) until the boards feel stable. Because changes in temperature and humidity can cause flooring to expand and contract over time – the reason why acclimating your laminate is a crucial step you don't want to skip during flooring installation – it's a good idea to use a flexible sealant that will allow for some movement when this happens.
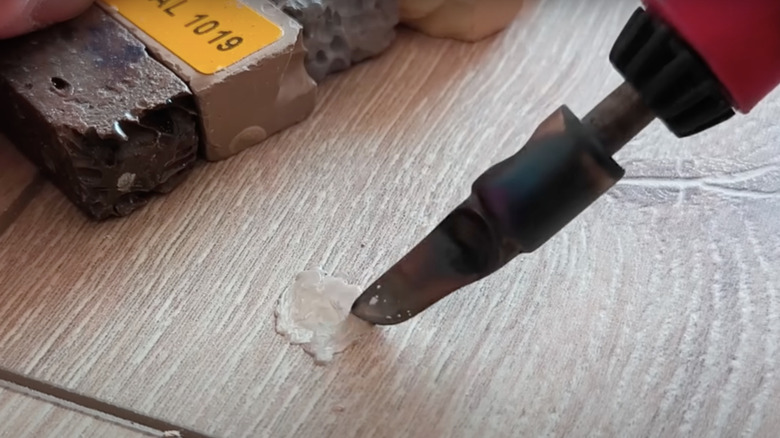
Once the area under the boards has been filled and they feel solid, place something heavy on top until the sealant has a chance to set. Finally, you need to repair the holes you drilled. There are various ways to do this including filling the holes with wax, wood filler, or small scraps from a spare plank and carefully going over it with a soldering iron until the holes are filled in and level.
What to know before taking on this DIY floor repair
While this floor repair method is fairly simple and certainly less expensive than replacing your entire floor, there are a few things you should be aware of before tackling this project. There are various items you will need to purchase if you don't already have them on hand, including caulk or adhesive and a caulk gun or syringe. If you're moving click-lock planks to inject the sealant underneath, you'll need a heavy-duty suction cup. Alternatively, if you're drilling into the planks, you'll need a drill, drill bit, and soldering iron to repair the holes.
While drilling the holes and injecting the sealant is straight forward, you will need to exercise caution when repairing the holes in the planks. If the soldering iron gets too hot or lingers in one place too long, it can cause the floorboard to melt or become discolored. If this does happens you can fix your vinyl flooring without breaking the bank by cutting out and replacing the damaged section of the plank.
You should also be mindful that if your floor is sloping or sagging significantly in several spots, it may mean there's a larger underlying issue. It could be a sign there is a problem with your home's foundation, weak floor joists, moisture issues, termite damage, or some other culprit that may require structural repairs and should be assessed by a professional.