Joanna Gaines' Tips For Budget-Friendly Home Projects You Can DIY

We may receive a commission on purchases made from links.
Even if you're desperate to give your house a refresh, you might be hesitant about starting a new home project for a number of reasons. For instance, you might be keeping a close rein on your finances and simply can't justify updating your home. Maybe you're leery of pressing go on projects that might require you to hire professionals, or simply don't want to undertake something which will trigger weeks of disruptive work.
Fortunately, not all home projects require massive budgets, professional teams, and months of work. Throughout the years, design extraordinaire Joanna Gaines has imparted her wisdom on how homeowners can change up their space while sticking to a relatively strict budget. And don't worry, you don't need to get a construction contractor license to complete any of these projects! Here are seven of Gaines' best tips for budget-friendly home projects you can do without professional help.
Backsplashes in small kitchens are relatively easy to put up, especially if you find a budget tile
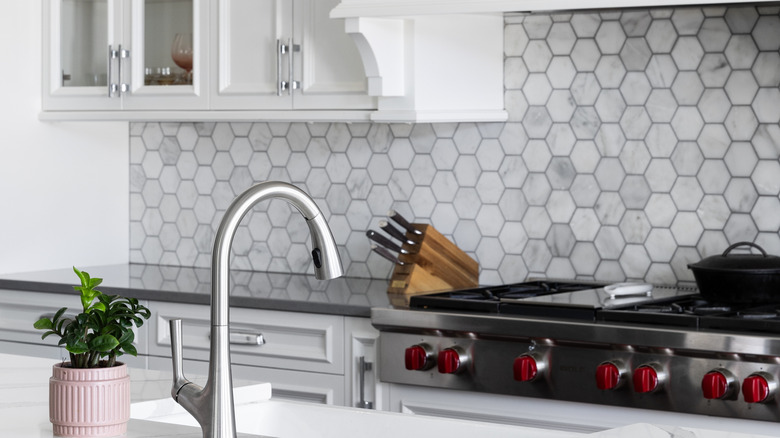
A design tip from Gaines we think you should add to your arsenal is to use a beautiful backsplash to elevate the look of your kitchen. Backsplash tiling is often something people leave to their contractor — but it's also a DIY kitchen project Joanna Gaines recommends for beginners on a budget. While speaking to Country Living, she said that those with smaller kitchens will especially save some cash when taking on this backsplash project. "The good thing about a backsplash in smaller spaces is you don't have a ton of square footage that you have to work with, so you can go find a nice, affordable tile, and have fun with the pattern," said Gaines during the interview.
Start by shopping around for inexpensive yet durable tile. From there, consider taking Gaines' advice and make eye-catching designs with how you lay the tile. For instance, you could go with a charming basket weave or crosshatch design, a gorgeous block herringbone design, or a playful combination of horizontal and vertical stacks. Playing with tile layout is a favorite technique among designers, a smart way to elevate basic tiles and make them look like a bespoke install — and something a homeowner can reasonably undertake. Just make sure you like the layout of your design by placing it on a flat surface before you start applying any mortar to your walls!
Joanna Gaines says a couple coats of paint can make a huge impact
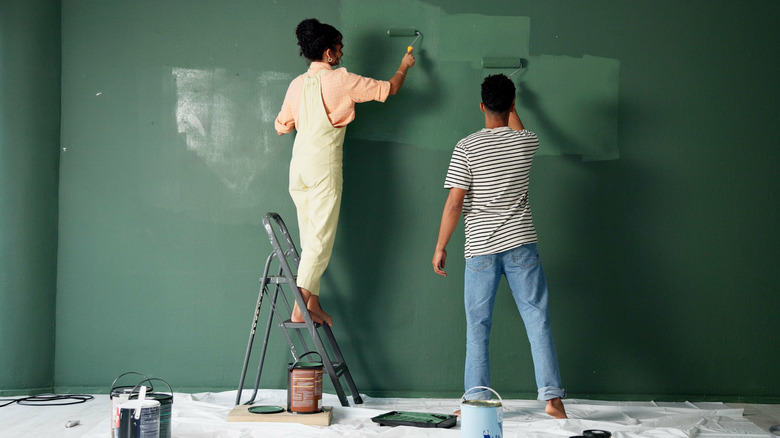
Fans know that Gaines is a big proponent of using a fresh coat of paint to liven up a space, and her renovations are living proof of the impact paint can have. While speaking to Elle Decor, Gaines shared that she believes "color is the biggest extension of our personality and style." The act of painting is relatively straightforward, and it's a project just about any homeowner can do. However, choosing the right shade can be tricky, even if you're planning to paint your walls white (there's more to choosing white paint than meets the eye). However, you don't have to be a designer to get it right. Rather than consulting a pro, Gaines urges homeowners to trust their gut while picking paint out. "I think your eye will gravitate towards the colors that are right for you — you don't have to be a design expert. We love that paint is emotional. You can go with your gut and your eye will go with the thing that feels right for you. And that's what's fun about paint — it's personal," said Gaines in the interview.
Besides letting your gut guide the way, here are some nuggets of paint color wisdom to help you pick the perfect shade. First, be aware that the saturation and intensity of paint color tends to amplify once spread over a wall. What this means is that a small color swatch of sage green is probably going to look darker, deeper, and more dramatic once it's up on the wall than it looks on the little color swatch. Therefore, when in doubt, go with the lighter, subtler shade, because it's probably going to shapeshift into a stronger color after painting.
To test drive colors, it's always smart to take advantage of a paint visualizer tool, where you can upload pictures of your room and see what it looks like with different paint colors. Most major paint brands like Behr, Sherwin-Williams, and Benjamin Moore have visualizer tools for their colors, and there are also apps you can download. You should also know that paint can look wildly different depending on the light. So make sure to put up large paint swatches in the room to know that you love the color regardless of how the sun hits it. You may also want to check out these tips for painting your home like a professional to make sure the end result looks flawless.
Add decorative trim to easily elevate the look of a space
In "Mini Reni" Season 1, Episode 3, Gaines transformed a rather plain shed into a stylish art workshop, dressing up the walls and windows with trim. The resourceful designer explained how adding decorative trim is a relatively simple, low-cost project that can have a big impact. "We did scallop on paint grade material because we were going to paint it," shared Gaines, adding that "these little cheats make it feel more impactful. Make it feel more elevated, but you're not spending too much to make a pretty cool impact."
If you are handy with a circular jig, you can make your own scalloped trim out of cheap wood from a local hardware store. And those who don't feel up to doing woodwork can purchase something like this Cobzier 15-Pack Scalloped Decorative Wood Trim, which is still an affordable upgrade at under $16. The beauty of decorative trim is that you can use it to dress up anything from window frames to walls, built-ins, freestanding furniture — you name it. For an extra whimsical spin you can even incorporate scalloped trim under cabinets or as an extension to your crown molding. If scalloped trim is a little to cutesy for your design vision, and you want something more streamlined, you can also take inspiration from how Gaines utilized straight trim to add some dimension to the plain plywood walls of the shed: adhering vertical lengths, roughly ten inches apart.
Joanna Gaines says that exterior updates can make for ideal weekend projects
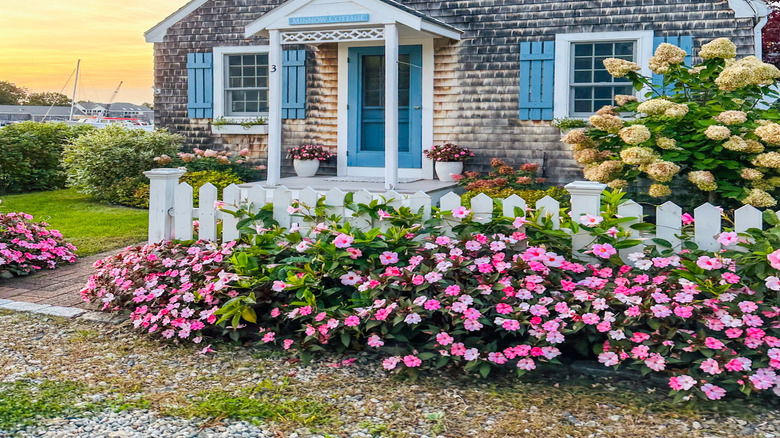
If you have a hankering to improve your home while getting some fresh air, Gaines has the perfect project for you. While speaking to Architectural Digest, Gaines said she believed the weekend (especially if you're experiencing good weather) is the perfect time to take on some exterior home renovations. "Freshening up the landscape, adding new shutters, and wrapping dated columns with redwood or cedar wood. These are all things you can tackle over the weekend and without killing your budget," said Gaines during the interview.
Giving your yard a mini makeover can be as simple as pruning back overgrown shrubs, trimming lawn edges, or laying down fresh mulch. But you can also tackle more ambitious projects, such as these budget-friendly garden path ideas, or even installing a cost-effective paver pathway patio by using a mix of gravel and paver slabs. Wrapping poles, like Gaines shared, is a straightforward project that only requires measuring out cedar boards and nailing them onto your existing columns. And although shutter installation can veer into more complex/expensive territory, DIYing stationery wood shutters can boost your home's curb appeal for far less than what it would cost to professionally install shutters.
Although all these projects sound exciting, we know that you might not want to spend your entire weekend toiling outside. To make the task a little easier, start prepping for the project during the week. For instance, you could order a mulch delivery ahead of time, schedule a small chipper rental to make clean up easier, or pick up supplies like lumber. Pro tip: If you want to avoid using a power saw for projects like pole wrapping, ask your local hardware store if they will be able to cut the lumber to length for you.
Wallpaper is a wonderful way to add interest to small spaces on a budget
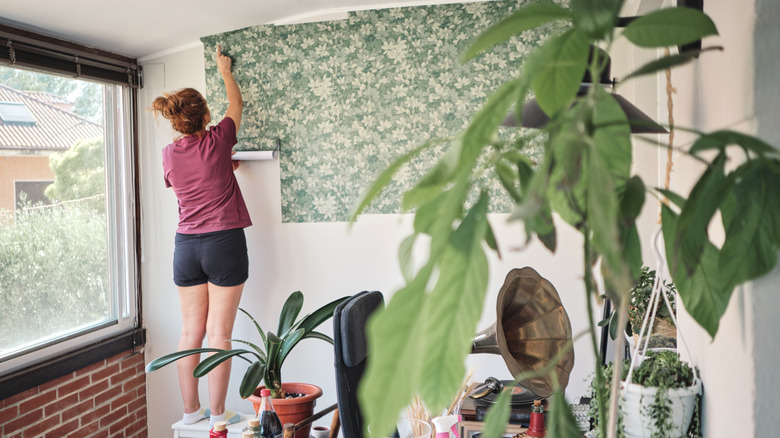
Wallpaper is one of the most impactful ways to change up a space, while being a highly DIY-able project, which, if you play your cards right, can also get done on a tight budget. The trick? Start with a small room. "Small spaces like bathrooms, mudrooms, and entryways are ideal for trying out a bold pattern because they're fairly low-risk in terms of the amount of real estate you're covering," Gaines shared in a Magnolia blog post. Smaller rooms also require less wallpaper, which will bring the cost of the project down and the time it takes to complete.
If you want to reduce the area of wallpaper you have to put up even further, you can take Gaines' lead and only wallpaper the bottom half of the room's walls. In this Instagram post, Gaines showcases how she gave a small bedroom a sophisticated makeover by doing this wallpaper trick. She also added trim, painted in a complementary color, where the wallpaper stops. With this hack, you can halve the money you'd spend on wallpapering the entire room. If you're renting, you can opt for peel-and-stick wallpaper and cap it off with some peel-and-stick trim, such as this Paparazzi Chair Rail or this Taaizau Paintable Peel and Stick Wall Molding Trim. If you go the reversible route, be aware that one major drawback of peel-and-stick wallpaper is that it's prone to bubbles, so make sure you have a smoothing tool on hand. Something soft like a sponge can work, alternatively, you can also pick up a kit, like this Art3d Smoothing Tool Kit for $6.
Plumbing pipes can be the perfect beginner-friendly frame for a set of DIY shelves
Yearning for some stylish shelving, but want to keep costs down? Plumbing pipes can be the foundation for a set of budget-friendly DIY shelves. Gaines showed the final product of her plumbing shelf project on Instagram. In the caption, she told her followers that they'll need plumbing pipes, some spray paint, and cedar wood to complete the DIY. "Looking for a simple DIY over the weekend? You can pick up plumbing pipe, flat black spray paint, and cedar at your local hardware store and have a simple shelf like this done in no time," read the post's caption.
If you feel comfortable cutting the pipes yourself, feel free to do so. However, you can always head over to your local home improvement store and see if they can cut the pipes for you. And while you're there, you can purchase a handy stud finder that can detect live wires. Something like the Franklin Sensors ProSensor will add about $40 onto your project, but it can save you the expense and hassle of having to call in an electrician to fix a damaged cable. You also might want to shop around to see if you can find a wood stain for the boards that will look flattering with the color of spray paint you settled on for the pipes. Here are some stunning wood stain and paint color combo ideas if you're not sure where to start
Creating vertical storage with a pegboard wall is a DIY-able project that can add style and functionality to small rooms
Adding storage through things like built-in cabinets usually isn't a cheap (or easy) undertaking. Mounting a pegboard wall, on the other hand, is an achievable, cost-effective project that can yield oodles of flexible organization, and make for a fun focal point. Gaines expounded on the benefits of a peg wall in an Instagram post where she revealed a giant peg wall from her "Mini Reni" series. "What I love about the peg wall is it really is modular. If you need a ledge for art, if you need a little desk — if you want to hang things from the pegs, there's a million different ways that you can incorporate these in any space," shared Gaines.
If you're feeling up for some woodwork, you can make your very own pegboard out of some wood panels using a hole saw, and then craft custom shelves, bins, and ledges to slot into the holes. However, if you don't have time for a project of this size, you can also pick up ready-to-go pegboard kits, like these Pegboard Wall Organizer Panels from Amazon (which come with the organizing accessories). To add interest and mimic Gaines' install, consider adhering some scalloped trim to the top, or even attaching a small drop-down desk. And if you want to customize the color, you can give it a few coats of paint — just make sure to check out these tips before applying any paint to the wood.