The Trick You Should Know To Achieve The Perfect Upholstery Corner
Whether it's vintage or from the past decade, or a treasured antique or well-used (especially by your kitten's claws), just about any piece of fabric-covered furniture will be worn out or damaged enough that it needs to be reupholstered eventually. You may have explored the average cost to reupholster an armchair DIY-style vs. hiring a professional and decided you could tackle this yourself. Possibly this is a passion project for you or a skill you've been wanting to learn, and now you're ready! This time you're planning to be armed (see what we did there?) with a trick up your upholstered sleeve; you're going to learn how to achieve the perfect upholstery corner. Making tidy corners on your chairs will not only give your projects a professional look, but it also will protect the integrity of your work.
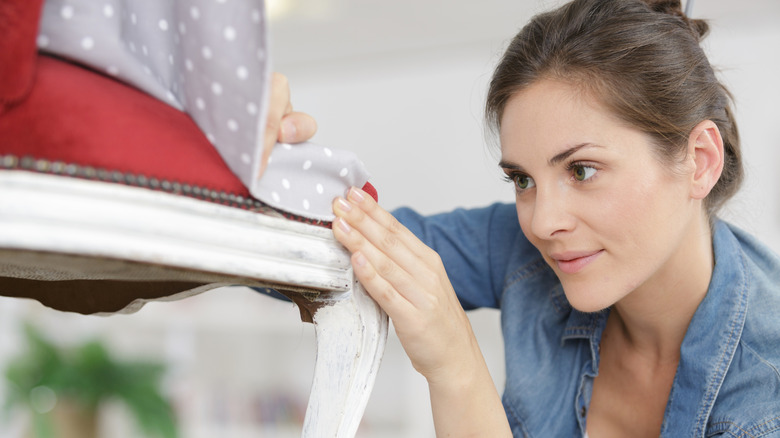
The trick to achieving the perfect upholstery corner is largely in the removal of excess material —which can be done by cutting out a triangle shape — that it accumulates at the corners when the material is pulled toward the center. Some of the most prevalent types of corners are boxed, knife edge, bullnose, T-cushion, and waterfall. The decision on which corner to use, though, is often driven by the vibe or aesthetic of the piece of furniture, the overall style of the chair being covered, and by the fabric being used.
Corner the market on good-looking reupholstery DIYs
If you're ready to breathe life into an outdated dining chair with a no-sew reupholstery, begin by taking apart the chair you'll be working on, noting each step along the way since that's how you'll be putting it back together again. When you reconstruct it, turn it upside down to work on the corners. One corner at a time, pull the fabric tightly from its outer edge toward the center, adding a few staples to keep it in place but leaving a few inches for a border to work with for the folds. The next step is the trick: Cut a narrow triangle of fabric on either side of the stapled area. Now you can tack down the fabric on either side of the corner then fold and pleat the center part where the two sides come together, forming a tidy corner.
There isn't one definitive rule on how to tighten the fabric and secure the corners of your newly upholstered chairs. Some experts can pull the fabric tightly with one hand, while others can't. Most will minimize excess fabric before or after stapling it. A few outliers forge ahead without slicing away the extra material, but the resulting corner could end up bulky.
Sitting pretty on a chair you reupholstered
Upholstery should feel less daunting now. After all, it's just stretching fabric, stapling it, cutting little pieces out of it, and stapling it some more, right? That might be true in an oversimplified way, but as easy as it seems, the trick of cutting triangles out of the excess fabric that collects at the corners before stapling them to the chair's base isn't universally accepted. There are those who say it is more difficult than it appears while others championed it. Bargain Block's Keith and Evan shared their best tips for reupholstering a couch and lean more toward rolling and folding the excess materials for their upholstery projects rather than slicing into them. You could choose to do the same if you feel like your project isn't going to be very hefty. If you're working with heavier fabrics, however, plus many inches of batting and cushioning, you may want to try a simple method that involves stapling, folding, and trimming, which would let your stapling be more manageable as it pushes through the layers to hit the structural board layer.
For your reupholstery project to be successful, the end result should pass what some upholsterers call the "pinch test," meaning that if you're able to pinch the fabric between your fingers after you've tacked it down, there's room to make it tighter. Because just like many people on the planet, your chairs, couches, love seats, and pillows would like to look fresh and smooth, too.